Have you ever wanted to create something beautiful with your own hands? Making clay items at home is easier than you think, and it’s a fun way to bring your ideas to life.
Whether you want to craft unique gifts, decorate your space, or simply enjoy a relaxing hobby, this guide will show you exactly how to get started. By the end, you’ll feel confident to shape your own clay creations, step by step.
Ready to discover the simple secrets that make homemade clay items so special? Let’s dive in!

Credit: potterycrafters.com
Choosing The Right Clay
Making clay items at home starts with picking the right clay. The type of clay affects how your project looks and lasts.
Different clays work better for different crafts. Choose clay that fits your skills and tools.
Air-dry Vs. Oven-bake Clay
Air-dry clay hardens by drying in open air. It does not need heat or special tools. It is easy to use for beginners.
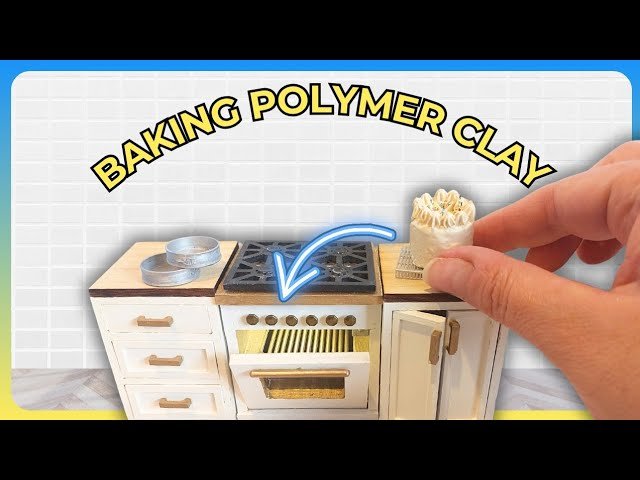
Oven-bake clay needs to be baked in an oven to harden. It is stronger and lasts longer. It works well for detailed items.
- Air-dry clay dries in 24 to 72 hours
- Oven-bake clay hardens in a few minutes in the oven
- Air-dry clay is soft and easy to shape
- Oven-bake clay is firmer after baking
- Air-dry clay is good for light decorations
- Oven-bake clay suits jewelry and small sculptures
Tools And Materials Needed
You need simple tools to start making clay items. Some tools help shape the clay better. Others help finish your project.
- Clay (air-dry or oven-bake)
- Rolling pin or smooth bottle
- Clay shaping tools or toothpicks
- Cutting knife or blade
- Smooth surface for working
- Sandpaper for smoothing dried items
- Oven (for oven-bake clay)
- Sealant or paint (optional)

Credit: www.youtube.com
Preparing Your Workspace
Making clay items at home needs a tidy and organized space. This helps you work smoothly and keeps your clay clean.
Prepare your workspace before you start. It will save time and avoid messes.
Setting Up A Clean Surface
Choose a flat surface that is easy to clean. Cover it with a plastic sheet or wax paper to protect it.
- Clear away any dust or crumbs
- Use a damp cloth to wipe the surface
- Place a cutting board or clay mat on top
- Keep a small trash bin nearby
- Make sure the area is well-lit
Organizing Tools For Efficiency
Arrange your tools so you can reach them easily. Group similar items together for quick access.
| Tool | Purpose | Storage Tip |
| Clay cutting wire | Cutting clay pieces | Hang on a hook |
| Sculpting tools | Shaping and detailing | Place in a jar or cup |
| Rolling pin | Flattening clay | Keep on the side of your workspace |
| Water spray bottle | Keep clay moist | Store within arm’s reach |
| Plastic containers | Store extra clay | Label and stack neatly |
Basic Clay Techniques
Making clay items at home is fun and easy. You only need a few simple tools and some clay.
Learning basic clay techniques helps you create smooth and strong clay pieces. These skills include rolling, shaping, smoothing, and joining.
Rolling And Shaping
Rolling clay helps you flatten or stretch it evenly. Use a rolling pin or your hands to make the clay thin or thick.
Shaping means forming the clay into the design you want. You can use your fingers or simple tools to shape the clay.
- Roll clay on a smooth surface to avoid sticking
- Use even pressure to get a flat shape
- Pinch or mold the clay to create curves or details
- Use cookie cutters or shapes for uniform pieces
Smoothing And Joining Pieces
Smoothing makes the clay surface clean and nice. Use your fingers or a damp sponge to smooth out bumps or cracks.
Joining pieces means connecting different clay parts together. Score the surfaces, add water or slip, and press firmly to attach.
- Score both pieces with a tool or toothpick to roughen surfaces
- Apply a little water or slip (clay mixed with water) on scored areas
- Press the pieces together and hold until they stick well
- Smooth the joint with your finger or a tool for a clean look

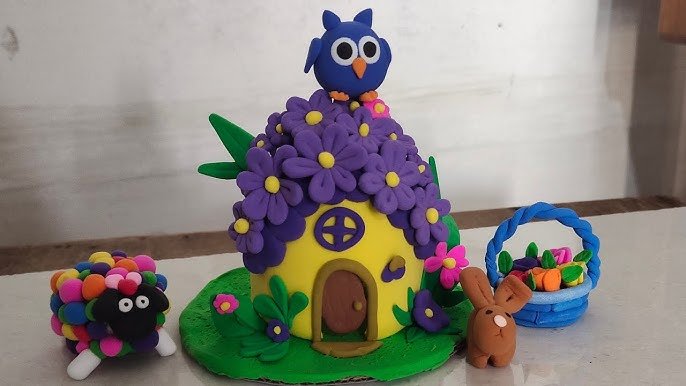
Credit: www.youtube.com
Creating Simple Clay Items
Making clay items at home is fun and easy. You only need basic tools and some clay. This guide helps you create simple items like bowls, figurines, and jewelry.
These projects are great for beginners. They help you learn how to shape and design clay with your hands.
Making Small Bowls
Small bowls are useful and simple to make. Start with a ball of clay and press your thumb in the center. Pinch the sides gently to shape the bowl. Smooth the edges with water.
- Roll clay into a ball
- Press thumb in the center
- Pinch sides to form walls
- Smooth edges with water
- Let dry before painting
Crafting Figurines
Figurines let you express creativity. Start by shaping a simple body with clay. Add small parts like arms, legs, and head. Use tools or fingers to add details.
| Part | Tips |
| Body | Shape a round or oval base |
| Arms and Legs | Roll thin clay ropes |
| Head | Make a small ball and attach |
| Details | Use toothpick for eyes and mouth |
Designing Jewelry Pieces
Clay jewelry is light and unique. You can make beads, pendants, or charms. Shape the clay and use a tool to make holes for stringing.
Here are some ideas for clay jewelry:
- Round beads with patterns
- Flat pendants with stamped designs
- Small charms shaped like animals or stars
- Textured pieces using tools or fabric
Adding Details And Textures
Adding details and textures makes your clay items look more interesting. Small touches can change a simple shape into art. You can use many tools and colors to create patterns and finishes.
These techniques help your clay pieces stand out. They add personality and style. Learn how to use tools and paints to bring your creations to life.
Using Tools For Patterns
You can use everyday tools to add patterns on clay. Textures give your work a unique look and feel. Press, carve, or roll tools on soft clay to create designs.
- Use toothpicks or needles to draw fine lines.
- Press lace or fabric into the clay for a textured pattern.
- Roll a textured roller or stamp to create repeated designs.
- Use forks or combs for parallel lines or crosshatches.
- Carve with knives or sculpting tools for deeper details.
Incorporating Paint And Glaze
Paint and glaze add color and shine to your clay items. They also protect the surface and highlight textures. Choose the right type based on your clay and drying method.
| Type | Use | Finish |
| Acrylic Paint | After clay dries or bakes | Matte or glossy |
| Glaze | Before firing kiln-baked clay | Glossy and smooth |
| Watercolor | On air-dry clay for soft color | Matte and delicate |
| Spray Paint | On fully dry clay for even coverage | Varies by product |
Drying And Curing Clay
Creating clay items at home is fun and easy. Drying and curing are important steps to ensure your creations last.
Understanding different methods helps you choose the best way to dry and cure your clay items.
Air-drying Tips
Air-drying is a simple way to cure clay without heat. It works well for small items and crafts.
- Place clay items on a flat, dry surface.
- Ensure good airflow around the items.
- Turn items occasionally for even drying.
- Avoid direct sunlight to prevent cracking.
Baking Instructions For Oven Clay
Baking clay in an oven makes it hard and durable. Follow these steps for best results.
Preheat your oven according to the clay's package instructions. Usually, this is around 275°F (135°C).
Place clay items on a baking sheet lined with parchment paper. Bake for the time recommended on the clay package.
Let the items cool completely before handling.
Finishing Touches
Finishing touches make your clay items shine. They improve appearance and durability. Here are some steps to enhance your creations.
Let's explore the process of sanding and polishing. We will also discuss sealing for durability.
Sanding And Polishing
Sanding smooths the surface of your clay items. It removes bumps and rough spots. Use fine-grit sandpaper for best results.
Polishing makes your clay items shine. Use a soft cloth to buff the surface. It adds a nice finish to your creations.
- Use gentle, circular motions when sanding
- Polish until the surface is smooth and glossy
- Be careful not to apply too much pressure
Sealing For Durability
Sealing protects your clay items from damage. It makes them last longer. Choose a sealant suitable for clay.
Apply the sealant evenly across the surface. Let it dry completely before handling. This step ensures your items stay beautiful.
- Read sealant instructions carefully
- Apply a thin, even layer
- Allow full drying time for best protection
Troubleshooting Common Issues
Making clay items at home can be fun but sometimes problems happen. Cracks and breaks are common issues. This guide helps you fix and prevent these problems.
Understanding why these issues occur helps you create stronger, better clay items. Read on to learn simple tips for avoiding cracks and fixing broken pieces.
Preventing Cracks
Cracks often happen when clay dries too fast or unevenly. You can stop cracks by controlling how you handle and dry your clay.
- Keep clay moist while working by covering it with a damp cloth.
- Dry clay slowly at room temperature, not in direct sunlight.
- Use thin layers of clay to prevent uneven drying.
- Mix clay well before shaping to avoid weak spots.
- Store unused clay in airtight containers to keep it soft.
Fixing Broken Pieces
If your clay item breaks, you can repair it with the right steps. Using glue or extra clay helps join the broken parts smoothly.
| Method | How to Use | Tip |
| Clay Slip | Mix clay with water to make a paste. Apply to broken edges and press together. | Smooth edges before drying to hide the repair. |
| Strong Glue | Use for dried or fired clay. Apply glue on broken surfaces and hold firmly. | Choose glue safe for crafts and let dry fully. |
| Rebaking | After repair, bake the clay again if it is oven-bake type. | Follow clay package instructions for temperature and time. |
Frequently Asked Questions
What Materials Are Needed To Make Clay Items At Home?
You need air-dry clay, water, sculpting tools, a rolling pin, and paint. These basic materials help you shape and finish your clay creations easily at home.
How Long Does Homemade Clay Take To Dry?
Air-dry clay typically takes 24 to 48 hours to dry completely. Dry time varies based on thickness and humidity in your environment.
Can I Reuse Leftover Clay For New Projects?
Yes, you can store leftover clay in an airtight container. Keep it moist to reuse for future crafting without losing its texture.
What Are Simple Clay Projects For Beginners?
Start with small items like beads, bowls, or ornaments. These projects help you practice shaping and decorating without complexity.
Conclusion
Making clay items at home is fun and simple. You only need a few tools and some clay. Practice shapes and designs step by step. Let your creativity guide you. Enjoy the process of shaping and painting. Clay crafts can decorate your home or become gifts.
Keep trying to improve your skills each time. Soon, you will feel proud of your handmade clay items. Start today and see what you can create!