Have you ever wanted to create your own unique crafts without spending a lot of money? Making baking clay at home is easier than you think, and it opens up a world of creative possibilities right in your kitchen.
Imagine shaping your ideas into lasting keepsakes, gifts, or decorations—all with simple ingredients you probably already have. In this guide, you’ll discover step-by-step how to make your own baking clay quickly and safely. By the end, you’ll be ready to start crafting beautiful items that are truly one of a kind.
Ready to get your hands messy and your creativity flowing? Let’s dive in!

Credit: www.hgtv.com
Ingredients Needed
Baking clay is a fun and easy craft material you can make at home. It needs just a few simple ingredients.
You can mix basic supplies to make the clay and add optional additives for color or texture.
Basic Supplies
These ingredients form the main part of baking clay. You can find them in your kitchen or local store.
- 1 cup baking soda
- 1/2 cup cornstarch
- 3/4 cup water
- Mixing bowl
- Stove or microwave for heating
The baking soda and cornstarch work together to create a dough that hardens when baked.
Optional Additives
You can add extra ingredients to change the look or feel of your baking clay. These are not required but can enhance your craft.
- Food coloring for different colors
- Essential oils for scent
- Glitter for sparkle
- Small beads or buttons for texture
Add these items carefully to keep the clay smooth and easy to work with.
Step-by-step Preparation
Baking clay is an easy craft material you can make at home. It works well for small projects and decorations.
This guide shows clear steps to prepare the clay with simple tools and ingredients.
Mixing The Ingredients
Start by gathering all your ingredients in one place. Mixing them well is key to good clay.
- Measure 1 cup of baking soda and 1/2 cup of cornstarch.
- Pour 3/4 cup of water into a saucepan.
- Add the baking soda and cornstarch to the water.
- Stir the mixture slowly to combine all ingredients.
Kneading The Dough
Once the mixture cools down, transfer it to a clean surface for kneading. This step gives the clay its texture.
- Press the dough gently to remove air bubbles.
- Fold the dough in half and press again.
- Repeat until the dough feels smooth and elastic.
- If sticky, sprinkle a little cornstarch while kneading.
Adjusting Consistency
Check the dough’s texture before use. Adjust it by adding small amounts of water or cornstarch.
| Condition | Fix |
| Dough too dry and crumbly | Add a teaspoon of water and knead well |
| Dough too sticky and soft | Sprinkle cornstarch and knead until firm |
| Dough too hard | Knead with a little warm water to soften |
Shaping And Sculpting Tips
Making baking clay at home is fun and creative. To make your clay shapes look good, you need the right tips.
Good shaping and sculpting skills help your creations last after baking. This guide shares simple tips for better clay art.
Tools To Use
Using the right tools makes shaping clay easier and neater. You do not need fancy tools to start.
Basic tools help you cut, smooth, and add details to your clay pieces.
- Plastic or metal knives for cutting shapes
- Rolling pins or smooth bottles for flattening clay
- Toothpicks or needles for making small details
- Clay sculpting tools or simple kitchen tools like forks
- Sanding paper for smoothing baked clay edges
Techniques For Beginners
Start with easy techniques to get comfortable with baking clay. Practice makes your skills better.
Try these simple ways to shape and decorate your clay.
- Roll clay into balls or snakes to form basic shapes
- Press clay flat to create tiles or simple layers
- Use fingers to smooth edges and join parts firmly
- Add texture by pressing objects like fabric or leaves
- Work in small pieces to avoid cracking during baking
- Keep clay moist with a little water to prevent drying out
Drying And Baking Methods
Making baking clay at home is fun and easy. You can dry it in different ways to get the best results.
Two popular methods are air drying and oven baking. Each method has its own benefits.
Air Drying Vs Oven Baking
Air drying is simple and requires no special equipment. It takes longer, but is great for kids.
Oven baking is faster and gives a stronger finish. It needs careful attention to time and temperature.
- Air drying: No heat needed, takes 1-3 days
- Oven baking: Quick, takes 15-60 minutes
Temperature And Time Guidelines
For oven baking, set the oven to the right temperature. This ensures the clay hardens without burning.
Follow these guidelines to get the best results for your baking clay.
| Clay Thickness | Temperature | Time |
| 1/4 inch | 200°F (93°C) | 15-20 minutes |
| 1/2 inch | 200°F (93°C) | 30-40 minutes |
| 1 inch | 200°F (93°C) | 50-60 minutes |
Finishing Touches
After creating baking clay, finishing touches can enhance its look. These steps make your clay projects smooth and colorful.
Follow these simple methods to give your baking clay a polished appearance. You will learn how to sand, paint, and seal your creations.
Sanding And Smoothing
Sanding your clay is important for a smooth finish. It removes imperfections and prepares the surface for painting.
- Let the clay dry completely before sanding.
- Use fine-grit sandpaper for a smooth texture.
- Gently sand the surface in circular motions.
- Wipe off any dust with a damp cloth.
Painting And Sealing
Painting adds color and personality to your clay projects. Sealing protects the paint and makes the clay durable.
- Choose acrylic paints for vibrant colors.
- Apply thin layers and let each layer dry.
- Seal the paint with a clear varnish to protect it.

Credit: www.clayartcenter.org
Storage And Preservation
After making baking clay at home, proper storage helps keep it fresh. Good preservation stops the clay from drying out or cracking.
Knowing how to store both unused clay and finished pieces makes your projects last longer. This guide explains easy ways to store them safely.
Keeping Unused Clay Fresh
Keep unused baking clay soft by sealing it well. Air can dry out the clay quickly, so airtight containers work best.
Wrap the clay in plastic wrap before placing it in a container. Store it in a cool, dry place away from sunlight.
- Use airtight containers or resealable plastic bags.
- Wrap clay tightly with plastic wrap or foil.
- Keep clay in a cool spot, not in direct sunlight.
- Check clay regularly for dryness and add a few drops of water if needed.
Storing Finished Pieces
Finished baking clay items must be stored carefully to avoid damage. Keep them in a safe place where they won’t break or get dusty.
If your pieces are painted or varnished, let them dry fully before storing. Use soft padding to protect delicate parts.
- Store finished pieces in boxes with soft tissue paper.
- Avoid stacking heavy objects on top of them.
- Keep pieces in a dry place to prevent moisture damage.
- Use display cases for special or fragile items.
Troubleshooting Common Issues
Making baking clay at home is fun but sometimes problems happen. These problems can affect how your clay looks and feels. Fixing these issues helps you get better results.
Below are tips for common problems like cracking, drying, and sticky clay. Follow these to improve your clay-making experience.
Cracking And Drying Problems
Cracks appear when clay dries too fast or mixes unevenly. Drying problems happen if the clay stays wet or hardens too much. Fix these by adjusting your clay and drying process.
- Mix clay well to avoid dry spots.
- Dry clay slowly at room temperature.
- If cracks appear, add a small amount of water and knead again.
- Cover clay with a damp cloth during drying to keep moisture.
- Avoid direct sunlight or heat sources while drying.
Soft Or Sticky Clay Fixes
Clay can be soft or sticky if there is too much moisture. This makes it hard to shape and work with. Use these tips to fix soft or sticky clay.
| Problem | Cause | Fix |
| Too soft | Too much water | Let clay air dry a little before use |
| Sticky surface | Wet hands or environment | Dust hands with flour or cornstarch |
| Sticks to tools | High humidity | Use non-stick tools or dust with dry powder |
| Hard to shape | Not kneaded well | Knead clay longer to spread moisture |
Creative Project Ideas
Baking clay is fun to make at home. It is easy and cheap. You can use it for many creative projects.
This guide shows simple crafts and gift ideas you can create with baking clay.
Simple Crafts For Beginners
Start with small projects to learn how to shape and bake the clay. These crafts are great for kids and adults.
- Make small animals like birds or cats.
- Create colorful beads for necklaces or bracelets.
- Shape fridge magnets with fun designs.
- Craft little bowls or dishes for keys.
- Try making simple ornaments for holidays.
Gift And Decoration Ideas
Baking clay makes nice handmade gifts and decorations. You can personalize items for friends or your home.
| Project | Description | Tips |
| Keychains | Small shapes with a hole for a ring | Use bright colors and smooth edges |
| Christmas Ornaments | Flat shapes with ribbon holes | Paint after baking for a polished look |
| Photo Holders | Clay base with wire to hold pictures | Make stable bases to avoid tipping |
| Personalized Name Tags | Clay tags with names or messages | Use letter stamps before baking |

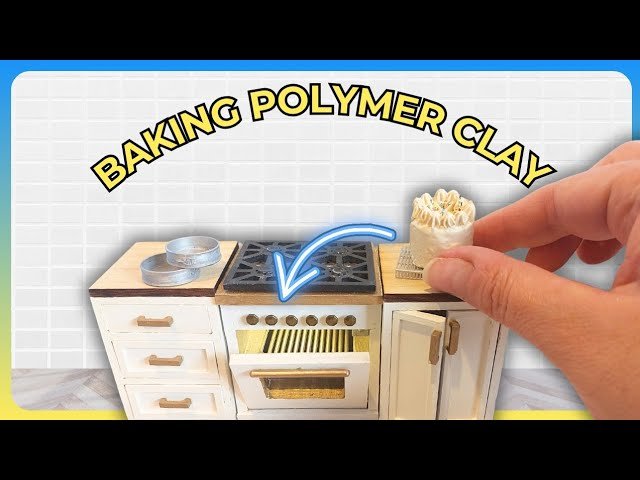
Credit: www.youtube.com
Frequently Asked Questions
What Ingredients Are Needed To Make Baking Clay At Home?
You need baking soda, cornstarch, and water. These simple ingredients mix to form a smooth clay. No special tools are required, making it easy to prepare at home.
How Long Does Homemade Baking Clay Take To Dry?
Baking clay usually takes 1 to 2 hours to dry. Drying time depends on thickness and room temperature. Thinner pieces dry faster, while thicker ones need more time.
Can Baking Clay Be Painted After Baking?
Yes, you can paint baking clay after it hardens. Use acrylic paints for best results. Allow the clay to fully cool before painting to ensure durability.
Is Baking Clay Safe For Kids To Use?
Baking clay is generally safe for kids with supervision. It uses non-toxic ingredients, but avoid ingestion. Always supervise young children during crafting to ensure safe handling.
Conclusion
Making baking clay at home is simple and fun. You only need a few common ingredients. This craft lets you create many shapes and designs. It saves money and avoids harsh chemicals. Kids and adults both enjoy this activity. Try different colors and textures for variety.
Store the clay in an airtight container to keep it fresh. Enjoy your homemade clay for crafts, gifts, or decorations. Start today and watch your creativity grow. Easy, safe, and enjoyable for everyone.