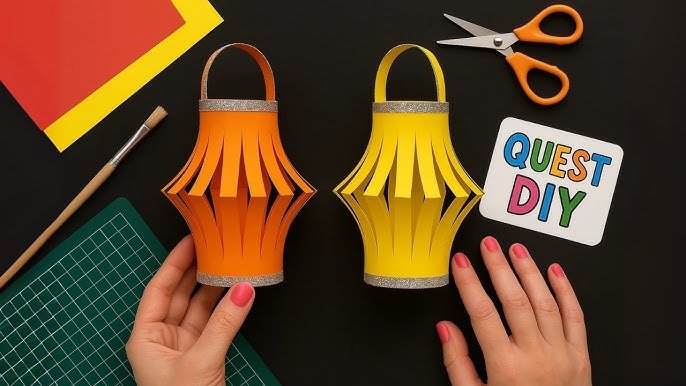
Have you ever wanted to add a warm, magical glow to your home without spending a lot of money? Making your own paper lantern is easier than you think—and it can brighten up any room or event instantly.
Imagine creating a beautiful, glowing decoration with just a few simple materials you already have at home. In this guide, you’ll discover step-by-step how to craft your own paper lantern, perfect for adding charm to your space or impressing your friends.
Ready to light up your creativity? Let’s get started!

Credit: www.makeanddohk.com
Materials Needed
Making a paper lantern at home is a fun and easy craft project. You need a few simple materials to get started. These items help you create a beautiful and safe lantern.
Choose the right materials to make your lantern strong and pretty. Below are the main types of supplies you will need.
Paper Types
Select paper that is light but sturdy. Different papers give your lantern a unique look. Some papers let light shine through nicely.
- Colored construction paper for bright colors
- Rice paper for a soft glow
- Origami paper for patterns and designs
- Cardstock for a stronger frame
Cutting Tools
You need tools that cut paper cleanly and safely. Sharp tools make neat shapes for your lantern. Use tools that you handle easily.
- Scissors for simple straight or curved cuts
- Craft knife for detailed or small cuts
- Paper trimmer for quick straight cuts
- Cutting mat to protect your work surface
Adhesives And Decorations
Use glue or tape to hold your lantern parts together. Decorations make your lantern more beautiful and unique. Choose safe adhesives for paper.
- Glue stick for easy and clean bonding
- Liquid glue for stronger hold
- Double-sided tape for quick attachment
- Markers or stickers for decorating
- Glitter or ribbons for extra shine
Preparing The Paper
Making a paper lantern starts with choosing and preparing the right paper. This step helps your lantern look good and last longer.
We will cover how to pick the right size and the best folding techniques for your paper lantern.
Choosing The Right Size
The size of the paper affects the final shape and strength of your lantern. Larger paper makes a bigger lantern but can be harder to fold.
| Paper Size | Best For | Notes |
| 8.5 x 11 inches | Small lanterns | Easy to handle and fold |
| 12 x 12 inches | Medium lanterns | Good balance of size and ease |
| 18 x 24 inches | Large lanterns | Needs careful folding and support |
Folding Techniques
Folding the paper correctly gives the lantern its shape and strength. Use clean, sharp folds for the best results.
- Fold the paper in half lengthwise to create a center line.
- Make parallel cuts on one side, stopping before the fold.
- Unfold the paper carefully after cutting.
- Roll the paper into a cylinder shape with the cuts running vertically.
- Secure the edges with glue or tape to hold the shape.
Cutting The Lantern Design
Cutting the design for your paper lantern is an important step. It shapes how your lantern will look when lit.
Use care and patience to cut the pattern cleanly. This makes your lantern safe and pretty.
Marking The Pattern
Start by drawing your lantern pattern on the paper. Use a pencil to mark where you will cut.
Check that all lines are clear and easy to follow. This helps you cut without mistakes.
- Use a ruler for straight lines
- Draw light lines to erase easily if needed
- Mark all cut and fold lines differently
Safe Cutting Tips
Always cut slowly and carefully to avoid accidents. Keep your fingers away from the blade.
Use a sharp craft knife or scissors for clean cuts. Replace dull blades to reduce slips.
- Cut on a safe surface like a cutting mat
- Hold the paper firmly but not too tight
- Follow the lines exactly without rushing
- Keep your workspace clean and well-lit
Credit: www.makeanddohk.com
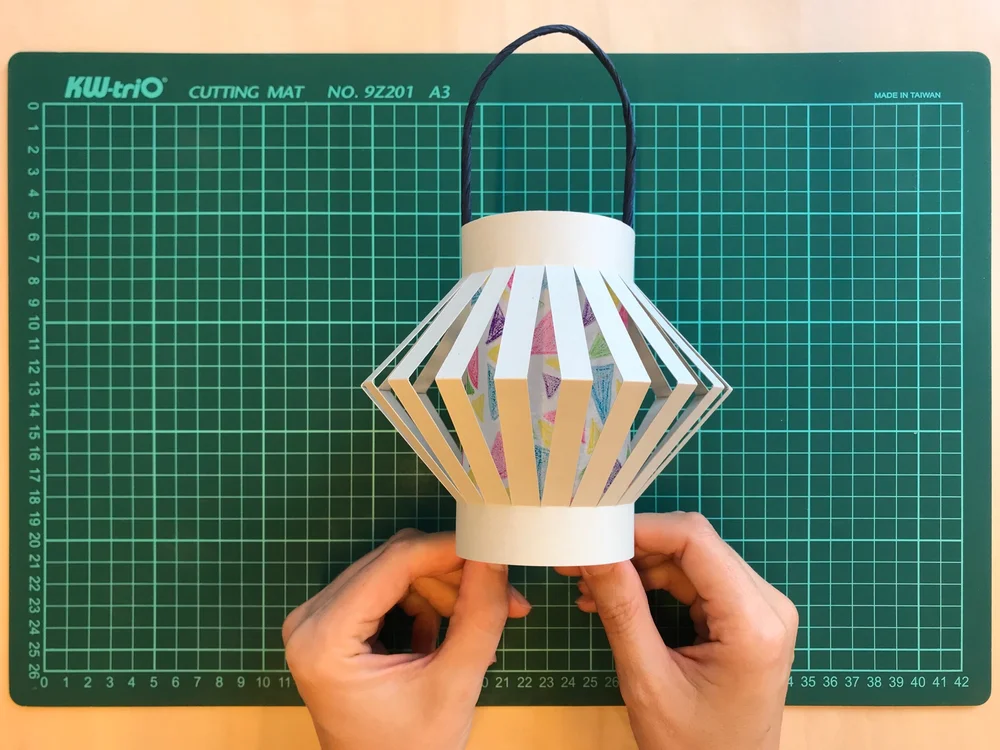
Assembling The Lantern
After cutting and decorating the paper, you need to put the lantern parts together. This step makes your lantern ready to use.
Follow these instructions carefully to join the edges and add a handle. This will help your lantern keep its shape and be easy to carry.
Joining Edges
To shape the lantern, you must join the cut edges of the paper. Use glue or tape for a strong hold. Make sure the edges meet evenly to form a smooth cylinder.
- Apply glue or double-sided tape along one edge.
- Carefully press the opposite edge to the glued side.
- Hold the edges together for 30 seconds to secure.
- Check that the cylinder shape is even and straight.
- Let the glue dry fully before moving on.
Adding The Handle
The handle lets you carry the lantern safely. Use a strip of paper or thin wire. Attach it firmly to the top edges of the lantern.
| Handle Material | Attachment Method | Tips |
| Paper Strip | Glue or tape at two points | Use sturdy paper for strength |
| Thin Wire | Twist ends around top edge | Bend ends inward to avoid sharp points |
Decorating Ideas
Making paper lanterns at home is a fun and creative activity. There are many ways to decorate them for a personal touch.
Here are some easy and exciting ideas to decorate your paper lanterns using painting, drawing, stickers, and glitter.
Painting And Drawing
Painting and drawing on your paper lanterns can add vibrant colors and unique designs. Use brushes, sponges, or even your fingers for interesting textures.
- Use watercolors for a soft, blended effect.
- Try acrylic paints for bold and bright colors.
- Draw patterns with markers or pens for details.
Using Stickers And Glitter
Stickers and glitter can make your lanterns sparkle and shine. They are easy to apply and perfect for creating eye-catching designs.
For a dazzling effect, follow these steps:
- Choose stickers in various shapes and colors.
- Apply glitter glue along the edges for highlights.
- Sprinkle loose glitter over wet glue for extra sparkle.
| Decoration Material | Effect |
| Stickers | Fun and colorful |
| Glitter | Sparkly and shiny |
| Markers | Detailed and precise |
Lighting Options
Paper lanterns look beautiful when lit up. Choosing the right light inside your lantern helps set the mood.
Two common lighting options are LED lights and traditional candles. Each has its own benefits and safety tips.
Led Lights
LED lights are safe and energy-efficient. They come in many colors and styles to fit your lantern design.
- Battery-operated, so no wires needed
- Stay cool to the touch, safe for paper
- Long-lasting light without smoke or smell
- Easy to turn on and off
Traditional Candles
Candles give a warm, natural glow. Use small tea lights or votive candles inside your lantern.
| Advantage | Disadvantage |
| Soft flickering light | Fire hazard if not careful |
| Easy to find in stores | Heat can damage paper lantern |
| Creates a classic look | Needs supervision while lit |
Safety Tips
Making paper lanterns at home is fun and creative. It's important to follow safety tips for a safe experience.
Here are some essential safety measures to consider while crafting your paper lanterns.
Fire Safety Measures
Fire safety is crucial when using paper lanterns. Paper can catch fire easily, so stay cautious.
Use LED lights instead of candles. Keep the lantern away from any open flames.
- Always supervise lanterns when lit
- Keep fire extinguisher nearby
- Choose flame-retardant paper
Handling Fragile Paper
Paper used in lanterns can be very fragile. Handle with care to prevent tears and damage.
Use gentle hands while folding and shaping the paper. Avoid using sharp tools.
- Work on a clean, flat surface
- Store finished lanterns in a safe place
- Repair tears immediately with tape

Credit: www.makeanddohk.com
Creative Variations
Making paper lanterns at home is fun and allows you to express your creativity. You can try many designs to fit your style and occasion.
This guide covers some creative ideas using different shapes and color combinations for your paper lanterns.
Different Shapes
Paper lanterns do not have to be just round. You can make many shapes by folding and cutting paper differently.
- Square Lanterns: Use folded paper to create neat edges and a boxy look.
- Star-Shaped Lanterns: Cut points and fold to make a star that shines bright.
- Heart-Shaped Lanterns: Perfect for special occasions like Valentine’s Day.
- Diamond Lanterns: Fold paper into a diamond shape for a modern style.
- Animal Shapes: Try simple shapes like fish or birds for fun designs.
Color Combinations
Choosing the right colors can make your paper lanterns stand out. You can mix colors to match seasons or events.
| Color Theme | Best For | Effect |
| Red and Gold | Festivals and Celebrations | Bright and festive |
| Blue and White | Winter and Calm Events | Cool and peaceful |
| Green and Yellow | Spring and Nature | Fresh and lively |
| Pink and Purple | Parties and Romantic Settings | Soft and charming |
| Orange and Brown | Autumn and Cozy Times | Warm and comforting |
Frequently Asked Questions
How Do I Make A Paper Lantern At Home Easily?
To make a paper lantern at home, start with colored paper. Cut slits evenly, fold, and secure with glue or tape. Add a handle using a strip of paper. This simple method creates a beautiful, decorative lantern quickly and affordably.
What Materials Are Needed For Homemade Paper Lanterns?
You need colored paper, scissors, glue or tape, and a ruler. Optional items include markers for decoration and string for hanging. These basic materials help you craft vibrant paper lanterns with ease, perfect for home décor or celebrations.
Can I Use Recycled Paper For Paper Lanterns?
Yes, recycled paper works well for paper lanterns. It’s eco-friendly and often sturdy enough. Just ensure the paper isn’t too thick to fold or cut easily. Using recycled materials makes your craft sustainable and budget-friendly.
How Long Does It Take To Make A Paper Lantern?
Making a paper lantern usually takes 10 to 20 minutes. The time depends on the size and decoration complexity. Simple designs are quick, making this a fun and easy craft for all ages.
Conclusion
Making a paper lantern at home is fun and simple. You only need a few basic materials. Follow the steps carefully, and you will create a beautiful lantern. This craft adds charm to any room or event. It also helps improve creativity and patience.
Try different colors and shapes to make it unique. Enjoy the warm glow your lantern brings. Crafting at home saves money and offers great satisfaction. Start your paper lantern project today and brighten your space.