Have you ever dreamed of adding a stunning chandelier to your home without spending a fortune? Imagine creating a beautiful light fixture that reflects your style and brightens up any room.
Making a chandelier at home is easier than you think, and you don’t need fancy tools or skills. In this guide, you’ll discover simple steps to craft your own eye-catching chandelier that will impress everyone who sees it. Ready to transform your space with a unique, handmade piece?
Let’s get started!
Choosing Materials
Making a chandelier at home is a fun project. The right materials help you create a beautiful light fixture.
Picking good supplies and tools makes the work easier and safer. You can also use items you already have.
Common Supplies
Common supplies for chandeliers include wires, bulbs, and frames. These basic parts hold the chandelier together.
- Light bulbs (LED or incandescent)
- Electrical wires and sockets
- Metal or wooden frame
- Chain or rod for hanging
- Light bulb holders
- Decorative beads or crystals
Repurposed Items
You can use old or unused items to make your chandelier unique. Repurposed parts save money and add charm.
- Old jewelry or beads
- Broken glass or mirrors
- Unused kitchen utensils
- Antique keys or buttons
- Wine corks or bottle caps
- Old light bulbs or lampshades
Tools Needed
Having the right tools helps you work safely and finish faster. Basic tools are enough for most chandeliers.
- Wire cutters and strippers
- Screwdrivers (flat and Phillips)
- Hot glue gun or strong adhesive
- Measuring tape or ruler
- Drill with small bits
- Pliers for bending wires
Design Inspiration
Making a chandelier at home is a fun way to add style to your space. You can choose from many design ideas. Pick one that fits your room and taste.
This guide shows three popular styles. These ideas can help you create a beautiful chandelier.
Modern Styles
Modern chandeliers use clean lines and simple shapes. They often have metal and glass parts. These look great in bright, open rooms.
Try using LED lights or bulbs with cool colors. You can use geometric shapes like circles or squares. Keep the design neat and balanced.
- Use metal wires or rods for structure
- Add clear or frosted glass bulbs
- Choose white or cool light bulbs
- Keep shapes simple and elegant
Vintage Looks
Vintage chandeliers have a classic and warm feel. Use old-style bulbs and brass or bronze colors. These fit well in cozy or traditional rooms.
Try adding crystals or beads for extra charm. Use soft yellow light bulbs to create a warm glow. Look for old materials or antiques for parts.
- Choose bronze or brass finishes
- Add hanging crystals or beads
- Use soft yellow or warm bulbs
- Include curved or ornate shapes
Nature-inspired Designs
Chandeliers inspired by nature use wood, leaves, or flowers. These designs bring a fresh and calm look to your room. They work well in natural or rustic spaces.
Use twigs, branches, or dried flowers for decoration. Soft light bulbs add a gentle touch. These chandeliers feel warm and inviting.
- Use wooden branches or twigs
- Add dried flowers or leaves
- Pick soft white or yellow bulbs
- Keep the look organic and simple
Basic Assembly Steps
Making a chandelier at home is a fun and creative project. It involves building a frame, adding wiring, and attaching light fixtures.
Following simple steps helps you create a safe and beautiful chandelier for your space.
Frame Construction
The frame holds the chandelier’s shape and supports the lights. You can use metal rings, wood, or sturdy wire for the frame.
Start by measuring the size you want. Then, cut and connect your materials to form a stable base and arms.
- Choose strong materials like metal or hardwood
- Cut pieces to equal lengths for symmetry
- Use screws or welding to join parts securely
- Make sure the frame is balanced and stable
Wiring Basics
Wiring supplies power to the chandelier’s lights. Use safe and approved electrical wires and tools.
Connect wires carefully and follow electrical codes. Use wire nuts and tape to secure connections.
- Turn off power before starting wiring
- Use insulated wires rated for lighting
- Connect wires matching color codes (black to black, white to white)
- Secure all wire connections tightly
- Test wiring with a voltage tester before final assembly
Attaching Light Fixtures
Attach light fixtures like bulbs or lamps to the frame. Choose fixtures that fit your design and wiring setup.
Fix fixtures firmly to avoid movement. Connect them to the wiring, and check all parts before hanging the chandelier.
- Use light sockets that match bulb type and voltage
- Secure sockets to the frame with screws or clips
- Connect socket wires to main wiring
- Place bulbs after all wiring is done
- Double-check all fixtures for stability
Creative Techniques
Making a chandelier at home can add a personal touch to your space. You can use different materials and styles to create unique lighting.
Here are some creative techniques to help you build a beautiful chandelier with easy-to-find items.
Using Crystals And Beads
Crystals and beads add shine and sparkle to your chandelier. They catch the light and create beautiful reflections.
You can string beads or hang crystals from a frame to make an elegant design. Use clear or colored beads for different effects.
- Choose beads of different sizes for texture
- Use fishing line or thin wire to hang beads
- Arrange crystals evenly around the frame
- Add a light bulb in the center to enhance sparkle
Incorporating Wood Elements
Wood gives your chandelier a warm and natural look. You can use wooden rings, branches, or small wooden shapes.
Sand the wood smooth and paint or stain it if you want a finished look. Attach the wood pieces to a metal or wooden frame.
- Use driftwood or twigs for rustic style
- Cut wooden shapes like circles or squares
- Glue or screw wood pieces securely
- Combine wood with lights for cozy glow
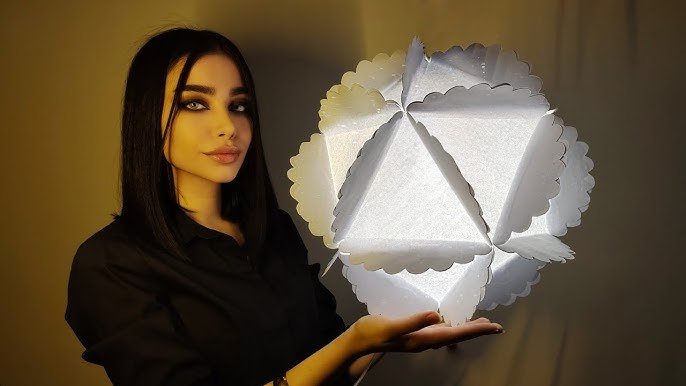
Adding Fabric Or Paper
Fabric and paper can soften the light and add color to your chandelier. Use lightweight materials for best results.
Wrap fabric around the frame or create paper shapes to hang. You can fold paper into flowers or stars for decoration.
- Choose translucent fabric to let light through
- Use patterned paper for interesting designs
- Secure fabric with glue or stitch it
- Make paper shapes with scissors or punch tools
Safety Tips
Making a chandelier at home can be fun and creative. Safety is very important during the process.
Follow these tips to keep yourself and your home safe while building and installing your chandelier.
Electrical Precautions
Always turn off the power before working with electrical wires. Use a voltage tester to check if wires are live.
Use wires and bulbs that match the chandelier’s voltage and wattage limits. Avoid overloading the circuit.
- Switch off the main power supply
- Use insulated tools for wiring
- Check wires for damage before use
- Follow electrical codes and guidelines
Securing The Chandelier
Make sure the chandelier hangs from a strong ceiling hook or support. It must hold the chandelier’s full weight safely.
Use proper anchors and screws made for ceiling installation. Avoid using weak materials that can fail over time.
- Find a ceiling joist for support
- Use heavy-duty hooks or brackets
- Tighten all screws securely
- Test the fixture’s stability before finishing
Fire Safety
Choose bulbs that do not get too hot. Use LED bulbs as they are cooler and safer than incandescent bulbs.
Keep flammable materials like paper and fabric away from the chandelier. Check wires regularly for signs of damage or overheating.
- Use LED bulbs to reduce heat
- Keep wires away from sharp edges
- Do not cover bulbs with cloth or paper
- Inspect wiring every few months

Credit: www.youtube.com
Finishing Touches
Adding the final touches to your homemade chandelier can make it truly unique. This stage focuses on enhancing its appearance and functionality.
Let's explore different methods to achieve a stunning finish for your chandelier.
Painting And Coating
Painting your chandelier can transform its look. Choose colors that match your room's theme.
Consider using these types of paint for the best results:
- Spray paint for a smooth finish
- Metallic paint for a shiny look
- Matte paint for a subdued effect
Decorative Enhancements
Decorative elements add charm to your chandelier. Be creative with your choices.
- Add crystal pendants for elegance
- Use beads for a colorful touch
- Attach ribbons for a whimsical feel
Adjusting Height And Placement
The height and placement of your chandelier affect its overall impact. Adjust them to enhance the room's ambiance.
| Room Type | Recommended Height |
| Dining Room | 30 inches above table |
| Living Room | 7 feet from the floor |
| Entryway | At least 7 feet from the floor |
Maintenance And Care
Making a chandelier at home can be fun. Proper care keeps it beautiful. Learn how to clean, replace bulbs, and handle repairs easily.
Regular maintenance ensures your chandelier lasts longer. Follow these simple steps to maintain its shine and functionality.
Cleaning Tips
Cleaning a chandelier is crucial for its appearance. Dust and dirt can dull its shine. Use gentle methods to avoid damage.
- Turn off the power before cleaning
- Use a soft cloth to wipe each piece
- Mild soap and water help with stubborn spots
- Dry each part thoroughly to prevent water spots
Replacing Bulbs
Bulbs need replacing when they burn out. This keeps the chandelier bright. Choose the right type for your fixture.
- Turn off the light before replacing bulbs
- Use a ladder for high chandeliers
- Check the bulb wattage to match the fixture
- Dispose of old bulbs safely
Handling Repairs
Sometimes chandeliers need repairs. Fixing small issues quickly prevents bigger problems. Handle repairs with care to avoid damage.
- Inspect for loose parts regularly
- Tighten screws and fittings gently
- Seek professional help for electrical issues
- Keep spare parts handy for quick fixes
Credit: www.diycraftsy.com

Credit: www.youtube.com
Frequently Asked Questions
What Materials Are Needed To Make A Chandelier At Home?
You need a frame, light bulbs, wiring, connectors, and decorative elements. Choose materials that fit your style and budget.
How Much Time Does It Take To Build A Chandelier?
Building a chandelier typically takes 3 to 6 hours, depending on complexity. Simple designs may take less time.
Can I Make An Eco-friendly Chandelier At Home?
Yes, use recycled materials like old bottles or metal scraps. Eco-friendly chandeliers reduce waste and look unique.
What Tools Are Required For Chandelier Assembly?
Basic tools include wire cutters, pliers, a screwdriver, and a drill. These help in cutting, connecting, and mounting components safely.
Conclusion
Making a chandelier at home is fun and rewarding. You only need basic materials and simple steps. Each part you create adds a personal touch to your space. Take your time and enjoy the process. This project brings light and style to any room.
Try it yourself and see how bright your home can shine.