Have you ever wanted to add a bright, focused light to your room but didn’t want to spend a lot of money? Making a spotlight at home is easier than you think.
With just a few simple materials and some easy steps, you can create a powerful light that highlights your favorite spots. Whether you want to brighten up your workspace, showcase artwork, or add a cozy glow to your room, this guide will help you do it yourself quickly and safely.
Ready to light up your space like a pro? Let’s get started!
Materials Needed
Making a spotlight at home is a simple project. You need the right materials to build a safe and working light. Gather everything before you start.
This guide lists the basic tools, lighting parts, and safety gear required for your spotlight project.
Basic Tools
You need some common tools to put your spotlight together. These tools help you cut, fix, and assemble parts easily.
- Screwdriver set
- Wire stripper
- Electric drill
- Measuring tape
- Pliers
- Hot glue gun
Lighting Components
The main parts of your spotlight include the light source and power supply. You also need a holder and a reflector for better light focus.
| Component | Description |
| LED bulb | Bright, energy-saving light source |
| Battery pack | Powers the spotlight, usually 9V or AA batteries |
| Light socket | Holds the LED bulb securely |
| Reflector | Focuses and directs the light beam |
| Switch | Turns the spotlight on and off |
Safety Gear
Wear safety gear to protect yourself while building the spotlight. These items prevent injuries and accidents.
- Safety goggles to protect your eyes
- Work gloves to guard your hands
- Face mask if you work with dust or fumes
- Long sleeves to protect your arms
Choosing The Right Bulb
Picking the right bulb is important for making a spotlight at home. The bulb affects the light quality and energy use. It helps to know what types are available and what suits your needs.
This guide explains the main bulb types, brightness and color temperature, and energy efficiency. These points help you choose the best bulb for your spotlight.
Types Of Bulbs
There are several types of bulbs you can use for a spotlight. Each has its own features and uses.
- Incandescent bulbs:These are traditional bulbs. They give warm light but use more energy and last shorter.
- Halogen bulbs:A type of incandescent bulb. They are brighter and more efficient but get very hot.
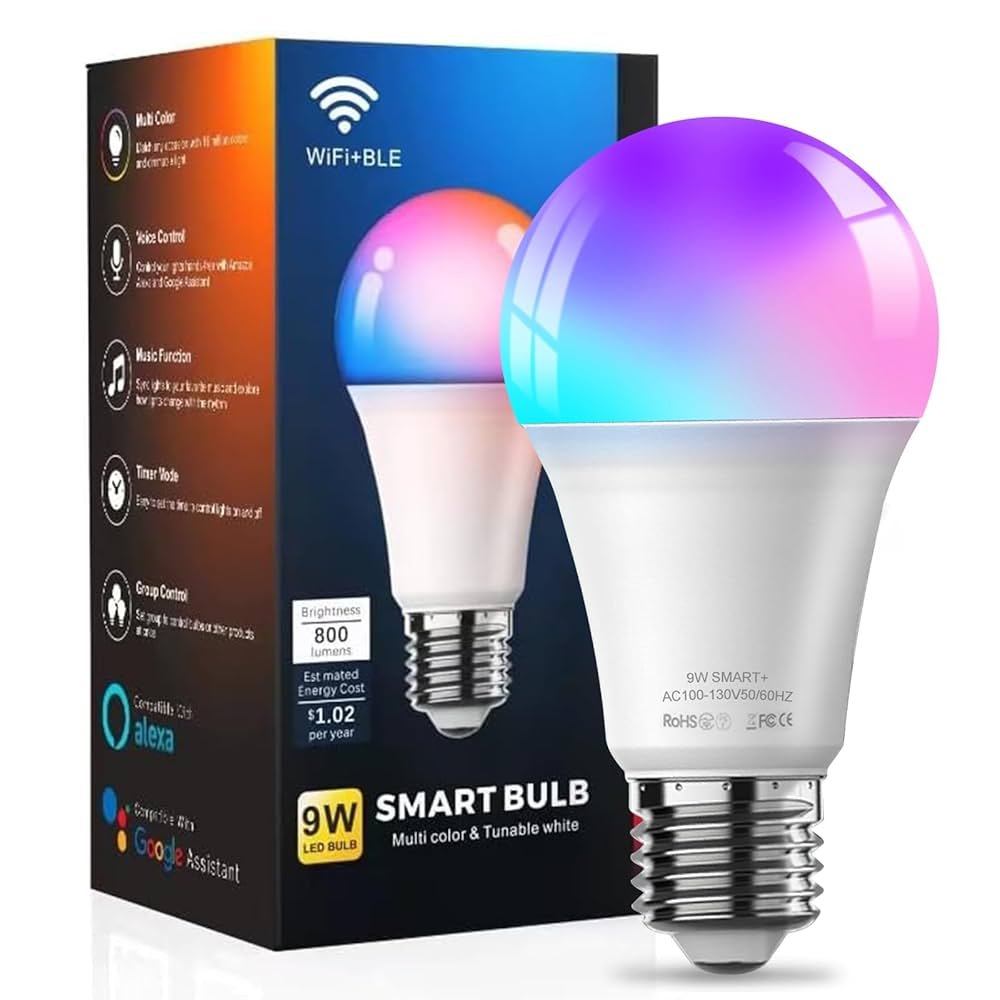
- LED bulbs:These bulbs use less energy and last longer. They come in many colors and brightness levels.
- CFL bulbs:Compact fluorescent lamps save energy but may take time to reach full brightness.
Brightness And Color Temperature
Brightness shows how much light the bulb gives. Color temperature tells if the light looks warm, neutral, or cool. Both matter for the mood and use of the spotlight.
| Brightness (Lumens) | Use | Color Temperature (Kelvin) | Light Appearance |
|---|---|---|---|
| 400–600 | Small spotlights, accent lighting | 2700K–3000K | Warm white |
| 700–900 | General spotlights, task lighting | 3500K–4100K | Neutral white |
| 1000+ | Bright spotlights, work areas | 5000K–6500K | Cool white / daylight |
Energy Efficiency
Energy efficiency shows how much power the bulb uses to give light. Efficient bulbs save electricity and lower bills. They also last longer, reducing replacement needs.
- LED bulbs use the least energy and last the longest.
- CFL bulbs use less power than incandescent bulbs but contain small amounts of mercury.
- Halogen bulbs are less efficient but brighter than traditional bulbs.
- Incandescent bulbs use the most energy and have the shortest life.
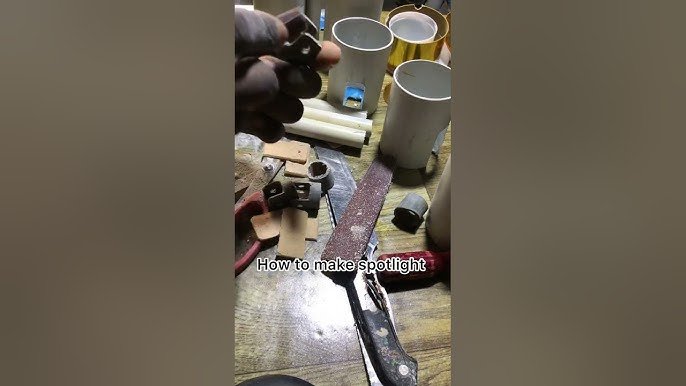
Building The Spotlight Frame
Making a spotlight at home starts with building a strong frame. The frame holds the light and helps direct it.
This guide shows how to select materials, cut pieces, and secure them to build the frame.
Selecting Frame Materials
Choose materials that are easy to work with and sturdy. Wood, metal, or plastic are good options.
Wood is light and simple to cut. Metal is strong but needs special tools. Plastic is flexible but less durable.
- Wood: plywood or softwood boards
- Metal: aluminum or steel sheets
- Plastic: acrylic or PVC sheets
Cutting And Assembling
Measure the parts carefully before cutting. Use a saw for wood and metal, and a cutter for plastic.
After cutting, fit the parts together. The frame usually has a square or rectangular shape with an open front.
- Measure twice, cut once
- Sand edges to avoid splinters or sharp parts
- Assemble parts on a flat surface
Securing The Components
Use screws, nails, or glue to fix the frame parts. Make sure the frame is strong and holds its shape.
Check that the frame holds the light fixture securely. Add extra supports if the frame feels weak.
- Use wood glue or metal adhesive for extra hold
- Tighten screws or nails firmly
- Add corner braces for more strength

Credit: www.youtube.com
Wiring And Electrical Setup
Creating a spotlight at home can be a rewarding project. This guide focuses on wiring and electrical setup, ensuring your spotlight functions safely and effectively.
Follow these steps carefully to connect your spotlight, use a switch, and maintain electrical safety.
Connecting The Bulb Holder
The bulb holder is essential for securing the light bulb. Proper connection ensures the bulb functions well.
- Identify the live and neutral wires in your setup.
- Connect the live wire to the correct terminal on the bulb holder.
- Attach the neutral wire to the opposite terminal.
- Ensure all connections are secure to avoid loose wires.
Using A Switch
A switch controls the flow of electricity to your spotlight. Installing it correctly is crucial for safe operation.
| Component | Function |
| Switch | Turns the light on and off |
| Live Wire | Carries current to the switch |
| Neutral Wire | Completes the circuit |
Ensuring Electrical Safety
Safety is the top priority when dealing with electrical setups. Taking precautionary steps can prevent accidents.
Consider these safety tips:
- Always turn off the power supply before beginning work.
- Use insulated tools to avoid electric shock.
- Double-check all connections for tightness.
- If unsure, consult a professional electrician.
Adding Reflectors And Diffusers
Creating a spotlight at home can improve your lighting for photos or video calls. Reflectors and diffusers help shape and soften light.
Using these tools lets you control brightness and reduce harsh shadows. They are simple to make with common materials.
Improving Light Focus
Focus light by using reflectors to bounce it in one direction. This makes the light more intense on your subject.
You can also use a small tube or cardboard to narrow the light beam. This helps create a clear spotlight effect.
Materials For Reflectors
Reflectors need a shiny surface to bounce light well. You can use common household items for this.
- Aluminum foil on cardboard
- White poster board
- Metal baking tray
- Mirrors or reflective tape
Choose materials that are easy to shape and place near your light source.
Installing Diffusers
Diffusers spread light evenly to reduce harsh shadows. You can use thin, light-blocking materials for this.
- White fabric or bedsheets
- Wax paper or parchment paper
- Frosted plastic sheets
- Translucent shower curtains
Place the diffuser in front of the light source. Secure it with clips or tape without blocking the light completely.

Credit: coolfurnishing.wordpress.com
Testing And Adjustments
After building your spotlight at home, you need to test it carefully. Testing helps you see if everything works well. Adjustments make sure the light shines just right.
This guide covers checking electrical connections, adjusting the light angle, and fixing common problems.
Checking Electrical Connections
Start by inspecting all electrical connections. Loose wires can stop your spotlight from working safely. Make sure each wire fits tightly in its terminal or connector.
- Turn off the power before checking wires.
- Look for any exposed or damaged wires.
- Tighten screws on connectors and terminals.
- Use a voltage tester to confirm power is off before touching wires.
- Replace any faulty wiring or components immediately.
Adjusting Light Angle
Set the spotlight angle to highlight your target area. Adjusting the angle lets you control where the light falls and how wide the beam spreads.
| Adjustment Type | Description |
| Vertical Tilt | Move the light up or down to change beam height. |
| Horizontal Pan | Rotate the light left or right to cover wider areas. |
| Beam Focus | Adjust the lens or reflector to narrow or widen the light beam. |
Troubleshooting Common Issues
If your spotlight does not work as expected, check these common problems first. Fixing them is usually simple and quick.
- The light does not turn on: Check power source and connections.
- Flickering light: Tighten loose wires and check bulb condition.
- Overheating: Ensure proper ventilation around the spotlight.
- Uneven light beam: Adjust angle and check lens for dirt.
- Buzzing sound: Replace faulty transformer or ballast.
Creative Customizations
Creating a spotlight at home is a fun project. You can customize it to fit your needs and style.
Explore different ways to personalize your spotlight. This guide will help you with creative ideas.
Painting And Finishing
The color and finish of your spotlight can make it unique. Choose paints that match your decor.
- Use spray paint for a smooth finish
- Consider metallic colors for a modern look
- Add a clear coat for durability
Adding Mounts Or Stands
Mounts or stands give your spotlight stability and style. Choose what suits your space best.
| Mount Type | Benefits |
| Wall Mount | Saves floor space |
| Tripod Stand | Portable and adjustable |
| Ceiling Mount | Discreet and out of the way |
Incorporating Smart Features
Smart features add convenience to your spotlight. You can control it easily with technology.

Credit: www.youtube.com
Safety Tips
Making a spotlight at home can be rewarding but requires care. Safety must come first to avoid accidents and damage.
This guide shares important tips to keep you safe during setup and use of your homemade spotlight.
Handling Electrical Components
Always handle wires, bulbs, and sockets with dry hands. Ensure the power is off before starting any work.
- Use insulated tools to avoid electric shocks.
- Check all wires for frays or damage before use.
- Connect components according to the correct polarity.
- Keep electrical parts away from water or damp areas.
- Use a certified power cord and plugs.
Avoiding Overheating
Spotlights generate heat, so keep them in well-ventilated spaces. Avoid covering the light or placing it near flammable materials.
| Cause | Effect | Prevention |
| Poor ventilation | Heat buildup | Place spotlight where air can flow freely |
| Using high wattage bulbs | Excess heat | Use recommended wattage bulbs only |
| Covering the light | Heat trapped | Keep spotlight uncovered or use heat-resistant covers |
Proper Usage And Maintenance
Use the spotlight as intended and check it regularly. Clean dust and dirt gently to keep it working well.
- Turn off and unplug before cleaning.
- Inspect bulbs and replace if flickering or dim.
- Do not modify electrical parts once assembled.
- Store in a dry place when not in use.
- Follow manufacturer instructions for bulbs and accessories.
Frequently Asked Questions
How Can I Make A Spotlight At Home Easily?
You can make a spotlight using a strong LED bulb, a reflector, and a cardboard tube. Assemble these parts carefully for focused light. This DIY method is cost-effective and simple, perfect for home projects or photography lighting needs.
What Materials Are Needed To Create A Homemade Spotlight?
Basic materials include a bright LED bulb, a reflective surface like aluminum foil, a cardboard tube, and electrical tape. These items help focus and direct light effectively. They are inexpensive and easy to find at home or local stores.
Is It Safe To Build A Spotlight At Home?
Yes, building a spotlight at home is safe if you use low-voltage LED bulbs. Avoid high heat sources and ensure all electrical connections are secure. Always follow safety guidelines to prevent electric shock or fire hazards.
How Can I Improve Spotlight Brightness At Home?
Use a high-lumen LED bulb and a shiny reflector to boost brightness. Position the reflector to direct light precisely. Also, ensure the power source provides consistent voltage for stable illumination.
Conclusion
Creating a spotlight at home is simple and fun. Use basic tools and materials you already have. Follow the steps carefully to get the best results. A homemade spotlight can brighten any room or project. It adds a personal touch and saves money.
Try different ideas to fit your style and needs. Enjoy the warm glow and focus your light where you want. Making your own spotlight gives great satisfaction and useful light. Give it a try today and see the difference.