Are you ready to make your home smarter and more convenient? Adding a smart bulb to your Apple Home setup is easier than you think.
Imagine controlling your lights with just a tap or your voice, setting the perfect mood without leaving your seat. In this guide, you’ll learn simple steps to connect your smart bulb to Apple Home, so you can enjoy seamless control and bright ideas at your fingertips.
Keep reading, and transform your space with smart lighting today!
Choose Compatible Smart Bulbs
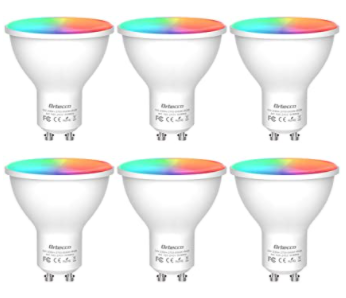
Adding a smart bulb to Apple Home requires choosing the right bulb. Compatibility is key to make sure the bulb works with your system.
Not all smart bulbs support Apple HomeKit. Picking the correct bulb helps you control lights with Siri and the Home app.
Check Apple Homekit Compatibility
Only bulbs with HomeKit support can connect directly to Apple Home. Look for the “Works with Apple HomeKit” label on the package or product description.
- Verify the bulb supports HomeKit before buying.
- Make sure your iPhone or iPad runs the latest iOS or iPadOS.
- Check that your home Wi-Fi network is stable and secure.
- Confirm the bulb’s app instructions mention Apple Home integration.
Popular Smart Bulb Brands
| Brand | HomeKit Support | Key Features |
| Philips Hue | Yes | Wide range, strong app, lots of accessories |
| LIFX | Yes | Bright colors, no hub needed |
| Eve Light Strip | Yes | Easy setup, good for accent lighting |
| Nanoleaf | Yes | Unique shapes, customizable light panels |
| TP-Link Kasa | No | Works with Alexa and Google Home, but not HomeKit |
Prepare Your Apple Home App
Adding a smart bulb to your Apple Home app needs some setup first. Preparing the app helps your devices work smoothly together.
This guide shows how to get your Apple Home app ready for smart bulb control.
Update Ios And Home App
Make sure your iPhone or iPad uses the latest iOS version. Updates fix bugs and add new features.
Also, check that the Home app is up to date to avoid problems connecting smart devices.
- Go to Settings > General > Software Update
- Download and install any available iOS updates
- Open the App Store and update the Home app if needed
Set Up Home Hub Devices
A Home Hub lets you control smart devices remotely and automates actions. You need one for full smart bulb control.
HomePod, Apple TV, or an iPad can work as a Home Hub if set up correctly.
- Sign in to iCloud using the same Apple ID on your device
- Enable Home in iCloud settings
- Keep the device powered and connected to Wi-Fi at home
- On iPad, go to Settings > Home > Use this iPad as a Home Hub
Power On And Reset Smart Bulb
Adding a smart bulb to Apple Home starts with powering on the bulb correctly. You may need to reset the bulb if it was used before. This helps the bulb connect smoothly to your Apple Home setup.
Follow simple steps to power on and reset your smart bulb. This guide explains the initial setup and how to do a factory reset.
Initial Bulb Setup
First, screw your smart bulb into a light socket. Turn the power switch on to light up the bulb. The bulb will blink or change colors to show it is ready.
Open the Apple Home app on your iPhone or iPad. Tap the plus (+) icon to add a new accessory. Follow the instructions to scan the HomeKit code on the bulb or its packaging.
- Insert the bulb into a light socket
- Turn on the power switch
- Wait for the bulb to blink or show light
- Open Apple Home app and add accessory
- Scan the HomeKit code to connect
Factory Reset Instructions
If the smart bulb does not connect, reset it to factory settings. This clears old settings and prepares the bulb for a fresh start.
To reset, turn the bulb on and off several times. Usually, you switch it off and on five times quickly. The bulb will flash to confirm the reset.
- Turn bulb power off and on quickly five times
- Watch for blinking or flashing light
- Wait for the bulb to restart
- Open Apple Home app to add bulb again

Credit: www.reddit.com
Add Smart Bulb To Apple Home
Adding a smart bulb to Apple Home lets you control lights using your iPhone or iPad. You can turn lights on or off, adjust brightness, and set schedules.
This guide explains two ways to add your smart bulb: scanning the HomeKit code and using manual setup options.
Scan Homekit Code
Most smart bulbs come with a HomeKit code. It looks like a small QR code or numeric code on the bulb or its packaging.
To add the bulb, open the Home app on your iOS device and follow these steps:
- Tap the plus (+) icon to add an accessory.
- Select "Add Accessory."
- Use your camera to scan the HomeKit code.
- Follow the on-screen instructions to finish setup.
If the code scans correctly, your smart bulb will connect to your Apple Home system.
Manual Setup Options
If you cannot scan the HomeKit code, use manual setup. This may need the bulb’s model number and Wi-Fi details.
Manual setup steps include:
- Open the Home app and tap the plus (+) icon.
- Choose "Add Accessory" and select "I Don’t Have a Code."
- Find your smart bulb from the list of nearby devices.
- Enter any required information, like the device name or password.
- Complete the setup by assigning the bulb to a room.
| Manual Setup Tips | Details |
|---|---|
| Check bulb instructions | Look for setup codes or Wi-Fi info. |
| Use same Wi-Fi | Connect your iPhone and bulb to the same network. |
| Restart devices | Reset the bulb or phone if connection fails. |
Customize Bulb Settings
Adding a smart bulb to Apple Home is easy. You can adjust its settings to fit your needs.
Customizing the bulb settings lets you control the ambiance in your home. You can rename the bulb and assign it to a room. You can also adjust its brightness and color.
Rename And Assign Room
Renaming your smart bulb makes it easy to identify. Assigning it to a room helps organize your devices in Apple Home.
- Open the Apple Home app on your device.
- Select the smart bulb from the list of devices.
- Tap on the settings icon to access bulb settings.
- Type a new name for the bulb in the name field.
- Choose a room from the list to assign the bulb.
- Save your changes to update the settings.
Adjust Brightness And Color
Changing the brightness and color of your bulb can set the right mood. You can make your room bright or cozy.
- Select the smart bulb in the Apple Home app.
- Find the brightness slider and adjust as needed.
- Tap on the color wheel to select a color.
- Experiment with different colors for different occasions.
- Save your settings to keep the changes.
Credit: diylifetech.com
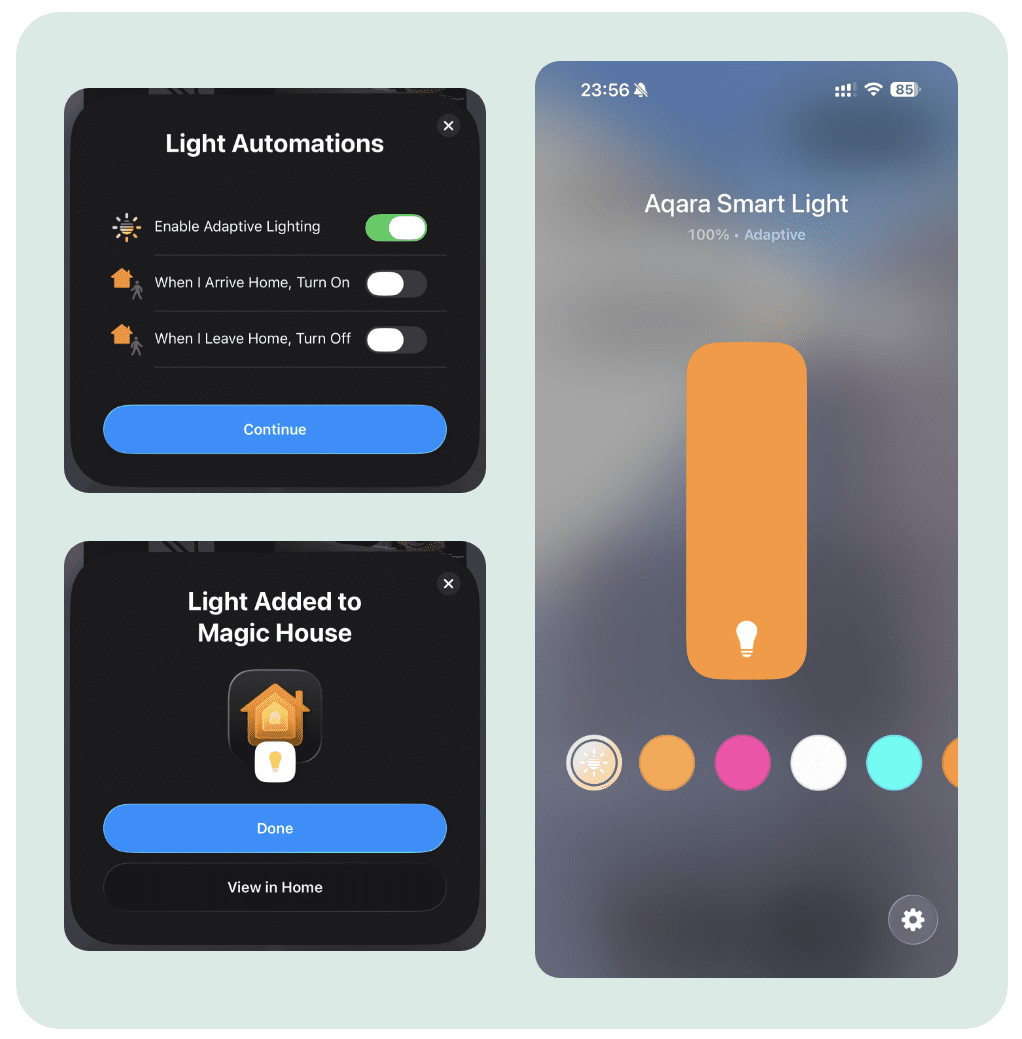
Create Automations And Scenes
Adding a smart bulb to Apple Home lets you control lighting easily. You can create automations and scenes to customize your lights.
Automations change light settings based on time or events. Scenes adjust multiple devices with one tap.
Schedule Lighting Changes
You can set your smart bulb to turn on or off at certain times. This helps save energy and adds convenience.
Use the Home app to create schedules that fit your daily routine. For example, turn lights on at sunset or off at bedtime.
- Open the Home app on your iPhone or iPad
- Tap the Automation tab at the bottom
- Select “Create new Automation”
- Choose a trigger like time of day
- Pick your smart bulb and set the action
- Save the automation to activate it
Link Bulbs With Other Devices
You can connect your smart bulb with other HomeKit devices. This lets you control multiple devices at once.
For example, create a scene to turn on the lights and start your smart speaker together. This makes your home more comfortable.
- Open the Home app and tap the Scenes tab
- Tap “Add Scene” and name it
- Select your smart bulb and other devices
- Choose the settings for each device
- Save the scene for easy access
Troubleshooting Common Issues
Smart bulbs are a great addition to your Apple Home. Sometimes, setting them up can be tricky. Here, we address common issues you might face.
Follow these steps to solve problems with your smart bulbs. This guide will help you enjoy seamless lighting control.
Connection Problems
Connection issues are common with smart bulbs. Ensure your device is on the same Wi-Fi network as your smart bulb.
If the bulb does not connect, try restarting your router. A simple restart can fix many connection problems.
- Check Wi-Fi settings on your phone
- Ensure the bulb is within range
- Restart the router if needed
Resetting And Re-adding Bulbs
If your smart bulb is unresponsive, a reset may help. Resetting the bulb is easy and can solve many issues.
To reset, turn the bulb off and on several times. Then, add the bulb to Apple Home again.
- Turn the bulb off and on 3-5 times
- Wait for the bulb to flash
- Add the bulb in the Home app

Credit: www.reddit.com
Frequently Asked Questions
How Do I Connect A Smart Bulb To Apple Home?
To connect a smart bulb to Apple Home, open the Home app and tap “Add Accessory. ” Scan the bulb’s HomeKit code or enter it manually. Follow the prompts to assign the bulb to a room and customize settings.
Which Smart Bulbs Are Compatible With Apple Home?
Smart bulbs compatible with Apple Home support Apple HomeKit. Popular options include Philips Hue, LIFX, and Nanoleaf. Always check the product description for HomeKit support before purchasing to ensure seamless integration.
Can I Control Smart Bulbs Using Siri?
Yes, you can control smart bulbs with Siri. After adding them to Apple Home, use voice commands like “Turn on the living room light. ” Siri allows you to adjust brightness, color, and power status hands-free.
What Should I Do If My Smart Bulb Won’t Connect?
If your smart bulb won’t connect, ensure it’s powered on and within range of your Wi-Fi. Restart the bulb and your iPhone. Also, confirm your device’s iOS is up to date and the bulb supports HomeKit.
Conclusion
Adding a smart bulb to Apple Home is simple and quick. Follow the steps carefully to connect your device. Control your lights with your voice or phone easily. Enjoy customizing brightness and color to suit any mood. Smart bulbs make your home more comfortable and energy-saving.
Start using your smart bulb today and feel the difference.