Looking for a fun and creative way to spend time at home? Clay is the perfect material to bring your ideas to life.
Whether you want to make something useful, decorative, or just plain fun, clay lets you shape your imagination. You’ll discover simple and exciting projects you can create with clay right now. Get ready to unlock your creativity and make something amazing with your own hands!

Credit: www.aol.com
Choosing The Right Clay
Clay is a fun material to use for crafts at home. Picking the right clay helps you make better projects. Different clays have different uses and features.
Think about what you want to create and how you want to use the clay. This will help you choose the best type for your needs.
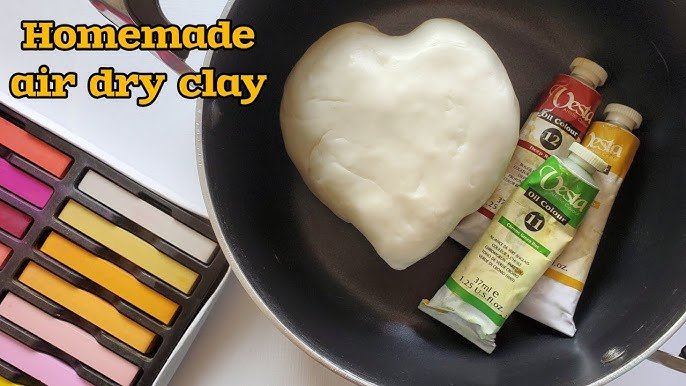
Air-dry Clay Benefits
Air-dry clay is easy to use. It does not need a kiln or oven to harden. Just leave it out to dry at room temperature.
This clay is good for kids and beginners. It is light and soft to shape. You can paint it after it dries.
- No baking needed
- Dries in 24 to 48 hours
- Good for small sculptures and crafts
- Paintable and easy to sand
Polymer Clay Options
Polymer clay is a type of clay that hardens in a regular oven. It stays soft until baked. This lets you work on details for a long time.
It comes in many colors and can be mixed. After baking, polymer clay becomes strong and durable. It is great for jewelry and small models.
- Bakes in home ovens at low heat
- Available in many colors
- Can be sanded and painted after baking
- Good for detailed and small projects
Natural Clay Varieties
Natural clay comes from the earth. It needs to be fired in a kiln to harden. This clay is good for pottery and art pieces.
There are different types, like earthenware and stoneware. Each type has unique textures and colors. They can be painted or glazed after firing.
- Requires kiln firing
- Used for pottery and ceramics
- Varies in texture and color
- Can be glazed for a shiny finish
Basic Tools For Clay Crafting
Clay crafting at home is fun and relaxing. You only need a few simple tools to start shaping your ideas.
Using the right tools helps you create smooth and detailed pieces. Let’s look at some basic tools you can use.
Essential Sculpting Tools
Sculpting tools help you shape, cut, and add details to your clay. They come in many shapes and sizes.
Some common tools include:
- Wire clay cutters for slicing clay blocks
- Loop tools to remove clay and create curves
- Needle tools for fine lines and textures
- Rubber or wooden shapers for smoothing surfaces
- Rolling pins to flatten clay evenly
Diy Tools From Household Items
You can use many household items as clay tools. These save money and work well for beginners.
Try these items for your clay projects:
- Toothpicks or skewers for small details
- Old credit cards or plastic cards for scraping
- Kitchen knives or butter knives for cutting
- Sponges to smooth and clean clay surfaces
- Forks for making texture patterns
Storage Tips For Tools And Clay
Keeping your tools and clay organized helps your crafting stay neat and easy. Proper storage also keeps clay fresh.
Use these storage tips:
- Store clay in airtight containers or plastic wrap to prevent drying
- Keep tools in a box or jar to avoid losing them
- Label your clay colors and tools for quick access
- Clean tools after use to keep them in good condition
- Use a damp cloth to cover clay if you use it often
Simple Clay Projects For Beginners
Clay is a fun and easy material to use at home. You can create many simple projects with just a little practice.
These beginner projects help you learn basic clay skills. You can make useful and pretty items quickly.
Making Clay Beads
Clay beads are small and easy to shape. You can use them for jewelry or decorations.
Roll small balls or shapes from clay. Use a toothpick to make holes through each bead.
- Choose colors you like
- Shape beads into balls, cubes, or stars
- Make holes for stringing
- Let beads dry or bake if using polymer clay
- String beads to make necklaces or bracelets
Creating Decorative Bowls
Decorative bowls are useful and pretty around the house. You can make them in different sizes and shapes.
Press clay into a bowl shape using your hands or a mold. Smooth the edges to make the bowl neat.
- Start with a ball of clay
- Press clay into a small bowl form
- Smooth the inside and outside surfaces
- Add designs with tools or stamps
- Let dry or bake according to clay type
Crafting Personalized Keychains
Keychains are quick and fun to make. Personalize them with names, shapes, or small designs.
Shape clay into your chosen design. Use letter stamps or tools to add details before drying.
- Choose simple shapes like hearts or circles
- Use stamps to add letters or patterns
- Poke a hole for the keyring
- Bake or air dry the clay
- Attach a keyring to finish the keychain

Credit: www.gatheringbeauty.com
Home Decor Ideas With Clay
Clay is a great material to create beautiful home decor. It is easy to shape and customize at home.
You can make many unique items that add charm to any room. Clay crafts bring a personal touch to your space.
Designing Planters And Pots
Clay planters and pots are perfect for indoor plants. You can shape them in different sizes and styles.
Decorate pots with patterns or paint to match your room. They also help keep plants healthy by holding soil well.
- Use air-dry clay for easy crafting
- Add texture with simple tools or stamps
- Paint with water-based or acrylic paints
- Seal with varnish for durability
Custom Wall Hangings
Create wall art by shaping clay into different designs. You can make abstract shapes, flowers, or geometric forms.
Hang your pieces with string or attach hooks to display them. Custom wall hangings add texture and interest to plain walls.
- Use rolled clay sheets for flat shapes
- Cut designs with cookie cutters or knives
- Paint or glaze for colors and shine
- Drill holes before drying to hang easily
Clay Candle Holders
Clay candle holders bring warmth and style to your home. You can make holders for tea lights or small candles.
Shape the clay around a mold to create holders. Decorate them with carvings or paint to match your decor.
- Press clay into small bowls or rings
- Make sure the holder is stable and flat
- Let dry completely before use
- Avoid using candles that get too hot
Functional Clay Creations
Clay is a fun and easy material to use at home. You can make many useful items that help organize and decorate your space.
Functional clay creations bring beauty and purpose to everyday objects. These projects are simple and great for beginners.
Diy Coasters And Trivets
Coasters and trivets protect tables from heat and water. Making them from clay lets you design unique shapes and patterns.
You can use air-dry clay or oven-bake clay for sturdy and colorful pieces. Add texture or paint after drying for a personal touch.
- Roll clay flat and cut into circles or squares
- Press leaves or stamps for patterns
- Let dry or bake according to clay type
- Seal with varnish to protect from moisture
Unique Jewelry Pieces
Clay lets you create custom jewelry like earrings, pendants, and rings. You can make small, detailed pieces with many colors.
Use clay tools to shape and carve designs. After baking, attach jewelry findings to finish your wearable art.
- Shape small pieces using molds or by hand
- Mix colors or add glitter for effects
- Bake pieces in the oven to harden
- Attach hooks, chains, or rings
Personalized Magnets
Clay magnets brighten up your fridge or office board. You can create letters, shapes, or fun designs to fit your style.
After shaping and baking, glue a small magnet on the back. These make great gifts or small decoration pieces.
- Roll and cut clay into favorite shapes
- Add initials or small decorations
- Bake the clay to harden it
- Glue magnets on the back with strong adhesive
Advanced Clay Techniques
Working with clay at home can be very fun. Advanced techniques help you create amazing pieces. These methods require practice and patience.
With advanced skills, your clay projects become more detailed. You can add textures, patterns, colors, and even mix materials.
Texturing And Pattern Making
Texturing adds depth to your clay pieces. You can use household items like forks or sponges. Patterns make your work unique and interesting.
Press objects into the clay to create patterns. Stamps and rollers work well for this. Experiment with different tools to see what you like best.
- Use leaves for natural patterns
- Create lines with a toothpick
- Press buttons for circular designs
Painting And Sealing Finished Pieces
Painting brings your clay pieces to life. Acrylic paints work well on clay. Use a thin brush for small details.
Sealing your pieces protects them. A clear glaze or varnish adds shine. Make sure the paint is dry before sealing.
- Choose colors that match your design
- Let each layer dry before adding more
- Use a spray sealer for even coverage
Combining Clay With Other Materials
Mixing clay with other materials creates unique pieces. You can use wood, metal, or glass. This adds texture and interest to your work.
Attach different materials to your clay. Use strong glue or wire for this. Make sure the other materials can handle the kiln's heat if you plan to fire them.
| Material | How to Attach |
|---|---|
| Wood | Glue or wire |
| Metal | Wire or embed in clay |
| Glass | Glue or set in clay |
Tips For Drying And Curing Clay
Working with clay at home can be fun and creative. It's important to dry and cure your clay properly to ensure great results.
Drying and curing your clay the right way prevents cracks and breakage. Let's explore some useful tips.
Air-dry Clay Best Practices
Air-dry clay is easy to use and doesn't require baking. It hardens by drying in the air. Follow these best practices for success.
- Place clay on a clean, dry surface.
- Turn pieces regularly to dry evenly.
- Keep away from direct sunlight to prevent warping.
Baking Polymer Clay Safely
Polymer clay needs to be baked to harden. Baking it safely ensures durability and prevents harmful fumes.
| Clay Type | Baking Temperature | Time |
| Standard | 265°F (130°C) | 30 minutes |
| Thick Pieces | 265°F (130°C) | 60 minutes |
| Thin Pieces | 265°F (130°C) | 15 minutes |
Avoiding Cracks And Breakage
Cracks and breakage can ruin your clay projects. Here are tips to prevent these issues.
Ensure clay is not too dry before working. Keep unused clay sealed to maintain moisture.
Creative Inspiration And Resources
Clay is a fun material to create many things at home. You can make pots, figures, or jewelry with simple tools.
Finding ideas and learning new skills helps you enjoy clay art more. There are many places to get help and inspiration.
Online Tutorials And Communities
Many websites and videos teach how to work with clay step-by-step. These tutorials show easy projects for beginners.
Online groups let you share your work and get advice. You can meet others who enjoy clay art too.
- Video lessons on shaping and painting clay
- Photo guides for making animals, bowls, or ornaments
- Forums where artists share tips and answers
- Social media groups focused on clay crafts
Books And Magazines On Clay Art
Books explain clay types and tools. They give many project ideas with simple instructions.
Magazines show new trends and artist stories. They inspire you with photos of creative clay works.
- Step-by-step project books for kids and adults
- Clay art technique guides and tips
- Monthly magazines featuring clay artists
- Pattern and design collections for creative ideas
Local Workshops And Classes
Many towns offer clay workshops at art centers or schools. These classes teach hands-on skills in small groups.
Workshops help you try new methods and meet local artists. You get personal feedback to improve your work.
- Beginner classes for basic clay shaping
- Advanced workshops on glazing and firing
- Group sessions for creative projects
- Special events for kids and families

Credit: www.youtube.com
Frequently Asked Questions
What Are Easy Clay Projects For Beginners At Home?
Simple clay projects include making beads, small bowls, and figurines. These are easy, quick, and require minimal tools. Beginners can practice shaping, smoothing, and painting. These projects build confidence and skills for more complex creations later.
How Can I Dry Clay Creations Without An Oven?
Air-dry clay is perfect for home use as it hardens naturally. Leave your clay piece in a dry, ventilated area for 24-48 hours. Avoid direct sunlight to prevent cracking. This method is safe and ideal for kids’ crafts.
What Tools Do I Need For Home Clay Crafting?
Basic tools include a rolling pin, sculpting knives, and shaping tools. Household items like toothpicks and plastic knives also work well. Investing in a clay modeling kit can enhance precision and creativity.
Can I Paint Clay Crafts After Drying?
Yes, once fully dried, clay crafts can be painted with acrylics. Use a sealant after painting to protect your design. Painting adds color and detail, making your creations more vibrant and personalized.
Conclusion
Clay offers endless fun and creative possibilities at home. You can make pots, jewelry, or small sculptures easily. It helps you relax and express your ideas with your hands. Kids and adults both enjoy shaping clay into unique art pieces.
Start with simple projects and try new designs over time. Keep clay tools nearby and let your imagination grow. Making things with clay brings joy and a sense of pride. Give it a try and discover what you can create today.