Is your big living room chair looking tired or outdated? Reupholstering it with piping can give it a fresh, stylish look that stands out.
You might think this is a tough job, but with the right steps, you can transform your chair yourself and save money. Imagine how satisfying it will feel to relax in a chair that looks brand new—made by your own hands.
Keep reading, and you’ll discover simple tips and tricks to reupholster your chair with piping like a pro. Your living room is about to get a serious upgrade!
Gathering Materials
Reupholstering a big living room chair with piping needs the right materials. Gathering them first makes the job easier.
Careful choice of fabric, piping, and tools helps you get good results. Let’s look at what you need.
Choosing Fabric And Piping
Pick a fabric that is strong and fits your room style. Look for fabrics made for furniture use.
Piping adds a nice edge to your chair. Choose piping that matches or contrasts your fabric well.
- Durable fabrics like cotton, linen, or polyester blends
- Fabric with a tight weave resists wear
- Piping made from the same fabric or a coordinating color
- Consider pre-made piping or make your own from fabric strips
Essential Tools Needed
Have the right tools ready before starting. These tools help you work faster and cleaner.
- Staple gun with staples
- Scissors for cutting fabric and piping
- Measuring tape to check sizes
- Needle and thread for sewing details
- Flathead screwdriver or pliers to remove old staples
- Chalk or fabric marker to mark fabric
- Rubber mallet to tap staples if needed
Preparing The Chair
Reupholstering a large living room chair takes careful preparation. The first step is to remove the old fabric and clean the chair frame. This makes sure the new fabric fits well and lasts long.
Taking your time during preparation helps you avoid problems later. You will also check the chair for any damage that needs fixing before adding new upholstery and piping.
Removing Old Upholstery
Start by carefully removing the old fabric and any staples or tacks holding it in place. Use tools like a staple remover and pliers. Keep the old fabric pieces; they can help you cut the new fabric correctly.
- Use a screwdriver or staple remover to lift staples.
- Pull fabric gently to avoid breaking the frame.
- Save fabric pieces to trace new cuts.
- Remove any padding or foam that is worn out.
Cleaning And Inspecting Frame
After removing the fabric, clean the chair frame well. Dust, dirt, and old glue can stop the new fabric from sticking properly. Also, check the frame for loose joints or broken parts.
| Task | Tools Needed | Notes |
| Remove dust and dirt | Vacuum, soft cloth | Be gentle to avoid scratches |
| Check joints and screws | Screwdriver, wood glue | Tighten or glue loose parts |
| Remove old glue residue | Sandpaper | Light sanding only |
| Inspect wood for damage | Visual check | Repair cracks before upholstering |
Measuring And Cutting Fabric
Reupholstering a big living room chair needs careful measuring and cutting. This ensures fabric fits well and looks neat.
Focus on taking precise measurements and cutting fabric and piping strips to match. This guide helps you do both correctly.
Taking Accurate Measurements
Start by measuring each part of your chair where fabric will go. Use a soft tape measure for curves and edges.
- Measure the width, height, and depth of the seat cushion.
- Note the dimensions of the backrest and armrests.
- Add extra inches for seams and tucking under.
- Record all measurements clearly on paper.
- Double-check measurements before cutting fabric.
Cutting Fabric And Piping Strips
After measuring, transfer measurements to fabric and piping material. Cut carefully to keep shapes and sizes accurate.
| Material | Cutting Tips |
| Fabric | Use sharp scissors; cut on flat surface |
| Piping Strips | Cut slightly longer than edges; allow for corners |
| Seam Allowance | Add 1 to 2 inches extra for sewing |
Sewing The Piping
Sewing piping onto a living room chair can add a polished look. It involves attaching a narrow strip of fabric filled with cord along the edges.
This process requires precision and attention to detail. Let's explore how to sew piping effectively.
Attaching Piping To Fabric Edges
Lay your fabric flat with the right side up. Place the piping along the edge where you want it attached.
Pin the piping in place securely. Use a zipper foot on your sewing machine to stitch close to the piping cord.
- Ensure the piping aligns with fabric edges
- Stitch slowly to maintain a straight line
- Remove pins as you sew
Handling Corners And Curves
When reaching a corner, snip the piping fabric slightly. This helps it bend without bunching.
For curves, gently pull the piping to fit the fabric shape. Sew slowly, adjusting as needed.
- Make small snips for sharp corners
- Ease the piping around curves
- Sew with care to avoid puckering
Attaching Fabric To Chair
Attaching fabric to a big living room chair requires care and precision. The right method keeps the fabric smooth and secure.
This guide focuses on how to position the fabric correctly and staple it properly for a neat finish.
Positioning Fabric Correctly
Place the fabric over the chair so it covers all areas evenly. Align the fabric’s pattern and seams with the chair’s shape.
- Start by draping the fabric over the chair’s back.
- Smooth out wrinkles and folds as you go.
- Check that the fabric hangs evenly on all sides.
- Pin the fabric in place if needed before stapling.
Stapling And Securing Fabric
Stapling holds the fabric firmly. Use a staple gun and work from the center outward to avoid wrinkles.
| Stapling Tips | Why It Matters |
| Staple at the center of each side first | Keeps fabric tight and balanced |
| Pull fabric tight before each staple | Prevents loose or sagging fabric |
| Place staples close but not overlapping | Secures fabric without damage |
| Trim excess fabric after stapling | Prepares for neat edges and piping |

Credit: gluesticksblog.com
Finishing Touches
Finishing touches make your reupholstered chair look neat and polished. These steps help secure the fabric and add style.
Focus on trimming excess fabric and adding details like piping to complete the project.
Trimming Excess Material
Remove extra fabric from the edges to avoid bulk. Use sharp scissors for clean cuts close to the piping.
Cut slowly and carefully to keep the piping intact and the fabric smooth around corners.
- Trim fabric about ¼ inch from the piping seam
- Cut small notches near curves for better folding
- Check that no loose threads remain
Adding Final Details
Add any extra details like buttons or decorative nails to enhance your chair’s look. These details bring character to the piece.
Secure the piping with extra stitches if needed. Make sure all fabric edges are tucked in neatly.
- Sew loose ends on piping to prevent fraying
- Attach buttons or nails evenly along the edges
- Press fabric gently to smooth any wrinkles
Care Tips For Reupholstered Chairs
Reupholstering a big living room chair with piping can give it a new look. Proper care keeps it looking fresh and extends its life. Here are some essential tips to maintain your newly reupholstered chair.
These tips will help you clean and protect your chair. Follow them to ensure it stays in great condition for years.
Cleaning And Maintenance
Keeping your reupholstered chair clean is important. Dust and dirt can wear down the fabric over time.
- Vacuum the chair weekly using a soft brush attachment.
- Spot clean stains immediately with mild soap and water.
- Avoid using harsh chemicals that can damage the fabric.
Preventing Wear And Tear
Preventing wear and tear will keep your chair looking new. Simple habits can make a big difference.
Place the chair away from direct sunlight to prevent fading. Rotate cushions regularly to distribute wear evenly.
| Tip | Benefit |
| Use arm covers | Protects from oils and dirt |
| Add a throw blanket | Reduces direct wear on fabric |
| Avoid eating on the chair | Prevents food stains |

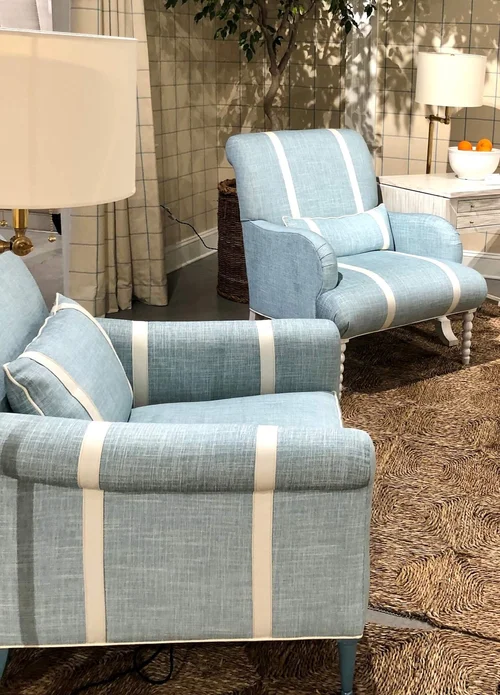
Credit: www.addicted2decorating.com
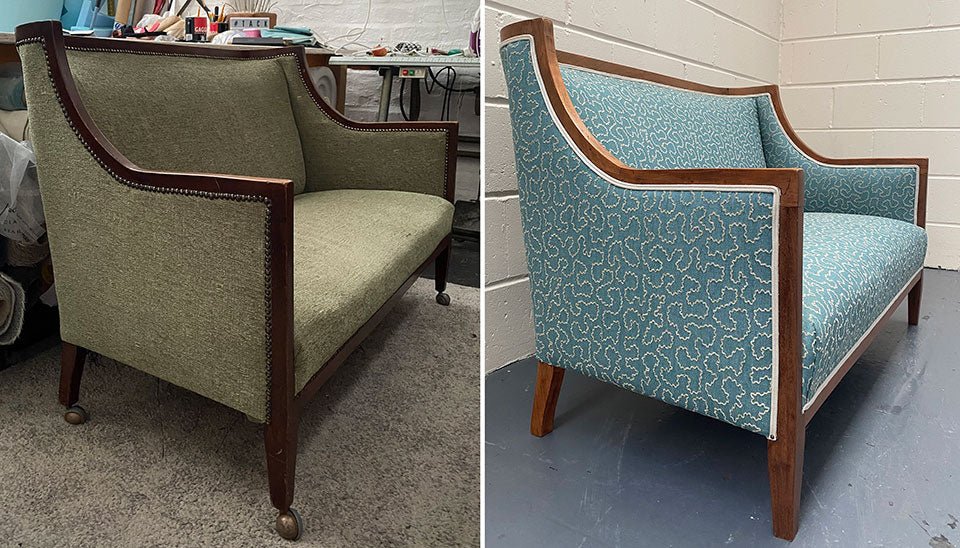
Credit: www.jrlinteriors.com
Frequently Asked Questions
How Do You Add Piping To A Living Room Chair?
To add piping, cut fabric strips, sew a cord inside, and stitch along chair edges. This creates a clean, professional look that enhances the chair’s shape.
What Tools Are Needed For Reupholstering A Big Chair?
You’ll need fabric, piping cord, sewing machine, scissors, staple gun, and upholstery needle. These tools help remove old fabric and attach new material neatly.
How Long Does It Take To Reupholster A Big Chair?
Reupholstering can take 6 to 12 hours depending on skill level and chair complexity. Allow extra time for adding piping details carefully.
Can Beginners Reupholster Chairs With Piping Easily?
Yes, beginners can succeed by following tutorials and practicing sewing piping. Patience and attention to detail are key for good results.
Conclusion
Reupholstering a big living room chair with piping adds style and comfort. The steps are clear and easy to follow. Take your time and enjoy the process. Choose fabric and piping that match your room’s look. Use the right tools for the best results.
This project can refresh your old chair nicely. Your chair will look fresh and feel new. Try it yourself and see the difference. A little effort brings big rewards.