Are you curious about how to process hemp at home but don’t know where to start? You’re in the right place.
Processing hemp can seem complicated, but with the right steps, you can do it yourself without any hassle. Imagine turning raw hemp into useful products right in your own space—saving money and gaining control over what you create. You’ll discover simple, clear instructions that make hemp processing easy and rewarding.
Keep reading, and you’ll soon have the confidence to handle hemp like a pro.
Choosing The Right Hemp
Choosing the right hemp is key to successful home processing. It starts with knowing what seeds or plants to select. Quality hemp leads to better results and easier handling.
Understanding how to spot quality hemp helps you avoid plants that will give poor yields or low cannabinoid content. This guide helps you select the best hemp for your needs.
Selecting Seeds Or Plants
Start with seeds or young plants from trusted sources. Choose varieties suited for your climate and purpose. Some are better for fiber, while others are best for CBD extraction.
- Look for certified seeds with clear labeling
- Pick strains adapted to your local weather
- Consider the intended use: fiber, seeds, or cannabinoids
- Choose seeds with good germination rates
- Buy from suppliers with good reviews
Identifying Quality Hemp
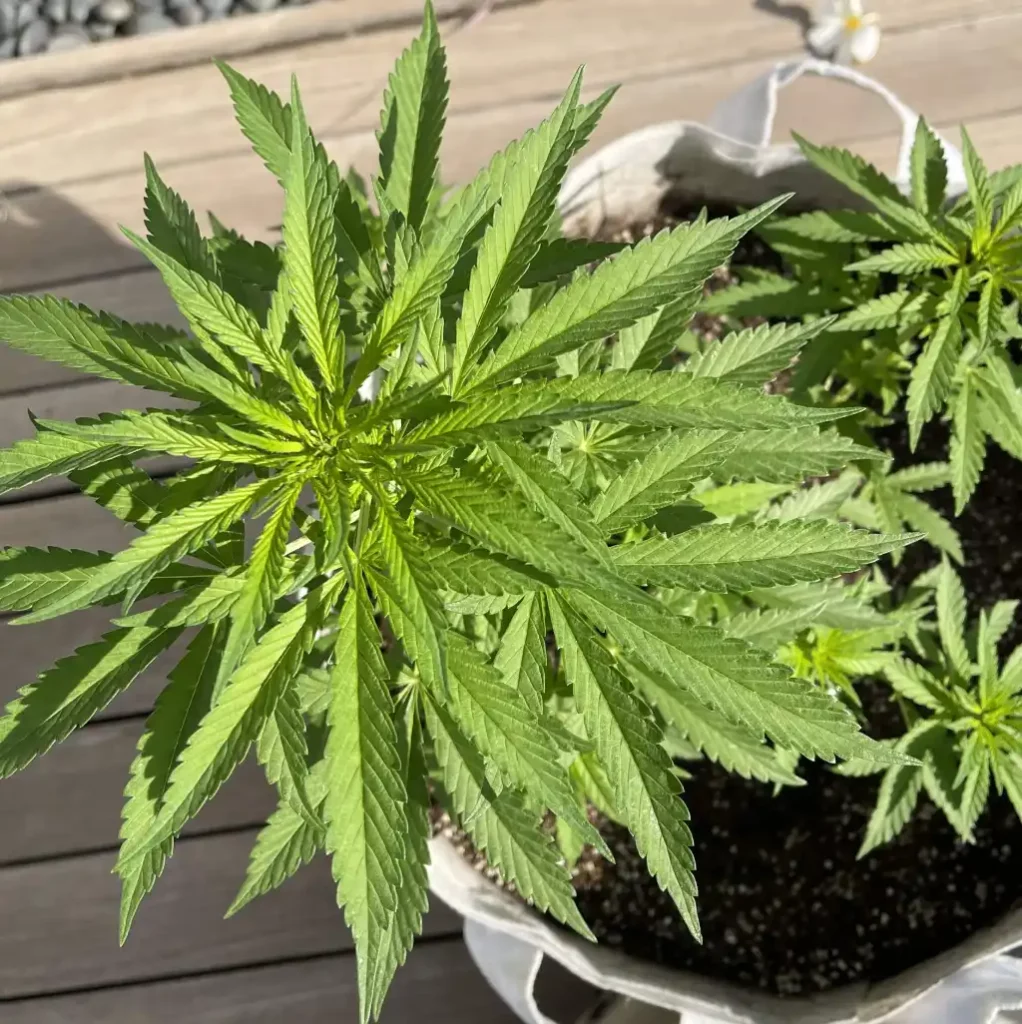
Good hemp plants have certain physical traits. Healthy leaves and strong stalks show the plant is well grown. Avoid plants with spots or signs of disease.
| Quality Factor | What to Look For |
| Leaf Color | Bright green, no yellowing |
| Stem Strength | Firm and sturdy, not brittle |
| Bud Appearance | Dense and resinous for CBD hemp |
| Pest Damage | No holes or webs on leaves |
| Smell | Fresh, herbal scent; not musty |
Preparing Your Workspace
Processing hemp at home needs a clean and organized space. This helps keep your hemp pure and easy to handle.
Setting up your workspace well makes the process faster and safer. It also protects your tools and materials.
Gathering Essential Tools
Before you start, collect all the tools you will need. Having everything ready prevents interruptions.
- Sharp scissors or pruning shears for cutting hemp stalks
- Gloves to protect your hands
- Large trays or containers for drying hemp
- Brush or comb for cleaning fibers
- Sharp knife for trimming leaves
- Measuring tools for precise cutting and weighing
- Storage bags or jars for keeping processed hemp
Setting Up A Clean Area
Choose a place with good light and air flow. A clean area keeps hemp free of dust and pests.
| Workspace Feature | Reason |
| Flat surface | Easy to cut and sort hemp fibers |
| Good lighting | See details clearly and avoid mistakes |
| Ventilation | Keep air fresh and dry for hemp drying |
| Easy to clean | Remove debris and maintain hygiene |
| Storage nearby | Store tools and hemp safely |
Harvesting Hemp
Harvesting hemp is an important step in processing it at home. It affects the quality and usefulness of the plant.
You need to know the right time to harvest and how to cut and collect the stalks properly.
Timing The Harvest
Harvest hemp when the plants reach full maturity. This is usually 70 to 90 days after planting.
Look for signs like brown pistils and swollen seeds. Harvesting too early or late can reduce quality.
- Check for brown or orange pistils on flowers
- Seeds should be hard and mature
- Leaves may start to yellow
- Harvest before seeds drop to the ground
Cutting And Collecting Stalks
Use sharp tools to cut hemp stalks near the base. Cut carefully to avoid damaging the fibers.
Gather the cut stalks into bundles. This makes it easier to transport and dry them at home.
- Cut stalks close to the ground
- Bundle stalks in small, manageable groups
- Keep bundles off the ground to avoid moisture
- Dry bundles in a ventilated, shaded area
Credit: blimburnseeds.com
Drying The Hemp
Drying hemp is a crucial step in home processing. It helps preserve the plant's quality and potency.
This guide will help you choose the best drying methods and monitor moisture levels effectively.
Choosing Drying Methods
Choosing the right drying method is important for maintaining hemp's quality. You have several options to consider.
- Air drying: Hang hemp in a well-ventilated area.
- Rack drying: Use drying racks for better space utilization.
- Oven drying: Quick method but requires careful temperature control.
Monitoring Moisture Levels
Keeping an eye on moisture levels ensures that the hemp dries evenly and prevents mold growth.
| Method | Optimal Moisture Level |
| Air drying | 10-15% |
| Rack drying | 10-15% |
| Oven drying | 8-12% |
Decortication Process
Decortication is the process of separating hemp fibers from the stalks. It is a crucial step in processing hemp at home.
This process helps in obtaining useful fibers for various products. It can be done using different techniques.
Separating Fibers From Stalks
The process involves breaking the hemp stalks to access the fibers inside. It requires care to keep the fibers intact.
After breaking, the fibers are pulled out gently. This ensures they are long and strong.
Manual Vs. Mechanical Techniques
Manual techniques involve using simple tools by hand. It is slower but offers more control over the fibers.
Mechanical techniques use machines to speed up the process. They are faster and suitable for large amounts of hemp.
- Manual: Cheaper, more control, time-consuming
- Mechanical: Faster, less labor, requires machinery

Credit: www.gorillagrowtent.com
Extracting Hemp Fibers
Extracting hemp fibers at home is a rewarding process. It lets you use natural fibers for many projects.
This guide covers cleaning and combing hemp fibers and preparing them for use.
Cleaning And Combing
Cleaning removes dirt and leaves from the hemp fibers. Combing aligns the fibers for smooth use.
- Rinse fibers in cold water to remove dust.
- Lay fibers flat to dry in the shade.
- Use a fine-toothed comb to gently separate fibers.
- Remove any remaining bits of leaf or stalk.
- Repeat combing until fibers are smooth and even.
Preparing Fibers For Use
Preparing fibers makes them ready for spinning or weaving. This step improves fiber strength and texture.
| Preparation Step | Description | Tools Needed |
| Drying | Ensure fibers are fully dry to avoid mold. | Dry rack or flat surface |
| Softening | Rub fibers gently to soften them. | Hands or soft brush |
| Spinning | Twist fibers into thread or yarn. | Spinning wheel or drop spindle |
| Weaving | Use prepared yarn to create fabric. | Loom or frame |
Processing Hemp Seeds
Processing hemp seeds at home lets you use them in many ways. You can clean, sort, and extract oil from the seeds yourself.
These simple steps help you get the best quality hemp seeds for cooking or making hemp oil.
Cleaning And Sorting Seeds
Start by removing dirt, leaves, and broken seeds. Clean seeds give better oil and taste.
- Spread the seeds on a flat surface.
- Pick out any sticks, stones, or debris.
- Use a fine sieve or screen to separate small dust.
- Sort seeds by size and color, discarding damaged ones.
- Rinse seeds gently with cold water and dry completely.
Extracting Oil At Home
You can press hemp seeds to get oil using simple tools. Cold pressing keeps the oil fresh and healthy.
| Method | Description | Pros | Cons |
| Manual Press | Use a hand crank press to squeeze seeds. | Low cost, easy to use. | Low oil yield, slow process. |
| Electric Oil Press | Machine presses seeds fast and more fully. | Higher yield, faster. | More expensive, needs power. |
| Cold Soaking | Crush seeds and soak in oil-friendly solvent. | Simple, no special tools. | Less pure oil, solvent use. |
After pressing, strain the oil through a fine cloth. Store in a dark bottle away from heat.

Credit: blimburnseeds.com
Storing Processed Hemp
After processing hemp at home, proper storage is important. Good storage keeps hemp fresh and useful for longer.
Storing hemp correctly helps keep its quality and prevents damage from moisture or pests.
Proper Storage Conditions
Keep hemp in a cool, dark, and dry place. Heat and light can reduce its quality quickly.
Use airtight containers to protect hemp from air and moisture. Avoid plastic bags that are not sealed well.
- Store hemp in glass jars with tight lids
- Keep containers away from direct sunlight
- Maintain temperature between 60°F and 70°F (15°C - 21°C)
- Use silica packs or moisture absorbers inside containers
Extending Shelf Life
To make hemp last longer, avoid exposing it to air and moisture. These cause mold and spoilage.
Check stored hemp regularly. Remove any parts that look damp or moldy to protect the rest.
- Keep hemp dry by using desiccants
- Store in small batches to reduce opening containers often
- Label containers with storage date
- Freeze hemp for long-term storage if needed
Common Mistakes To Avoid
Processing hemp at home can be rewarding but requires care. Many beginners face common problems that reduce quality.
Knowing what mistakes to avoid helps keep hemp clean, potent, and safe to use. Pay attention to details during each step.
Overdrying Or Mold Issues
Drying hemp too much or too little can harm its quality. Overdrying makes it brittle and loses aroma. Mold grows if hemp stays damp too long.
- Dry hemp in a cool, dark place with good airflow
- Check moisture daily to avoid overdrying or dampness
- Use a hygrometer to measure humidity levels accurately
- Do not stack hemp tightly; leave space for air circulation
- Trim and dry smaller batches to control the process better
Improper Handling Techniques
Handling hemp roughly can damage trichomes and reduce potency. Clean hands and tools prevent contamination. Keep hemp dry during handling.
| Common Handling Mistake | Effect | How to Avoid |
| Touching buds with bare hands | Removes trichomes and oils | Wear clean gloves |
| Using dull scissors | Crushes plant material | Use sharp, clean scissors |
| Stacking wet hemp | Leads to mold growth | Dry hemp fully before storage |
| Rough handling during trimming | Damages buds and lowers quality | Handle buds gently and slowly |
Simple Hemp Projects For Beginners
Processing hemp at home is easy and fun. You can create useful items with simple tools.
Start with small projects like making hemp rope or crafting natural textiles. These projects need few materials and little experience.
Making Hemp Rope
Hemp fibers are strong and make great rope. You only need hemp stalks, water, and a place to dry the fibers.
First, soak the hemp stalks in water for a few days. This softens the fibers. Then, strip the fibers from the stalks by hand.
- Twist fibers tightly to form strands
- Combine strands by twisting them together
- Keep the tension even for strong rope
- Dry the rope in the sun before use
Crafting Natural Textiles
You can make simple cloth from hemp fibers. After separating fibers, comb them to align the threads.
Spin the fibers into yarn using a drop spindle or your fingers. Then, weave the yarn on a small loom or frame.
- Card fibers to remove debris
- Spin fibers into yarn
- Set up a small loom or frame
- Weave yarn to create fabric
- Wash and dry the fabric before use
Frequently Asked Questions
How Do I Start Processing Hemp At Home?
Begin by harvesting mature hemp plants. Dry the stalks thoroughly, then decorticate by removing the outer layer. Use simple tools to separate fibers and prepare them for further use or storage.
What Tools Are Needed To Process Hemp At Home?
Basic tools include pruning shears, a drying rack, a decorticator or hand tools, and a fiber comb. These help in harvesting, drying, breaking, and refining hemp fibers effectively.
Can I Extract Cbd From Hemp At Home?
Yes, but it requires proper equipment and knowledge. Use safe extraction methods like ethanol or oil infusion. Always ensure hemp is legal and CBD content is within regulated limits.
How Long Does Hemp Processing Take At Home?
Processing time varies by method and scale. Drying can take 5-10 days. Fiber extraction may take several hours, depending on manual or mechanical processes.
Conclusion
Processing hemp at home can be simple and rewarding. Start with clean tools and fresh hemp. Follow each step carefully for best results. Take your time and be patient. You will see progress with practice. Small batches help you learn better.
Always store hemp products safely and dry. Enjoy the process and learn as you go. Hemp can offer many uses once processed. Keep experimenting and improving your skills steadily. This guide helps you start your hemp journey confidently.