Are you ready to give your room a fresh new look without spending a fortune? Learning how to paint roll a wall is easier than you think, and it can transform your space in just a few hours.
Imagine the satisfaction of seeing a smooth, flawless finish that you did yourself. In this guide, you’ll discover simple steps and insider tips that make the painting process quick and stress-free. By the end, you’ll have the confidence to tackle your walls like a pro.
Let’s get started and turn your walls into a masterpiece you’ll love!
Gathering Supplies
Painting a wall with a roller needs the right supplies. Getting these items first saves time and effort.
This guide covers choosing paint, rollers, brushes, and other tools you need.
Choosing The Right Paint
Pick paint based on the room and surface. Use washable paint for kitchens and bathrooms. Matte finish hides wall flaws well. Satin or semi-gloss works for trim and high-use areas.
- Check the paint type: latex or oil-based
- Choose the finish: matte, satin, semi-gloss
- Consider color and coverage
- Buy extra paint for touch-ups
Selecting Quality Rollers And Brushes
Good rollers and brushes give a smooth finish. Rollers come in different nap lengths for wall texture. Brushes help with edges and corners.
| Tool | Use | Tip |
| Roller with 3/8" nap | Smooth walls | Use for flat surfaces |
| Roller with 1/2" nap | Textured walls | Holds more paint |
| Angled brush | Cutting in edges | Better control |
| Flat brush | Trim and detail | Use for clean lines |
Other Essential Tools
Besides paint and brushes, gather other tools for a smooth job. These help protect surfaces and make painting easier.
- Painter’s tape to protect edges and trim
- Drop cloths to cover floors and furniture
- Paint tray and liners for easy cleanup
- Extension pole for reaching high walls
- Sanding block to smooth rough spots
- Putty knife and spackle for fixing holes
Credit: www.familyhandyman.com
Preparing The Wall
Preparing the wall is important before you paint. It helps paint stick well and last longer.
Good preparation makes your wall look smooth and clean after painting.
Cleaning The Surface
Start by cleaning the wall to remove dirt and dust. Use a sponge or cloth with water and mild soap.
Rinse the wall with clean water and let it dry fully before painting.
Patching Holes And Cracks
Fill any holes or cracks with spackling paste or wall filler. Use a putty knife to smooth the surface.
Let the filler dry, then sand it lightly to make the wall even and smooth.
Taping And Covering
Use painter’s tape to cover edges and trim. This keeps paint off surfaces you do not want painted.
Cover the floor and furniture with drop cloths or plastic sheets to protect from paint splatters.
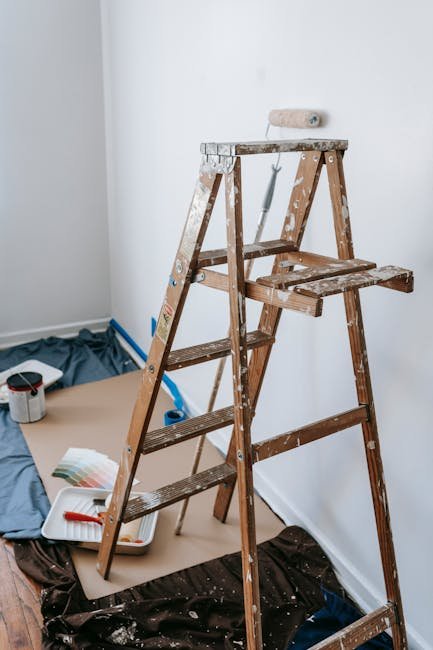
Setting Up The Workspace
Before you start paint rolling, prepare the room carefully. A good workspace helps you work faster and cleaner.
Proper setup protects your furniture and makes the job easier. Follow these tips to get ready.
Arranging Furniture And Floor Protection
Move furniture out of the room if possible. If not, push items to the center and cover them well.
Protect floors with drop cloths or old sheets. This stops paint drops from damaging surfaces.
- Clear the room or group furniture in the middle
- Cover furniture with plastic sheets or cloth
- Lay drop cloths or newspapers on the floor
- Secure coverings with painter’s tape to avoid slipping
Ensuring Proper Lighting
Good lighting helps you see the wall clearly. It shows where paint is missing or uneven.
Use natural light if you can. Add lamps or work lights for darker corners or evening work.
- Open curtains and blinds for daylight
- Use bright, white bulbs to avoid color distortion
- Place lamps near the wall to reduce shadows
- Check lighting from different angles before starting
Ventilation Tips
Keep the room well-ventilated to reduce paint fumes. Fresh air helps you breathe easier and dries paint faster.
Open windows and doors. Use fans to move air out of the room safely.
- Open all windows and doors if possible
- Place a fan near a window to blow air outside
- Avoid standing in the path of strong airflow
- Take breaks outside if paint smell feels strong
Credit: www.doityourself.com
Loading The Roller
Loading the roller correctly helps you paint walls evenly. It saves time and avoids mess.
Use the right technique to get the best paint coverage on your roller.
Pouring Paint Into A Tray
Pour paint into the tray’s deep end. Fill it about one-third full to avoid spills.
Use a slow, steady pour to keep paint from splashing outside the tray.
Evenly Coating The Roller
Roll the roller in the paint tray’s shallow area. Move it back and forth several times.
Make sure the roller covers all sides evenly. This helps spread paint smoothly on the wall.
- Start by dipping the roller into the paint
- Roll it on the tray’s slope to spread paint
- Check that all parts of the roller are coated
Avoiding Drips
Remove extra paint by rolling the roller on the tray’s ridged section. This stops drips on the wall.
Hold the roller horizontally to keep paint from dripping off the sides.
- Roll off excess paint before starting
- Keep a steady hand while painting
- Check the roller often for drips
Applying The Paint
Painting a wall with a roller needs care and technique. Applying paint evenly helps avoid streaks and marks. Use proper methods to get a smooth finish.
Focus on areas carefully and keep your strokes consistent. This guide explains key ways to apply paint with a roller for best results.
Starting At The Edges
Begin painting near the edges of the wall. Use a smaller brush or the roller's edge for corners and trim. This creates a clean border before filling the main area.
- Load the roller lightly near edges
- Roll slowly to avoid splatters
- Overlap slightly with brush strokes
- Keep a wet edge to blend with next sections
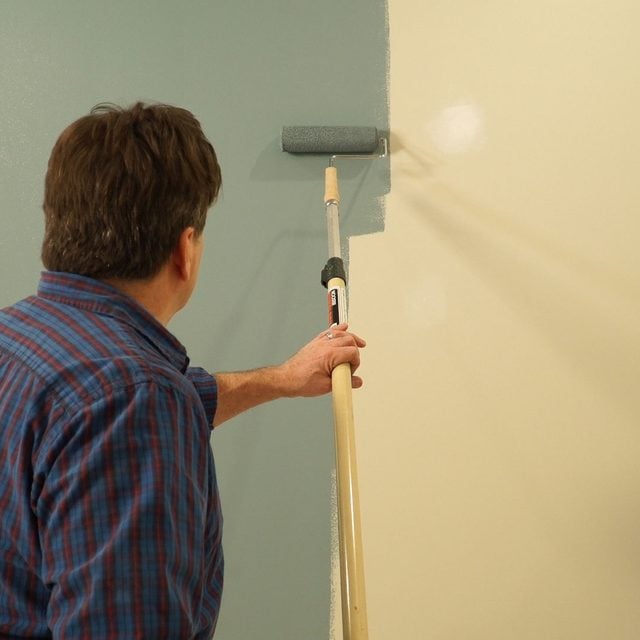
Using The 'w' Technique
Paint the wall by rolling in a ‘W’ shape. This method spreads paint evenly and prevents lines or marks. Fill in the spaces without lifting the roller.
How to use the 'W' technique:
- Start at the top of the wall.
- Roll in a large W shape.
- Fill in the empty spaces inside the W.
- Repeat in sections, blending edges.
Maintaining Consistent Pressure
Keep the roller pressure even for smooth paint coverage. Pressing too hard causes streaks. Too light leaves thin spots. Find a balance and keep it steady.
| Pressure Level | Effect on Paint |
|---|---|
| Too Hard | Paint splatters and streaks |
| Too Light | Uneven, thin coverage |
| Consistent | Smooth, even finish |
Finishing Touches
Completing a paint job requires attention to detail. The final steps can make your wall look professional and clean.
These finishing touches ensure a smooth surface and a neat appearance. Follow these tips for a perfect paint finish.
Smoothing Out Streaks
Streaks can ruin a freshly painted wall. Smooth them out for an even look.
- Use a damp sponge to gently buff streaks.
- Apply a thin coat of paint over the streaky area.
- Let the paint dry and check for uniformity.
Removing Painter's Tape
Removing painter's tape carefully prevents damage to your fresh paint. Follow these steps for a clean edge.
Tip: Remove the tape at a 45-degree angle for best results.
Cleaning Up Tools
Proper tool cleanup extends the life of your brushes and rollers. Clean tools ensure they're ready for your next project.
| Tool | Cleaning Method |
| Brush | Rinse with warm soapy water |
| Roller | Use a roller cleaner or hose |
| Tray | Wipe out excess paint, rinse |
Drying And Additional Coats
Painting a wall with a roller can be fun. It needs patience and care for a smooth finish. Drying times and extra coats are important steps. They ensure the paint looks even and lasts longer.
Knowing when to let the paint dry and when to add another coat helps. It prevents mistakes and makes the wall look great. Let’s explore these steps in detail.
Optimal Drying Times
Drying times depend on the paint type and room conditions. Most paints dry to the touch in 1-2 hours. Humidity and temperature can change this time. Always check the paint can for exact times.
Proper drying is key. It stops the paint from smearing. You get a smooth surface ready for the next coat. Ensure the room is well-ventilated for faster drying.
When To Apply A Second Coat
The second coat makes the color richer. Wait until the first coat is fully dry. This usually takes 4-6 hours. Check the paint instructions to be sure.
Applying too soon can ruin the paint job. Take your time. Ensure the first coat is dry and smooth. This helps the second coat stick better.
Final Inspection
After painting, inspect the wall. Look for missed spots or uneven areas. This is the time to fix any small mistakes.
Check under different lights. Some flaws may only show up under direct light. Make sure the paint looks smooth and even everywhere.
- Look for drips or runs
- Check for thin spots
- Ensure corners are covered

Credit: www.youtube.com
Frequently Asked Questions
How Do I Prepare A Wall Before Paint Rolling?
Clean the wall thoroughly to remove dust and dirt. Repair any holes or cracks with filler. Sand the surface lightly for smoothness. Use painter’s tape to protect edges and trim. Ensure the wall is dry before starting to paint roll.
What Type Of Roller Is Best For Wall Painting?
Use a medium nap roller (3/8 to 1/2 inch) for smooth to semi-smooth walls. It holds enough paint and applies evenly. For textured walls, choose a thicker nap roller. Quality rollers reduce streaks and improve coverage.
How Much Paint Should I Load On The Roller?
Dip the roller lightly into the paint tray. Roll it back and forth on the tray’s ridged area. Avoid overloading to prevent drips and uneven application. Aim for a damp roller that spreads paint smoothly.
What Is The Best Rolling Technique For Even Coverage?
Start rolling in a “W” or “M” pattern on the wall. Fill in the gaps without lifting the roller. Apply light pressure and maintain a wet edge. This prevents streaks and ensures uniform paint distribution.
Conclusion
Painting a wall with a roller is simple and effective. Use the right tools and prepare the surface well. Apply paint evenly in smooth strokes to avoid streaks. Take your time and work carefully for the best results. Clean your roller after finishing to keep it ready for next time.
With these tips, you can refresh any room easily and enjoy a clean, bright wall. Happy painting!