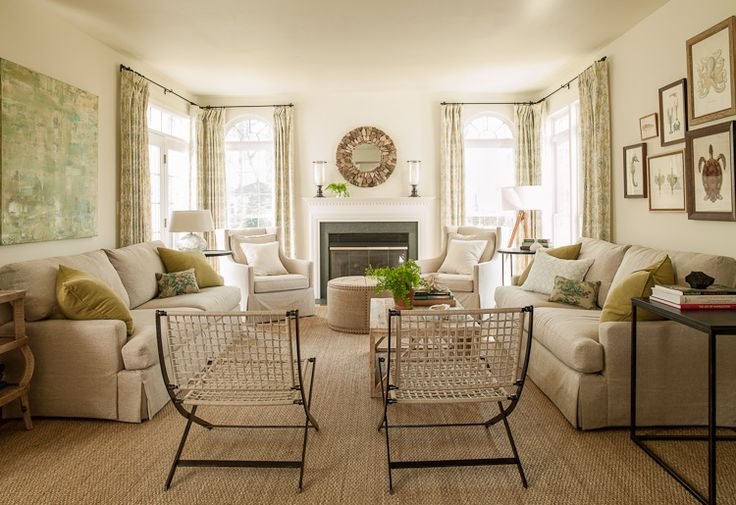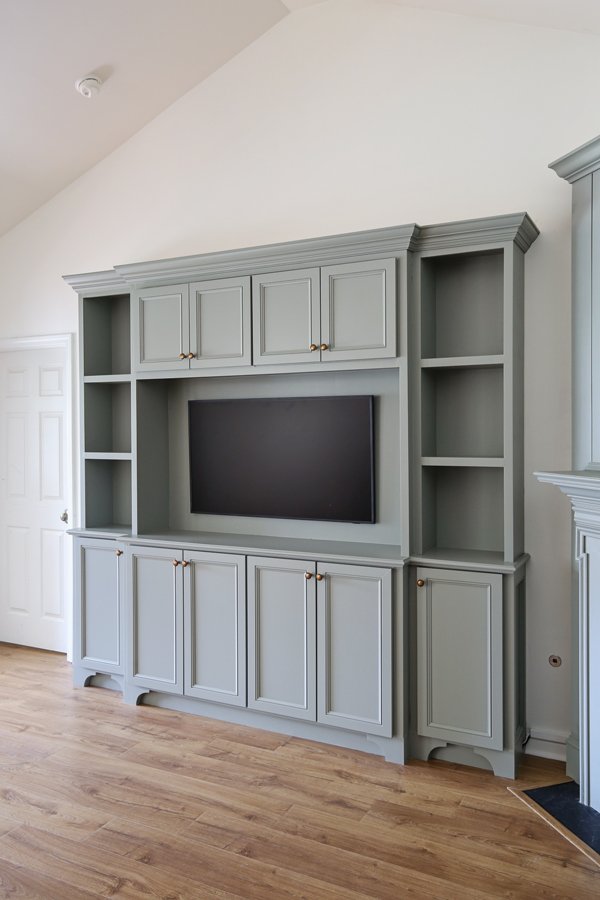
Are your living room built-in cabinets looking tired or outdated? Painting them can completely transform the space, making your room feel fresh and inviting without a full renovation.
But how do you get a smooth, professional finish that lasts? You’re about to discover simple, step-by-step tips that anyone can follow—even if you’ve never painted cabinets before. Keep reading, and you’ll learn everything you need to know to turn your cabinets into a stunning focal point you’ll be proud of.
Preparing The Cabinets
Painting built-in cabinets starts with good preparation. Clean and clear the cabinets first. This helps the paint stick well.
Take your time with each step. Proper prep makes your work last longer and look better.
Clearing And Cleaning
Remove everything from the cabinets. Clear shelves and drawers to reach all surfaces. This helps you clean and paint easily.
Clean all surfaces with a mild soap and water. Use a cloth or sponge to wipe away dirt and grease. Let the cabinets dry completely before painting.
Removing Hardware
Take off all handles, knobs, and hinges. Use a screwdriver to remove screws carefully. Keep all hardware in a safe place.
Removing hardware gives you a smooth surface to paint. It also prevents paint from sticking to these parts.
Sanding Surfaces
Sand all cabinet surfaces with fine-grit sandpaper. Sanding removes old paint and rough spots. It also helps new paint stick better.
Wipe away dust with a clean, dry cloth. Make sure no dust stays on the cabinets before painting.

Credit: www.theadoredabode.com
Choosing Paint And Supplies
Painting built-in cabinets in your living room can change the entire look. Choosing the right paint and supplies is key. This guide helps you pick the best options.
Good choices make your paint job last longer and look better. Let’s explore the paint types, colors, and tools you need.
Selecting The Right Paint Type
Use paint made for cabinets or furniture. These paints are tough and easy to clean. Satin or semi-gloss finishes work well because they shine but do not show dirt easily.
Acrylic latex paints dry fast and have less smell. Oil-based paints are strong but take longer to dry and need special cleaners.
Picking Colors
Pick colors that match your room’s style and lighting. Light colors make the room feel bigger. Dark colors add drama and depth.
- Choose neutral colors for a classic look
- Use bold colors for a modern feel
- Test paint samples on a small cabinet area first
- Consider the cabinet’s wood tone when picking colors
Gathering Tools
| Tool | Use |
| Paintbrush | For edges and corners |
| Foam Roller | For smooth, flat surfaces |
| Sandpaper | To smooth surfaces before painting |
| Painter’s Tape | To protect areas you don’t want painted |
| Drop Cloth | To keep floors clean |
| Paint Tray | To hold and spread paint evenly |
Priming The Cabinets
Priming built-in cabinets is an important step before painting. It helps paint stick better and lasts longer.
Good priming also hides stains and old colors. It creates a smooth surface for painting.
Applying Primer
Use a high-quality primer made for wood or laminate. Stir the primer well before use. Apply with a brush or roller.
Cover all cabinet surfaces evenly. Avoid thick layers to prevent drips. Thin coats dry faster and look smoother.
- Start with cabinet doors and drawers
- Use a brush for corners and edges
- Use a roller for flat surfaces
- Check for missed spots and cover them
Drying Time Tips
Let the primer dry fully before painting. Drying time depends on temperature and humidity. Follow the primer label instructions.
Wait at least two to four hours. Avoid touching the primer while drying. Good drying prevents peeling and uneven paint.
- Keep the room well-ventilated
- Keep temperature between 50°F and 85°F (10°C - 29°C)
- Avoid high humidity during drying
- Use a fan to speed drying if needed
Sanding Between Coats
Sanding after the primer dries smooths the surface. It helps the next coat stick better. Use fine-grit sandpaper (220 grit).
Sand lightly and evenly. Remove dust with a tack cloth or damp rag before applying paint or another primer coat.
- Sanding prevents bumps and rough spots
- Clean dust to avoid paint defects
- Repeat sanding if applying multiple primer coats
- Wear a mask to avoid inhaling dust
Painting Techniques
Painting built-in cabinets in your living room can change the whole look. Using the right painting techniques helps you get a smooth and even finish.
This guide explains brushing and spraying, how to apply even coats, and ways to avoid drips and streaks.
Brushing Vs. Spraying
Brushing uses a paintbrush to apply paint directly on the surface. It is easy to control and good for small details.
Spraying uses a spray gun to cover large areas quickly. It gives a smooth finish but needs more preparation to protect nearby areas.
- Brushing works well for corners and edges
- Spraying covers flat surfaces fast
- Brushing may leave brush marks if not careful
- Spraying can create a very even coat
- Spraying needs good ventilation and masking
Applying Even Coats
Apply thin and even coats of paint to avoid lumps. Thick coats take longer to dry and can drip.
Let each coat dry fully before adding the next. This helps you get a smooth and lasting finish.
- Use long, smooth strokes with a brush
- Keep the spray gun moving steadily
- Start and end each stroke off the cabinet edge
- Apply two or more thin coats instead of one thick coat
- Check the surface under good light after each coat
Avoiding Drips And Streaks
Drips and streaks happen if paint is too thick or applied unevenly. Use the right tools and technique to stop this.
Work patiently and watch your paint to catch drips early. Fix them before they dry.
- Do not overload your brush or spray gun
- Keep a wet edge while painting to blend strokes
- Lightly sand between coats to smooth any rough spots
- Hold the brush or sprayer at a consistent angle
- Use quality brushes or sprayers for better control
Finishing Touches
Painting built-in cabinets makes a big difference in your living room. Finishing touches help protect your work and improve the look.
These last steps make sure your cabinets stay beautiful for a long time. Take your time with each part.
Reattaching Hardware
Wait for the paint to fully dry before putting hardware back. This prevents smudging or damage to the paint.
Check each handle and knob for dirt or rust. Clean or replace them if needed for a fresh look.
- Use the original screws to avoid damage
- Tighten screws carefully to prevent stripping
- Align handles evenly for a neat appearance
Adding Protective Coats
Apply a clear protective coat to shield paint from scratches and stains. Choose a finish that matches your cabinet style.
Use a brush or spray for smooth coverage. Let each coat dry completely before adding another.
- Use water-based polyurethane for easy cleanup
- Matte finish keeps a soft look
- Satin or gloss adds shine and durability
Cleaning Up
Clean your workspace and tools right after finishing. This keeps brushes and rollers in good condition.
Remove painter’s tape carefully to avoid peeling paint. Dispose of waste paint and materials properly.
- Wash brushes with warm, soapy water
- Store leftover paint in sealed containers
- Wipe down cabinets to remove dust or fingerprints

Credit: drginteriorsblog.com
Maintaining Painted Cabinets
Painting your living room cabinets can brighten your space. Keeping them beautiful needs some care. With simple steps, you can maintain your painted cabinets easily.
Regular cleaning and touch-ups will help your cabinets last longer. Let's explore some tips to keep them looking fresh and new.
Cleaning Tips
Dust and dirt can dull your painted cabinets. Cleaning is simple and keeps them looking vibrant. Use gentle methods to protect the paint.
- Use a soft cloth for dusting weekly.
- Mix mild soap with water for gentle cleaning.
- Avoid harsh chemicals that can damage paint.
Touch-up Advice
Over time, small chips or scratches may appear. Quick touch-ups will keep your cabinets looking perfect. You don’t need to repaint the whole cabinet.
- Keep leftover paint for touch-ups.
- Use a small brush for precise application.
- Allow the paint to dry completely after touch-up.

Credit: angelamariemade.com
Frequently Asked Questions
How Do I Prepare Built-in Cabinets For Painting?
Start by cleaning the cabinets thoroughly with mild soap and water. Remove hardware and sand surfaces to create a smooth base. Fill any holes or cracks with wood filler. Finally, wipe off dust with a damp cloth before applying primer.
What Type Of Paint Is Best For Cabinets?
Use high-quality acrylic latex or enamel paint for durability and a smooth finish. Semi-gloss or satin finishes are ideal as they resist moisture and are easy to clean. Avoid flat or matte finishes, which can show dirt and wear quickly.
Should I Use A Primer Before Painting Cabinets?
Yes, priming is essential for good paint adhesion and longevity. Primer seals the wood, hides stains, and provides a uniform surface. It prevents peeling and helps the paint color appear vibrant and consistent. Choose a primer suited for your cabinet material.
How Many Coats Of Paint Do Cabinets Need?
Typically, two to three coats ensure even coverage and durability. Allow each coat to dry fully before applying the next. Multiple coats help avoid streaks and enhance the cabinet’s finish. Sand lightly between coats for a smooth result.
Conclusion
Painting built-in cabinets can change your living room’s look fast. Choose the right paint and tools to make the job easier. Take your time with each step for a smooth finish. Clean surfaces and proper drying help your paint last longer.
Enjoy your fresh, bright cabinets that bring new life to the space. Small efforts make a big difference in home style. Start your project with confidence and see the results yourself.