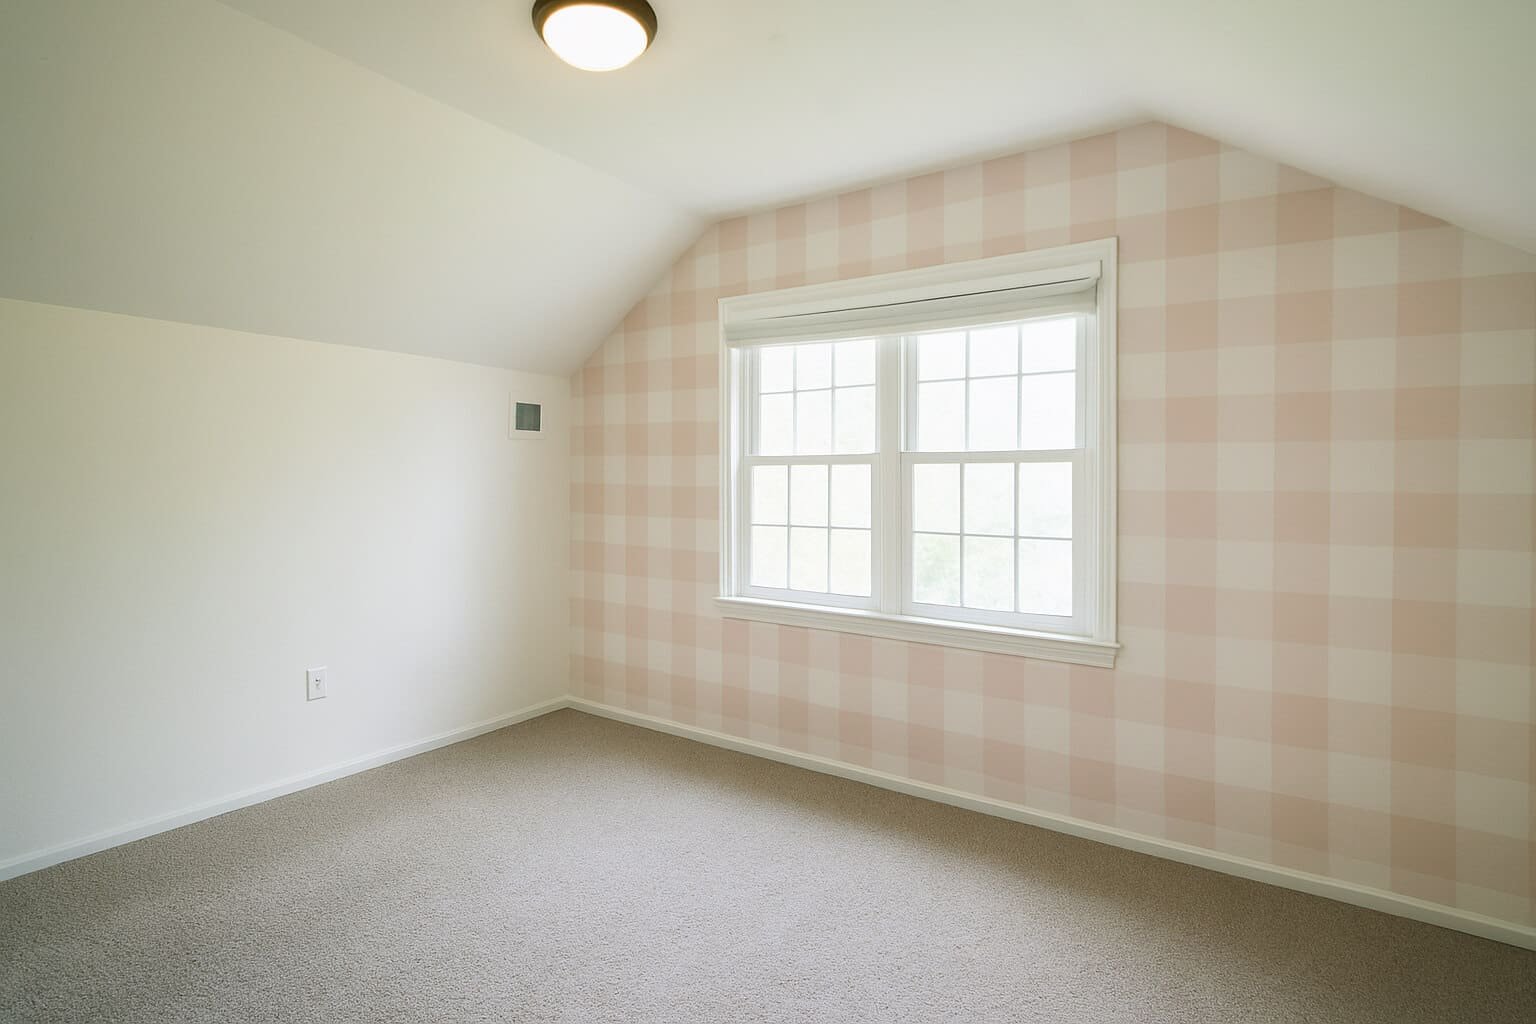
Are you ready to transform your space with a bold, eye-catching design? Painting a checkerboard wall is easier than you think—and it can add a unique touch to any room.
Whether you want to create a playful vibe in your kitchen or add a modern twist to your living room, this step-by-step guide will help you achieve a perfect checkerboard pattern. You’ll learn simple tricks to make your wall look professional, save time, and avoid common mistakes.
Keep reading, and soon your wall will be the stunning focal point you’ve been dreaming of!
Choosing The Right Wall
Picking the right wall is key to a good checkerboard paint job. The wall’s condition and location affect the final look.
Some walls work better than others. Knowing what to look for helps you get the best results.
Smooth And Even Surfaces
Smooth walls are easier to paint with clean lines. Rough or bumpy walls can make the pattern look uneven.
Good Lighting
Choose a wall with enough light. Good lighting shows off the checkerboard pattern well.
- Avoid walls in dark corners
- Natural light helps colors look true
- Use extra lighting if needed
Wall Size And Shape
Large walls give more space for the pattern. Odd shapes may make the design harder to plan.
| Wall Type | Best For Checkerboard | Notes |
| Flat Wall | Yes | Easy to paint, clear pattern |
| Textured Wall | No | Pattern may look uneven |
| Corner Wall | Maybe | Needs careful measuring |
| Small Wall | No | Pattern can look crowded |
Surface Material
Paint sticks better to some materials. Drywall and plaster work well. Avoid glossy or oily surfaces.
Tip:Test a small spot first to see if the paint adheres well.
Gathering Materials
Painting a checkerboard wall needs some special tools. You must have all materials ready before starting.
This helps the work go smoothly and gives a neat result.
Painter’s Tape
Painter’s tape helps create clean, sharp lines between squares. It prevents paint from bleeding.
Choose tape that sticks well but removes easily without damaging the wall.
Paints
You need two contrasting paint colors for the checkerboard pattern. Pick colors that look good together.
- Use wall paint suitable for your room’s surface
- Buy enough paint for full coverage
- Matte or satin finishes work best for walls
Paint Brushes And Rollers
Use brushes for edges and corners. Rollers help cover large areas quickly.
- Small angled brush for clean edges
- Medium roller for filling squares
- Tray to hold paint while working
Measuring Tools
Measuring tools make sure your squares are even and straight. Accuracy is key for checkerboards.
- Tape measure for wall dimensions
- Level to keep lines straight
- Pencil to mark guidelines
Drop Cloths And Cleaning Supplies
Protect floors and furniture with drop cloths. Keep cleaning supplies handy for quick messes.
- Plastic or fabric drop cloths
- Rags or paper towels
- Water or paint thinner for cleaning brushes
Preparing The Surface
Painting a checkerboard wall starts with a clean and smooth surface. Proper preparation helps the paint stick better. It also makes the design look sharp and clear.
Follow these steps to prepare your wall before painting the checkerboard pattern.
Cleaning The Wall
Remove dust, dirt, and grease from the wall. A clean wall lets the primer and paint bond well. Use a mild soap solution and a sponge to wash the surface gently. Rinse with clean water and let it dry completely.
- Use mild soap and warm water
- Wipe the wall with a soft sponge
- Rinse with clean water
- Allow the wall to dry fully
Repairing Imperfections
Check the wall for holes, cracks, or bumps. Fix these flaws before painting. Use spackling paste or wall filler to fill holes and cracks. Smooth the surface with sandpaper once the filler dries. This creates an even base for painting.
| Imperfection | Fixing Material | Tools Needed |
|---|---|---|
| Small holes | Spackling paste | Putty knife, sandpaper |
| Cracks | Wall filler | Putty knife, sandpaper |
| Bumps | Sandpaper | Sandpaper block |
Priming The Surface
Apply a primer coat to the wall. Primer seals the surface and improves paint adhesion. Use a roller or brush to spread the primer evenly. Let it dry according to the product instructions before painting.
- Choose a primer suitable for your wall type
- Use a roller for large areas
- Use a brush for edges and corners
- Wait for the primer to dry completely
Planning The Checkerboard Design
Painting a checkerboard wall needs careful planning. It helps you get even squares and straight lines.
Start by measuring your wall, marking the grid lines, and choosing the right square size.
Measuring The Wall
Measure the height and width of the wall. Use a tape measure for accuracy.
Write down the numbers. These will help you decide how many squares to paint.
Marking Grid Lines
Use a pencil and a level to draw straight lines on the wall. These lines form the grid.
Draw vertical and horizontal lines where each square will be. This makes painting easier.
- Start from one corner of the wall
- Mark lines at equal distances
- Check lines with a level tool
- Use light pencil marks for easy removal
Choosing Square Size
Pick a square size that fits your wall space and looks balanced.
Smaller squares create a detailed look. Bigger squares are bold and simple.
- Divide wall width by desired number of squares
- Check if square size fits well with wall height
- Adjust size for a neat checkerboard pattern
Taping The Squares
Taping the squares is a key step to paint a clean checkerboard wall. Use painter’s tape carefully to get sharp edges. Take your time to place the tape on the wall.
Good taping prevents paint from bleeding under the edges. This helps the checkerboard pattern look neat and professional.
Applying Painter’s Tape
Start by measuring and marking the squares lightly with a pencil. Then apply painter’s tape along the pencil lines. Press the tape down firmly to stick it well.
- Use a tape measure to mark each square evenly.
- Apply tape slowly and straight along the marks.
- Press the tape edges with a putty knife or fingernail to seal it.
- Make sure tape edges are smooth without wrinkles.
- Double-check your tape lines before painting.
Ensuring Straight Lines
Straight lines are important for a perfect checkerboard look. Use these tips to keep your lines straight and even.
| Tip | How to Do It |
| Use a level | Check tape lines with a level to keep them horizontal or vertical. |
| Work in sections | Tape one row of squares at a time to avoid mistakes. |
| Keep tape tight | Pull tape gently to prevent sagging or curves. |
| Check corners | Align tape edges exactly at the square corners. |
| Mark reference points | Use pencil marks to guide tape placement for even spacing. |
Painting The First Color
Painting a checkerboard wall starts with applying the first color. This step sets the base for your design.
Make sure to prepare the wall and gather all necessary supplies before you start painting.
Selecting Paint Type
Choosing the right paint is important for a smooth finish. Use interior wall paint for durability.
Choose a semi-gloss or satin finish for easy cleaning and a polished look.
- Water-based paint is easy to clean
- Oil-based paint offers a glossy finish
- Avoid flat paint for a checkerboard design
Applying Even Coats
Applying even coats ensures a uniform color. Use a roller for large areas and a brush for edges.
Don't overload the roller with paint. This helps avoid drips and uneven spots.
- Roll in a "W" pattern for coverage
- Keep a wet edge to avoid lines
- Apply thin layers for best results
Drying Time Tips
Allow the first color to dry completely before taping and painting the next color.
Check the paint can for recommended drying times. This avoids smudging and keeps lines crisp.
- Use fans to speed up drying
- Avoid painting in humid conditions
- Wait at least 24 hours before taping
Taping And Painting The Second Color
Creating a checkerboard wall requires careful taping and painting. This ensures clean lines and vibrant colors. Let's explore how to apply the second color effectively.
Precision in taping is crucial for achieving a stunning checkerboard pattern. Here’s how you can tackle the process step-by-step.
Removing And Reapplying Tape
Once the first color dries, you need to remove the tape carefully. This prevents the paint from peeling off.
- Gently peel off the tape at an angle.
- Ensure the edges of the painted squares remain intact.
- Reapply new tape on the borders of the squares meant for the second color.
Painting Alternate Squares
Now it's time to paint the squares with the second color. Use a steady hand for even application.
Make sure to use a roller for larger squares and a brush for edges.
Avoiding Paint Bleed
Paint bleed can ruin the crisp lines of your checkerboard pattern. Follow these tips to prevent it.
- Press the tape down firmly to seal the edges.
- Apply thin layers of paint to avoid oversaturation.
- Remove tape before the paint fully dries to prevent pulling.

Credit: crystelmontenegrohome.com
Finishing Touches
Finishing your checkerboard wall takes care and patience. This part makes your wall look neat and complete.
Follow these tips to remove tape, fix edges, and protect your paint for a long-lasting finish.
Removing Tape Carefully
Wait until the paint is dry but not fully cured before removing tape. This stops paint from peeling off.
Pull the tape back slowly at a 45-degree angle. This helps keep clean lines without damage.
- Peel tape while paint feels dry to touch
- Use a sharp blade to score tape edges if needed
- Remove tape gently to avoid pulling paint
Touching Up Edges
Check the edges of each square for paint bleeds or gaps. Small mistakes can be fixed easily.
Use a small brush and matching paint to carefully touch up any uneven lines or spots.
- Use steady hands for clean fixes
- Dab paint lightly for best results
- Let touch-up paint dry fully before moving on
Sealing The Paint
Apply a clear sealant to protect your checkerboard wall. It keeps paint safe from scratches and dirt.
Choose a water-based polyurethane for easy cleanup and low odor. Apply thin coats with a brush or roller.
- Wait for each coat to dry before applying the next
- Apply at least two coats for better protection
- Use a flat or satin finish to keep colors bright
Maintaining Your Checkerboard Wall
A checkerboard wall adds style to any room. Keeping it clean and safe helps it look great for years.
Follow simple steps to keep your wall fresh and avoid damage. This helps protect your hard work.
Cleaning Tips
Clean your checkerboard wall gently to keep the paint from fading. Use soft cloths and mild cleaners.
Avoid harsh scrubbing. Test any cleaner on a small area first to check for color changes.
- Dust the wall regularly with a soft cloth or duster
- Use a mix of warm water and mild soap for stains
- Wipe gently without pressing hard
- Dry the wall with a clean, dry cloth after cleaning
Preventing Damage
Protect your checkerboard wall from scratches and dents. Keep furniture and sharp objects away.
Use wall protectors or bumpers if needed. Avoid leaning items directly on the painted surface.
- Place furniture a few inches from the wall
- Use felt pads under furniture legs
- Fix small chips or scratches with matching paint
- Keep pets’ nails trimmed to avoid scratches

Credit: ashtonsedita.com

Credit: www.reddit.com
Frequently Asked Questions
How Do I Prepare A Wall For Checkerboard Painting?
Start by cleaning and sanding the wall to ensure smoothness. Apply a primer to help paint adhere evenly. Use painter’s tape to mark the grid lines for precise squares.
What Type Of Paint Is Best For Checkerboard Walls?
Use high-quality, washable latex paint for durability and easy cleaning. Choose contrasting colors for a bold checkerboard effect. Matte or satin finishes work best for smooth coverage.
How Do I Create Even Squares On The Wall?
Measure the wall’s dimensions and divide by the number of squares desired. Use a level and pencil to mark straight grid lines. Apply painter’s tape along the lines before painting.
How Long Should I Wait Between Painting Checkerboard Squares?
Allow each color to dry completely, usually 2-4 hours. This prevents smudging and bleeding between squares. Remove tape carefully after paint dries for clean edges.
Conclusion
Painting a checkerboard wall adds fun and style to any room. Start with careful measuring and clean surfaces. Use painter’s tape to keep lines sharp and neat. Take your time with each square to avoid mistakes. Let the paint dry fully between coats.
A checkerboard wall looks great in living rooms, kitchens, or kids’ rooms. You can change colors anytime for a fresh look. This simple project brings a bold touch without much cost. Give your space a unique feel with this easy paint idea.