Are you looking to brighten up your space with a cool, energy-saving light that you made yourself? Making an LED lamp at home is easier than you think.
Not only will you save money, but you’ll also enjoy the satisfaction of creating something useful with your own hands. In this guide, you’ll discover simple steps and tips to build a stylish LED lamp that fits your style and needs.
Ready to light up your room and impress your friends? Let’s get started!
Materials Needed
Making an LED lamp at home requires a few simple parts. These parts help the lamp work safely and brightly.
Below are the main materials to prepare before starting your project.
Led Types
Choose the right LED for your lamp. Different LEDs give different light colors and brightness.
- Standard 5mm LED - easy to use and common
- High-power LED - very bright, needs more cooling
- RGB LED - changes colors with control
- Strip LED - flexible and long, good for decorative lamps
Power Sources
Your LED lamp needs power to work. Pick a power source that fits your lamp size and use.
| Power Source | Description | Voltage |
| Battery | Portable and easy to use | 1.5V to 9V |
| USB Power | Common for small lamps, plugs into computers | 5V |
| AC Adapter | Good for lamps that stay in one place | 12V or more |
Supporting Components
Besides LEDs and power, you need other parts to make your lamp safe and work well.
- Resistors - control the current to protect LEDs
- Switch - to turn the lamp on and off
- Wires - connect all parts together
- Soldering kit - join wires and parts firmly
- Enclosure or case - hold the lamp parts safely

Credit: www.youtube.com
Tools Required
Making a LED lamp at home needs some basic tools. These tools help you assemble parts safely and correctly.
Below are the essential tool groups you will need for this project. Each group has specific items to prepare.
Soldering Equipment
Soldering is important to join wires and LED components. You need the right tools for good connections.
- Soldering iron with a fine tip
- Solder wire (rosin-core recommended)
- Soldering iron stand
- Desoldering pump or wick
- Helping hands tool or clamp
- Small wire cutters for trimming
Cutting And Measuring Tools
Accurate cutting and measuring make your lamp parts fit well. Use precise tools to avoid mistakes.
| Tool | Use |
| Wire stripper | Remove insulation from wires |
| Ruler or measuring tape | Measure lengths and distances |
| Utility knife or craft knife | Cut plastic or thin materials |
| Small saw or scissors | Trim larger parts or boards |
Safety Gear
Safety gear protects you from burns, cuts, and fumes. Always wear safety tools while working.
- Safety glasses to protect your eyes
- Heat-resistant gloves for soldering
- Face mask to avoid inhaling fumes
- Well-ventilated workspace
Basic Led Circuit
Making an LED lamp at home is easy and fun. You need a simple circuit to power the LED.
This guide shows how to build a basic LED circuit. It explains the parts and how to connect them.
Circuit Diagram
A circuit diagram is a drawing that shows all parts and their connections. It helps you build the LED lamp correctly.
The basic circuit has a power source, resistor, LED, and wires. The power source gives energy to the LED.

Connecting Leds
LEDs have two legs: a longer positive leg called the anode and a shorter negative leg called the cathode. Connect these correctly.
Attach the anode to the resistor, and the cathode to the negative terminal of the power source. This allows current to flow properly.
- Identify the longer leg (anode) and shorter leg (cathode)
- Connect anode to the resistor's one end
- Connect the resistor's other end to the positive power terminal
- Connect cathode directly to the negative power terminal
Using Resistors
Resistors protect LEDs by controlling the electric current. Without a resistor, the LED can burn out.
Choose a resistor with the right value to match your LED and power source. This keeps the LED safe and bright.
- Calculate resistor value using Ohm's law: R = (V_source - V_LED) / I_LED
- Use a resistor between 220 and 470 ohms for a 5V power supply
- Higher resistance means less current, dimmer light
- Lower resistance means more current, brighter light but risk of damage
Step-by-step Assembly
Making a LED lamp at home is fun and easy. You only need a few parts and tools.
This guide will help you build your lamp with simple steps. Follow carefully for best results.
Preparing Components
Gather all parts before starting. Check each piece to make sure it works well.
You will need LEDs, resistors, a battery, wires, a switch, and a base to hold parts.
- LED bulbs (choose color and size)
- Resistors (to control current)
- Battery (power source)
- Wires (for connections)
- Switch (to turn lamp on/off)
- Base or holder (to fix parts in place)
Soldering Connections
Use a soldering iron to join wires and parts firmly. Heat the joint and add solder carefully.
Connect the LED leads to the resistor first. Then attach wires from the resistor to the battery and switch.
- Heat the wire and LED lead together
- Apply solder to the heated joint
- Connect resistor to LED positive lead
- Link resistor to switch and battery
- Let all solder joints cool down
Testing The Circuit
After soldering, test your circuit to see if the LED lights up. Turn the switch on.
If the LED does not light, check all connections. Make sure the battery is good and parts are correctly placed.
- Turn on the switch
- Look for LED light
- If no light, check solder joints
- Confirm battery power
- Fix loose or wrong connections
Lamp Housing Options
Building an LED lamp at home means picking the right housing. The housing holds the lamp parts safely. It also affects the lamp's look and light direction.
You can create your lamp housing in many ways. Some use simple DIY ideas. Others recycle old things. You can also try new design styles for your lamp.
Diy Enclosures
DIY enclosures let you build lamp housings with easy materials. You can use wood, plastic, or metal sheets. These materials are simple to cut and shape.
Making your own enclosure means you can choose the size and style. You can add holes for heat or light. You can paint or decorate it too.
- Wood blocks or boxes
- Plastic containers or sheets
- Metal tins or sheets
- Acrylic or Plexiglas panels
Recycling Materials
Using recycled materials saves money and helps the environment. Old jars, bottles, and cans can become lamp housings. These items often have good shapes for lamps.
Check that recycled parts are clean and safe. Avoid materials that can melt or catch fire. Recycled housings can give your lamp a unique look.
- Glass jars and bottles
- Metal cans and tins
- Plastic containers
- Old lamps or light fixtures
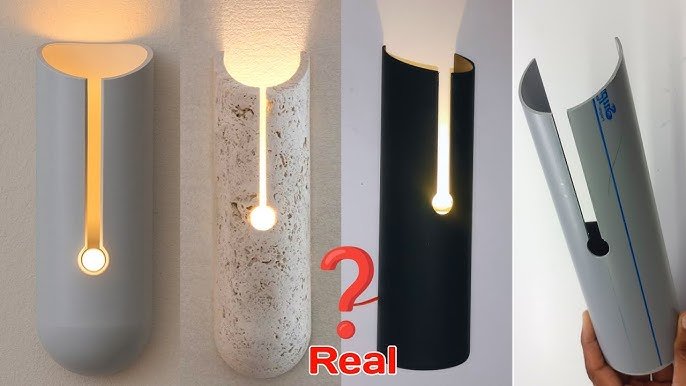
Design Ideas
Design matters for both function and style. You can make your lamp modern, rustic, or colorful. Think about how the light shines and where you place the lamp.
Try mixing materials or shapes. Add patterns or textures. Design your housing to match your room or your taste.
- Use geometric shapes for a modern look
- Wrap housing with fabric for soft light
- Paint bright colors for fun lamps
- Add perforations for light patterns

Credit: www.youtube.com
Powering The Lamp
When making a LED lamp at home, choosing the right power source is important. You can use batteries, USB power, or solar panels.
Each power option has its benefits and limitations. Understanding these will help you decide the best choice for your lamp.
Battery Choices
Batteries are easy to use and portable. They are a popular choice for homemade LED lamps. Choose from AA, AAA, or rechargeable batteries.
Rechargeable batteries are better for the environment. They save money in the long run, though they may cost more upfront.
- AA and AAA are common and easy to find
- Rechargeable batteries can be used many times
- Check battery voltage matches LED requirements
Using Usb Power
USB power is a modern and convenient option. It allows you to connect your lamp to a computer or wall adapter.
USB power is stable and reliable. It is great for desk lamps or areas with USB outlets available.
- USB cables are widely available
- Easy to connect to existing devices
- Ensure USB power matches LED voltage
Solar Power Integration
Solar power is eco-friendly and renewable. It uses sunlight to power your LED lamp. This is a good choice for outdoor lamps.
Solar panels store energy during the day. This energy powers the lamp at night, reducing electricity usage.
| Benefits | Considerations |
| Reduces electricity bills | Requires sunlight for charging |
| Environmentally friendly | Initial setup can be expensive |
Safety Tips
Making an LED lamp at home can be fun and educational. Safety is important to prevent accidents.
This guide will cover handling electronics, preventing overheating, and ensuring proper insulation.
Handling Electronics
Handling electronics carefully is crucial. It prevents damage and ensures safety.
- Always disconnect power before working on electronics.
- Use insulated tools to avoid electric shocks.
- Keep your workspace dry and clean.
Preventing Overheating
LED lamps can overheat if not properly managed. Overheating can damage components.
Custom Tip: Use a heat sink to dissipate excess heat. This will help your LED lamp last longer.
Proper Insulation
Proper insulation keeps your LED lamp safe. It prevents short circuits and other hazards.
| Material | Usage |
| Electrical Tape | Wrapping exposed wires |
| Heat Shrink Tubing | Securing wire connections |
| Wire Nuts | Connecting wires safely |
Troubleshooting
Making an LED lamp at home can be fun and useful. Sometimes, things do not work right. Troubleshooting helps fix common problems.
This guide covers common issues, connection problems, and ways to improve brightness. Follow these tips to get your lamp working well.
Common Issues
Some common problems include the lamp not turning on, flickering lights, or dim glow. These usually come from wiring or power supply errors.
- Loose or wrong wiring connections
- Dead or weak power source
- Burnt-out LED bulbs
- Incorrect resistor values
- Poor soldering joints
Fixing Connection Problems
Check all wires and joints to make sure they are tight and correct. Use a multimeter to test if electricity flows properly.
| Problem | Cause | Fix |
| Lamp does not turn on | Power supply off or loose wire | Turn on power and secure wires |
| Flickering light | Loose connection or bad solder | Resolder joints and tighten wires |
| LED not lighting | Wrong polarity or burnt LED | Reverse LED or replace it |
Improving Brightness
If your lamp is too dim, check the resistor size and power source voltage. Use a lower resistor value for more brightness but stay within LED limits.
- Use resistors with lower resistance but safe wattage.
- Check the power supply voltage matches LED needs.
- Clean LED surface for better light output.
- Use multiple LEDs in parallel for more light.
Creative Variations
Making an LED lamp at home can be fun and simple. You can add creative touches to make your lamp unique.
Try different ideas to change colors, control the lamp smartly, or add cool effects. These variations make your lamp special.
Color Changing Leds
Use LEDs that change colors to make your lamp lively. These LEDs can switch between red, green, blue, and other colors.
You can control the colors with a small remote or a simple circuit. This adds fun and style to your lamp.
- Choose RGB LEDs for many colors
- Use a controller for easy color change
- Mix colors to create new shades
Smart Controls
Add smart controls to turn your LED lamp on or off using a phone or voice. This makes your lamp easy to use.
You can use Wi-Fi or Bluetooth modules to connect the lamp to your smart devices. Set timers or dim the light remotely.
- Use a microcontroller like Arduino or ESP32
- Connect the lamp to a smartphone app
- Include voice control with assistants
Decorative Effects
Make your LED lamp stand out by adding decorative effects. Use shapes, covers, or patterns to change how the light looks.
Try using frosted glass, colorful plastics, or paper lampshades. You can also add blinking or fading effects with simple circuits.
- Use frosted glass for soft light
- Create patterns with cut-out covers
- Program blinking or fading effects

Credit: www.youtube.com
Frequently Asked Questions
What Materials Are Needed To Make An Led Lamp At Home?
To make an LED lamp, you need LEDs, resistors, a power source, wires, a switch, and a lamp holder. These materials are affordable and easy to find at electronics stores or online.
How Do I Connect Leds Safely In A Homemade Lamp?
Connect LEDs in series or parallel using resistors to control current. Ensure proper polarity and secure connections to prevent short circuits and damage.
Can I Use Batteries As A Power Source For Led Lamps?
Yes, batteries are a common power source for LED lamps. Use the right voltage and type, like AA or rechargeable batteries, for optimal performance.
How Long Does A Homemade Led Lamp Typically Last?
A homemade LED lamp can last 10,000 to 50,000 hours, depending on LED quality and usage. Proper assembly and ventilation extend its lifespan.
Conclusion
Making an LED lamp at home is simple and fun. You only need a few materials and some basic steps. This project saves money and helps you learn about electronics. You can customize your lamp to fit your style and space.
Try different colors and designs to make it unique. Enjoy the bright light and the pride of creating something yourself. Start your DIY LED lamp today and see how easy it can be. Small efforts bring great results. Why wait?
Give it a try!