

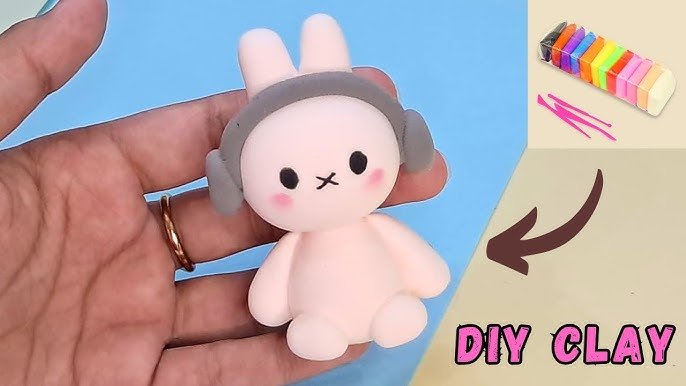
Have you ever wanted to create something fun and unique with your own hands? Making clay toys at home is easier than you think, and it’s a great way to bring your imagination to life.
Whether you want to entertain your kids, decorate your space, or simply enjoy a relaxing craft, this simple guide will show you exactly how to do it step by step. Ready to turn ordinary clay into your next favorite toy?
Keep reading, and you’ll discover tips and tricks that make the whole process fun and stress-free.
Choosing The Right Clay
Making clay toys at home is fun and creative. Choosing the right clay helps your toys last longer and look better.
Different clays have different qualities. Knowing these will make your work easier and safer.
Types Of Clay For Toys
You can use many kinds of clay for making toys. Each type has its own features.
- Air-Dry Clay:Dries without baking. Easy to use and safe for kids.
- Polymer Clay:Hardens in a home oven. It is strong and colorful.
- Natural Clay:Needs firing in a kiln. It is traditional and durable.
- Salt Dough Clay:Made from common kitchen ingredients. Good for simple crafts.
Where To Buy Clay
You can find clay in many places. Some sources are better for beginners and kids.
| Place | Type of Clay | Notes |
|---|---|---|
| Craft Stores | Air-Dry, Polymer | Wide selection, easy to find |
| Online Shops | All types | More variety, delivered at home |
| Art Supply Stores | Natural, Polymer | Good quality, more options |
| Supermarkets | Salt Dough (DIY) | Ingredients for homemade clay |
Safety Considerations
Safety is important when making clay toys. Some clays have chemicals or need heat to harden.
- Check labels for non-toxic clay.
- Keep clay away from small children if it contains harmful ingredients.
- Use an oven only with adult supervision.
- Wash hands after working with clay.
- Work in a well-ventilated area if using polymer clay.
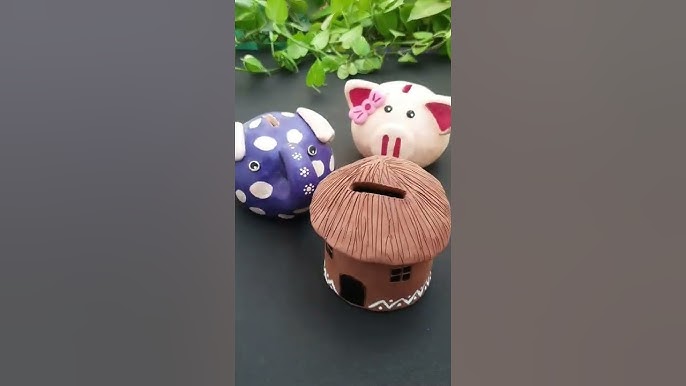
Preparing Your Workspace
Making clay toys at home is fun and creative. A good workspace helps you work better and keep things tidy.
Before you start, prepare your area so you have all tools and materials close. This also protects your furniture and floors.
Essential Tools And Materials
You need some basic tools and materials to make clay toys. Getting these ready will save time and help your work flow smoothly.
- Clay suitable for modeling, such as air-dry or polymer clay
- Sculpting tools like plastic knives, shaping sticks, and rolling pins
- Water and small containers for smoothing clay
- Paints and brushes for decorating finished toys
- Paper towels or cloth for cleaning hands and tools
- A sturdy surface like a wooden board or craft mat
Setting Up A Clean Area
Choose a spot in your home that is quiet and free of clutter. This helps you focus and keeps your materials safe.
Clear the table or desk where you will work. Make sure it is well lit and has enough space for your tools and clay pieces.
| Tip | Why it Helps |
| Use a small trash bin nearby | Keeps scraps and waste tidy |
| Keep a damp cloth close | Quickly cleans clay from hands and tools |
| Have good lighting | Helps see details while shaping toys |
Protecting Surfaces
Clay can stick and stain tables. Protect surfaces with easy-to-clean coverings before you start working.
Here are some good surface protectors:
- Plastic tablecloths or shower curtains
- Silicone baking mats
- Old newspapers or craft paper
- Cutting boards or craft mats
Basic Clay Techniques
Making clay toys at home is fun and creative. Using simple techniques helps shape your ideas into toys.
Understanding basic clay skills makes your toys look better and last longer. Practice these steps to improve.
Shaping And Molding
Start by shaping the clay with your hands. You can roll, pinch, or press it to form basic shapes.
Use simple tools like toothpicks or plastic knives to help mold the clay into detailed parts.
- Roll clay into balls or snakes
- Pinch clay to create curves
- Press clay flat for bases
- Use tools to cut or carve shapes
Smoothing And Joining
Smooth the clay surfaces by rubbing gently with fingers or a damp sponge. This removes cracks and rough spots.
Join two clay pieces by pressing them together and blending the edges with a small amount of water or clay slip.
- Use water to soften clay edges
- Blend joins with finger or tool
- Check for gaps and smooth them out
- Keep joints strong for durability
Adding Texture And Details
Add texture to your toys by pressing objects like leaves, fabric, or stamps into the clay surface.
Create small details using tools such as toothpicks, needles, or modeling sticks for eyes, lines, and patterns.
- Use natural objects for interesting textures
- Draw fine lines with sharp tools
- Make patterns by repeating shapes
- Keep details clear but simple

Creating Simple Toy Designs
Making clay toys at home is fun and easy. You can create many simple designs with just your hands.
Simple toy designs help you practice shaping and creativity. They are perfect for beginners and kids.
Animal Figures
Animal figures are popular clay toys. Start with basic shapes like circles and ovals for the body.
Add small details like ears, eyes, and tails using tiny pieces of clay. Use simple colors to make them look nice.
- Use a ball shape for the head
- Roll small cylinders for legs
- Pinch clay to form ears and tails
- Press dots for eyes
Miniature Food Items
Miniature food items are cute and easy to make. Use flat shapes for items like cookies and bread.
For round foods like fruits, roll small balls of clay. Add simple textures with a toothpick or small tool.
- Flatten clay for pancakes or cookies
- Shape balls for fruits like apples
- Create small slices for bread or pizza
- Use tools to add lines or dots
Fun Characters
Fun characters let you use your imagination. Start with a simple body shape like a cylinder or oval.
Add facial features and accessories with small clay pieces. Keep designs simple to avoid frustration.
- Make the head a round ball
- Use small pieces for eyes and mouth
- Add hats or hair with flat pieces
- Use bright colors for fun effects
Drying And Curing Clay Toys
Making clay toys at home is fun and creative. Drying and curing the toys correctly makes them strong and long-lasting.
There are different ways to dry and cure clay toys. Choosing the right way depends on the clay type and your tools.
Air-dry Methods
Air-dry clay hardens without heat. You just leave the toy in a dry place. It can take a few days to dry fully.
Make sure to turn the toy often. This helps all sides dry evenly and prevents soft spots.
- Place the toy on wax paper or a clean surface
- Keep it away from direct sunlight
- Turn the toy gently every day
- Wait 24 to 72 hours depending on size
Baking Clay Toys
Some clays need baking to cure. Use an oven to heat the toy at the right temperature. This makes the clay hard and durable.
Follow the clay package instructions for baking time and temperature. Use a baking tray and place the toy on parchment paper.
- Preheat oven to the recommended temperature
- Put the toy on a baking tray lined with parchment
- Bake for the time suggested on the clay package
- Let the toy cool completely before handling
Avoiding Cracks And Breakage
Cracks happen if clay dries too fast or unevenly. Handle toys gently to avoid breaking before they harden.
Keep the clay moist while shaping. Dry the toy slowly and evenly. Use small pieces to reduce cracking risks.
- Cover clay with a damp cloth if resting before drying
- Dry toys in a cool, dry place with good air flow
- Use thin layers of clay to prevent cracking
- Fix small cracks by smoothing with water before drying
Painting And Decorating
Painting and decorating clay toys make them unique. You can use different colors and patterns to bring them to life.
This guide will help you choose the right paints and add beautiful details to your clay toys.
Choosing Paints And Brushes
Pick paints that are safe and vibrant. Acrylic paints are a popular choice for clay toys. They dry quickly and are easy to use.
- Use small brushes for detailed work.
- Flat brushes help cover large areas.
- Keep a cup of water to clean brushes.
Adding Color And Patterns
Start with a base color for your clay toy. Once dry, you can add patterns like stripes or dots.
Mix colors on a palette to create new shades. This can add depth to your designs.
Sealing And Finishing Touches
After painting, sealing your toy will protect the colors. Use a clear varnish to add a shiny finish.
| Sealer Type | Finish |
| Acrylic Sealer | Glossy |
| Mod Podge | Matte |
| Spray Varnish | Glossy |
Tips For Safe Play And Storage
Making clay toys at home can be fun and creative. It's important to ensure they are safe to play with and store properly.
Here are some tips to keep your homemade clay toys safe and long-lasting.
Ensuring Durability
Durable toys last longer and provide more fun. You need to use the right type of clay and proper techniques.
- Choose air-dry clay for easy use and safety.
- Seal the toys with a non-toxic varnish after drying.
- Make sure to let them dry completely before playing.
Safe Handling For Kids
Kids enjoy playing with clay toys, but safety is key. Make sure they handle toys safely to prevent accidents.
- Supervise young children during playtime.
- Teach kids to play gently with the toys.
- Ensure toys are free of sharp edges.
Storing Clay Toys Properly
Proper storage keeps clay toys in good condition. This prevents damage and keeps them clean.
- Store toys in a dry, cool place.
- Use boxes or bins to organize and protect them.
- Avoid stacking heavy items on top of clay toys.

Encouraging Creativity And Learning
Making clay toys at home is a fun way to spark creativity. It helps children learn new skills while playing.
Clay work improves hand-eye coordination and teaches problem-solving. It also encourages imagination and artistic expression.
Making It A Family Activity
Creating clay toys together brings family members closer. Everyone can share ideas and work on projects as a team.
Parents can guide children while letting them explore their own designs. This builds trust and supports learning.
- Set a regular time for clay crafting
- Share tools and materials
- Celebrate each person’s creations
- Encourage storytelling about the toys made
Incorporating Educational Themes
Clay projects can teach many subjects like science and history. Children learn better when they make models related to lessons.
Use clay to create animals, plants, or historical figures. This hands-on learning makes ideas easier to remember.
- Make clay models of the solar system
- Shape animals from different habitats
- Create replicas of famous landmarks
- Build simple machines with clay parts
Exploring Advanced Clay Projects
Older children can try more complex clay toys. These projects improve fine motor skills and patience.
Advanced projects include jointed figures or multi-colored sculptures. These challenge creativity and technical skills.
- Create dolls with movable limbs
- Make layered clay animals
- Design clay puzzles or games
- Try clay painting techniques
Frequently Asked Questions
What Materials Do I Need To Make Clay Toys At Home?
To make clay toys, you need air-dry or oven-bake clay, basic sculpting tools, water, and paint. These materials are affordable and easy to find.
How Long Does It Take To Make Clay Toys?
Making clay toys typically takes 1 to 3 hours, depending on complexity. Drying or baking time varies from several hours to a full day.
Can Children Safely Make Clay Toys At Home?
Yes, children can safely make clay toys with supervision. Use non-toxic, child-friendly clay and simple tools to ensure safety and fun.
How Do I Paint And Finish Homemade Clay Toys?
Use acrylic paints to decorate dried or baked clay toys. Seal with a clear varnish for durability and a polished look.
Conclusion
Making clay toys at home can be fun and simple. It helps you use your creativity and enjoy time with family. You only need a few materials and some patience. Kids and adults both can join in and create unique toys.
Remember to keep the clay soft and shape it gently. Dry the toys properly to make them last longer. This activity teaches skills and brings joy. Try different shapes and colors to keep it exciting. Start today and enjoy the fun of crafting clay toys at home.






