

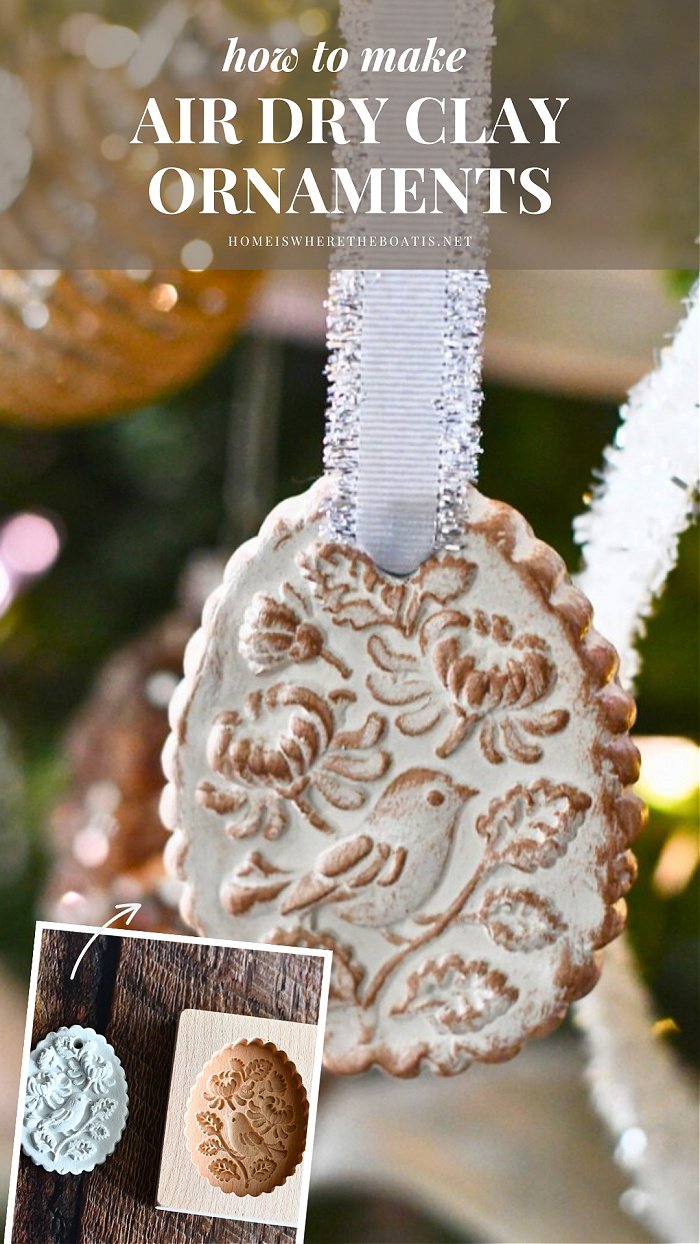
Are you looking for a fun and creative way to add a personal touch to your home or gifts? Making clay ornaments at home is easier than you think, and it lets you bring your unique ideas to life.
Imagine crafting beautiful decorations that reflect your style, all with simple materials you can find right in your kitchen or craft drawer. In this guide, you’ll discover step-by-step instructions that make the process simple and enjoyable. Keep reading, and soon you’ll be creating charming clay ornaments that everyone will admire.
Choosing The Right Clay
Making clay ornaments at home is fun and creative. Choosing the right clay is important for good results.
Different clays have different textures and drying times. Picking the right one helps your ornaments last long.
Types Of Clay For Ornaments
There are many types of clay you can use for ornaments. Each type works best for certain projects.
- Air-Dry Clay:Dries without baking. Easy to shape and paint.
- Polymer Clay:Hardens in the oven. Good for detailed designs.
- Salt Dough:Made from kitchen ingredients. Bakes in the oven and is budget-friendly.
- Ceramic Clay:Needs to be fired in a kiln. Best for advanced crafters.
Where To Buy Clay
You can find clay at many stores. Look for places that sell art or craft supplies.
Buying from a store lets you see the clay’s texture and color. Online shops offer many options too.
- Local craft stores
- Art supply shops
- Online marketplaces
- Some big department stores
Tools Needed
Having the right tools helps you shape and decorate your clay ornaments easily.
- Rolling pin to flatten clay
- Cookie cutters for shapes
- Clay modeling tools for details
- Paints and brushes for decoration
- Glue for attaching parts

Preparing Your Workspace
Making clay ornaments at home is fun and creative. Setting up your workspace helps you work neatly.
A clean and organized area makes the crafting process smooth and enjoyable.
Setting Up A Clean Area
Choose a spot with good light and enough space to work. Make sure the area is free from dust and dirt.
Clear the table or desk so you have room to roll and shape the clay without clutter.
Protecting Surfaces
Clay can stick and stain surfaces. Use a plastic sheet, wax paper, or a silicone mat to cover your workspace.
This cover will keep your table clean and help you remove clay easily after crafting.
- Use a non-stick mat or parchment paper
- Cover a large enough area for your tools
- Secure the cover with tape if needed
Organizing Materials
Gather all your clay, tools, cutters, and decorations before you start. Keep them within reach.
Use small containers or trays to separate different colors and small parts. This helps avoid mix-ups.
- Arrange clay colors in small bowls or plates
- Place tools like cutters and rollers nearby
- Keep water and cleaning cloths close for quick use
Shaping Your Ornaments
Shaping clay ornaments is an important step in making your decorations look great. You can create many styles by using simple tools and techniques at home.
This guide covers basic shaping methods, using molds and cutters, and how to add texture and details to your ornaments.
Basic Shaping Techniques
Start by rolling your clay into a smooth ball or flatten it with a rolling pin. You can shape it by hand or use simple tools like knives or toothpicks.
- Roll clay evenly to avoid cracks
- Use your fingers to pinch and form shapes
- Cut shapes carefully with a small knife
- Smooth edges with a damp sponge
Using Molds And Cutters
Molds and cutters help you create consistent shapes quickly. Press the clay into a mold or press cutters on rolled clay to form designs.
| Tool | Purpose | Tips |
| Silicone Mold | Create detailed shapes | Press clay evenly |
| Cookie Cutter | Cut simple shapes | Use firm pressure |
| Stamp | Add patterns | Press gently to avoid tearing |
Adding Texture And Details
Adding texture makes your ornaments more interesting. Use household items or tools to create patterns and details on the clay surface.
Try these ideas for texture:
- Press lace or fabric to leave a pattern
- Use a toothpick to draw fine lines
- Stamp with leaves or buttons
- Use a fork to make small dots or lines
Drying And Baking Tips
Making clay ornaments at home is fun and creative. Drying and baking are key steps to keep your ornaments strong and lasting.
Understanding the best way to dry or bake your clay helps avoid cracks and breakage. Let’s explore how to do it right.
Air-drying Vs. Oven-baking
Air-drying is the slow process of letting clay harden at room temperature. Oven-baking uses heat to speed up drying and hardening.
Air-drying works well for lightweight clay and small pieces. Oven-baking is better for thicker or larger ornaments that need extra strength.
- Air-drying: no heat, gentle drying, best for soft clays
- Oven-baking: uses heat, faster drying, best for polymer clays
- Choose based on clay type and ornament size
Recommended Drying Times
Drying time depends on the clay type and ornament thickness. Thin ornaments dry faster than thick ones.
Oven-baking time varies by clay brand. Always follow the package instructions for best results.
- Air-dry thin ornaments: 24 to 48 hours
- Air-dry thick ornaments: 3 to 7 days
- Oven-bake polymer clay: 15 to 30 minutes at 265°F–275°F (130°C–135°C)
- Cool ornaments slowly after baking to avoid cracks
Preventing Cracks And Breakage
Cracks happen when clay dries too fast or unevenly. Slow, steady drying helps keep ornaments whole.
Baking at the wrong temperature or too long can cause breakage. Use a thermometer to keep the oven steady.
- Dry ornaments on a flat, smooth surface
- Cover ornaments lightly with plastic to slow drying
- Do not bake above recommended temperatures
- Cool ornaments inside the oven before removing
- Handle ornaments gently after drying or baking
Painting And Decorating
Painting and decorating your clay ornaments make them unique and fun. It adds color and sparkle that bring your designs to life.
You can use simple tools and materials found at home or craft stores. Let your creativity guide you as you add details and shine.
Choosing Paints And Finishes
Pick paints that stick well to clay and dry fast. Acrylic paints are a good choice because they work on many surfaces.
Matte, glossy, or metallic finishes change the look of your ornaments. Test a small spot to see how the paint looks before painting all.
- Acrylic paints dry quickly and are easy to use.
- Metallic paints add a shiny, metal-like effect.
- Glossy finishes make colors brighter and shiny.
- Matte finishes give a soft, smooth look.
Adding Glitter And Embellishments
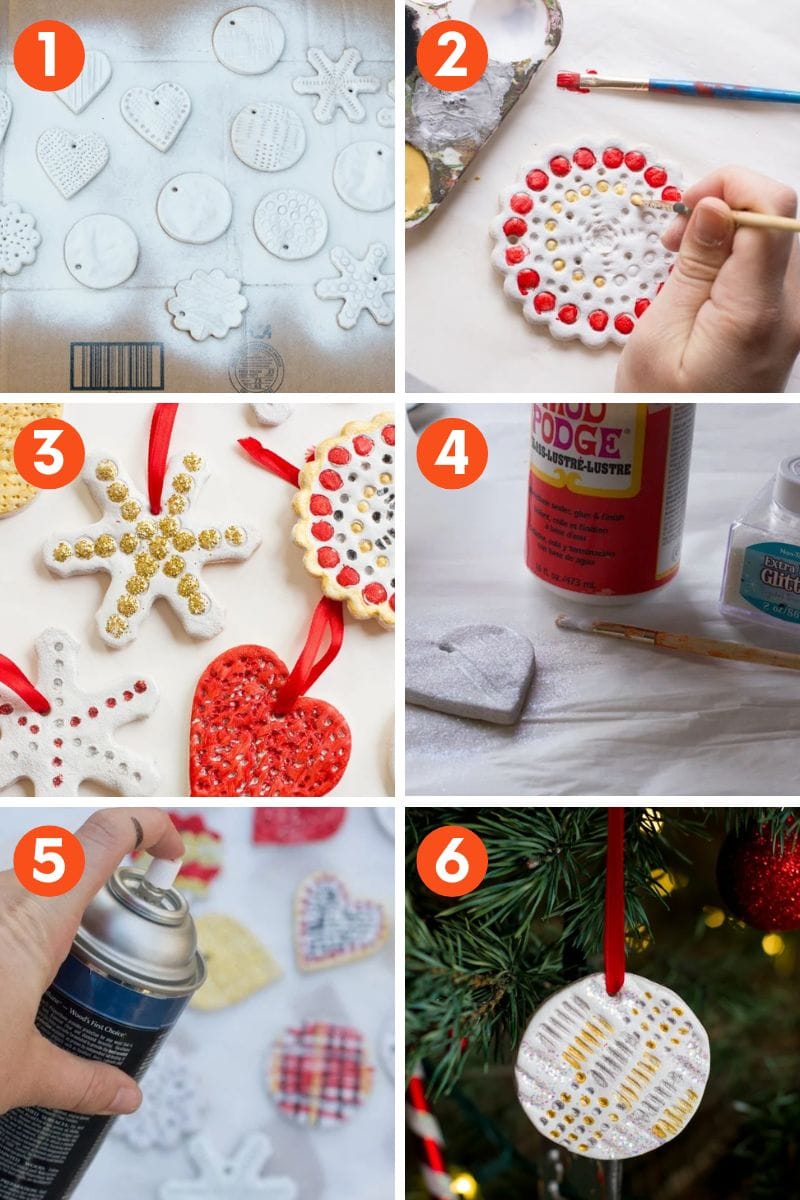
Glitter adds sparkle and fun to your ornaments. Use glue to apply glitter carefully so it does not fall off later.
You can add beads, small buttons, or ribbons for extra decoration. Attach them with strong craft glue or thread for a neat look.
- Use clear-drying glue to hold glitter in place.
- Add beads or sequins for texture and shine.
- Attach ribbons for hanging or decoration.
- Work gently to avoid breaking delicate ornaments.
Sealing Your Ornaments
Sealing protects your paint and decorations from damage. It also helps glitter and embellishments stay put longer.
Choose a clear sealant that matches your finish. Spray sealants are easy to use and give even coverage on all sides.
- Use a clear acrylic spray for a smooth finish.
- Apply thin layers and let each dry fully.
- Seal both sides for full protection.
- Keep ornaments in a dust-free area to dry.
Adding Hangers And Final Touches
Making clay ornaments at home is fun and creative. Adding hangers and final touches make them ready to display.
Follow these steps to attach hooks, personalize your creations, and even gift wrap them beautifully.
Attaching Hooks And Strings
Attaching hooks or strings helps hang your clay ornaments securely. Use these simple tips to do it right.
- Use a small metal hook for secure hanging.
- Thread a string through a pre-made hole in the ornament.
- Ensure the string is knotted tightly to prevent slipping.
Personalizing Your Ornaments
Personalizing ornaments adds a special touch. Paint or engrave them with names or dates for a unique charm.
Consider using acrylic paints for vibrant colors. Add glitter for sparkle. Use a thin brush for detailed designs.
Gift Wrapping Ideas
Gift wrapping makes your ornaments presentable. Choose wrapping that complements your ornament's style.
| Material | Style |
| Brown kraft paper | Rustic |
| Colorful tissue paper | Festive |
| Fabric scraps | Eco-friendly |
Troubleshooting Common Issues
Making clay ornaments at home is fun and creative. Sometimes, issues like cracks or air bubbles can occur. Here are some tips to help you fix these problems and store your ornaments properly.
Fixing Cracks And Breaks
Cracks can appear if the clay dries too fast. To fix small cracks, you can use a little water and gently rub it over the crack until it smooths out. For larger breaks, consider using slip, which is a mixture of clay and water, to bond the pieces together.
- Keep clay moist while working
- Use slip for larger breaks
- Smooth small cracks with water
Dealing With Air Bubbles
Air bubbles can weaken your clay ornaments. Knead your clay thoroughly to remove any trapped air. If you see a bubble while shaping, pop it with a needle and smooth over the area.
Remember to knead the clay for at least 5 minutes to ensure it is bubble-free.
Storage Tips
Proper storage keeps your clay ornaments in good shape. Store them in a cool, dry place. Avoid placing them in direct sunlight or humid areas.
| Storage Place | Condition |
| Cabinet | Dry |
| Shelf | Cool |
| Box | Away from sunlight |

Frequently Asked Questions
What Materials Do I Need To Make Clay Ornaments?
You need air-dry clay, rolling pin, cookie cutters, paint, and string. These basic materials are easy to find and perfect for beginners.
How Long Does It Take For Clay Ornaments To Dry?
Air-dry clay ornaments typically dry within 24 to 48 hours. Drying time depends on thickness and humidity levels in your environment.
Can I Paint Clay Ornaments After Drying?
Yes, you can paint clay ornaments after they dry. Use acrylic paints for vibrant colors and seal with varnish to protect the design.
How Do I Prevent Clay Ornaments From Cracking?
Keep clay thin and even when shaping. Dry ornaments slowly at room temperature to avoid cracks and ensure a smooth finish.
Conclusion
Making clay ornaments at home is fun and simple. You only need a few materials to start. Each ornament you create will be unique and special. Try different shapes and colors to make your designs stand out. This craft helps you relax and enjoy your free time.
Share your ornaments with family or friends as thoughtful gifts. Keep practicing to improve your skills and create beautiful decorations. Crafting at home brings joy and creativity to everyone. Give it a try and see how much fun it can be!






