

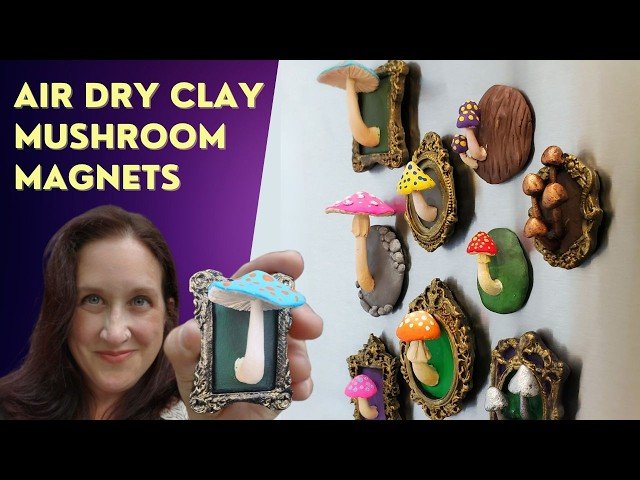
Have you ever wanted to create something fun and useful with your own hands? Making clay magnets at home is easier than you think.
Imagine turning simple clay into colorful magnets that brighten up your fridge or workspace. Not only is this a great way to express your creativity, but it also gives you a chance to personalize your space with items you made yourself.
In this guide, you’ll discover simple steps to craft your own unique clay magnets quickly and easily. Ready to start? Let’s dive in and bring your ideas to life!

Materials Needed
Making clay magnets at home is a fun and creative project. You need a few basic materials to start crafting your own designs. Gathering the right supplies helps you work smoothly and enjoy the process.
This guide covers the types of clay you can use, magnet options, and the basic tools required.
Types Of Clay
You can choose from different clays depending on your preference and the finish you want. Each type has its own benefits and curing methods.
- Air-dry clay: Easy to use and dries without baking.
- Polymer clay: Needs baking in an oven to harden.
- Cold porcelain clay: Smooth texture, air-dries hard.
- Modeling clay: Not permanent, good for practice.
Magnet Options
Choose magnets that suit your clay magnets' size and weight. Strong magnets hold better on surfaces like refrigerators or lockers.
| Magnet Type | Strength | Best Use |
| Disc magnets | Strong | Small, flat clay pieces |
| Strip magnets | Medium | Long or thin clay shapes |
| Button magnets | Strong | Round or bulky clay designs |
| Magnetic sheets | Light | Large, flat clay surfaces |
Basic Tools
Using simple tools makes shaping and finishing your magnets easier. Keep these items ready before you start.
- Clay sculpting tools or toothpicks for details
- Rolling pin or smooth bottle to flatten clay
- Cutting blade or craft knife for clean edges
- Sandpaper for smoothing dried clay
- Strong glue to attach magnets
- Oven or drying space depending on clay type

Preparing Your Workspace
Making clay magnets at home is a fun craft project. Setting up your workspace properly helps you work faster and cleaner.
A good workspace keeps your materials safe and makes the process enjoyable. Let’s look at how to prepare your area.
Surface Protection
Protect your table or desk before starting your clay magnets. Clay can stick and leave marks on surfaces.
Use a plastic sheet, a silicone mat, or parchment paper. These protect your surface and make cleanup easy.
- Plastic sheet covers large areas
- Silicone mats are reusable and non-stick
- Parchment paper works well for small projects
Organizing Supplies
Keep all your clay, magnets, tools, and paints within reach. Organizing helps you find things quickly.
Use small containers or trays to separate items. Label them if needed to avoid confusion.
- Clay pieces sorted by color
- Magnets in a small box
- Tools like cutters and rollers on a tray
- Paints and brushes kept in jars
Shaping The Clay
Shaping the clay is a fun part of making your own magnets. You can create many designs by molding the clay into different forms.
Work gently with the clay to get smooth shapes. This step helps your magnets look neat and ready to dry.
Basic Shapes
Start with simple shapes like circles, squares, or hearts. These are easy to make and look nice on magnets.
Roll the clay between your hands or on a flat surface to form the shape. Use your fingers to smooth the edges.
- Roll clay into a ball for circles
- Press clay flat and cut for squares
- Pinch the clay to create hearts
Adding Details
Add small marks or shapes to make your magnets unique. Use tools like toothpicks or small sticks for details.
You can press patterns, draw lines, or add tiny clay pieces to decorate your shapes.
- Draw lines with a toothpick
- Press texture with a fork or fabric
- Attach small clay dots or shapes
Using Molds
Molds help you make perfect shapes quickly. Press the clay into the mold and remove it carefully.
You can find molds in craft stores or use household items like cookie cutters to shape the clay.
- Press clay firmly into the mold
- Remove excess clay from edges
- Gently pop the shaped clay out

Baking And Curing
Baking and curing are important steps to harden clay magnets. They make the clay strong and long-lasting.
You can bake clay in an oven or let it dry in the air. Each way works well for different types of clay.
Oven Baking Tips
Baking clay magnets in an oven makes them hard quickly. Use the right temperature and time to avoid cracks.
Check the clay package for baking instructions. Usually, bake at 265°F to 275°F for 15 to 30 minutes.
- Preheat the oven before baking
- Place magnets on parchment paper or a baking sheet
- Do not bake too long to avoid burning
- Allow magnets to cool slowly after baking
- Avoid touching magnets while hot to prevent damage
Air Drying Methods
Air drying works well for clay that does not need baking. It takes longer but is simple and safe.
Keep magnets in a dry, warm place to dry. Turn them gently to dry evenly on all sides.
- Place magnets on a flat surface with paper underneath
- Leave space between magnets for air flow
- Turn magnets every 12 hours to avoid warping
- Allow 24 to 72 hours for full drying
- Do not stack magnets until completely dry
Painting And Decorating
Painting and decorating your clay magnets adds personality and charm. You can use many kinds of paints and finishes to make your magnets stand out.
Taking time to choose the right materials and seal your work will keep your magnets looking great for a long time.
Choosing Paints
Select paints that stick well to clay and dry quickly. Acrylic paints are a popular choice because they come in many colors and are easy to use.
- Acrylic paints: fast-drying and vibrant
- Watercolor paints: soft colors but may need sealing
- Oil-based paints: durable but take longer to dry
- Paint markers: good for fine details and lines
Try testing your paint on a small piece of clay first. This helps you see how the color looks and if the paint sticks well.
Sealing Your Design
Sealing protects the paint and clay from damage and water. It also adds shine or a matte finish depending on the type you use.
| Sealant Type | Finish | Use |
| Glossy varnish | Shiny | Brightens colors, adds shine |
| Matte varnish | Flat | Reduces shine, natural look |
| Spray sealant | Varies | Easy to apply, covers evenly |
| Brush-on sealant | Varies | More control, good for small areas |
Apply sealant in thin layers. Let each layer dry before adding another. This keeps your magnets safe and colorful.
Attaching Magnets
Making clay magnets at home is a fun activity. It is important to attach magnets securely so they work well. Let's explore some tips and options for attaching magnets to your clay creations.
Using the right glue and placement can ensure your magnets stay in place. Here are some simple steps to follow for the best results.
Glue Options
Choosing the right glue is important for attaching magnets. Some glues work better with clay and magnets.
- Super glue dries quickly and holds strongly.
- Epoxy glue is great for heavy magnets.
- Craft glue is easy to use for light magnets.
Placement Tips
Placing the magnet correctly ensures it sticks well. Here are some tips to help you.
- Place the magnet in the center of the clay piece.
- Make sure the surface is clean before gluing.
- Press the magnet firmly for a strong bond.
Creative Design Ideas
Making clay magnets at home is fun and easy. You can create unique designs to decorate your fridge. Use simple tools and let your imagination run wild.
Explore different themes and personalize your magnets. This makes them special and suitable for any occasion.
Seasonal Themes
Seasonal themes add a festive touch to your magnets. You can create designs that match the season or holiday. This brings cheer to your home.
Use colors and shapes that represent the time of year. This makes your magnets lively and relevant.
- Spring: Flowers and pastel colors
- Summer: Sun shapes and bright hues
- Autumn: Leaves and warm tones
- Winter: Snowflakes and cool shades
Personalized Magnets
Personalized magnets make great gifts. You can add names or initials to make them unique. This adds a personal touch that everyone loves.
Consider the recipient's interests and hobbies. This helps you create magnets that they will cherish.
- Names or initials for a personal touch
- Favorite animals or sports for hobby lovers
- Special dates like birthdays or anniversaries
Troubleshooting Common Issues
Making clay magnets at home is fun but can have some problems. Some common issues are cracking clay and magnets falling off.
Knowing how to fix these problems helps you make better magnets. Read on to find easy solutions.
Cracking Clay
Clay can crack if it dries too fast or is too thick. Cracks ruin the look and strength of your magnet.
- Dry clay slowly by covering it with a damp cloth.
- Make smaller or thinner shapes to avoid thick parts.
- Mix clay well to keep it soft and even.
- Use clay that is fresh and not too old.
- Seal finished magnets with a clear varnish to protect them.
Magnet Falling Off
Magnets may fall off if glue is weak or the surface is not clean. Secure magnets well for lasting use.
| Cause | Solution |
| Glue not strong enough | Use strong craft glue made for metal and clay |
| Surface dirty or oily | Clean clay surface with rubbing alcohol before gluing |
| Magnet too small | Choose magnets that fit the clay size better |
| Glue not dry before use | Let glue dry fully as per instructions |
Frequently Asked Questions
What Materials Do I Need To Make Clay Magnets At Home?
You need air-dry clay, small magnets, paint, glue, and sealant. These basic materials help create durable and colorful clay magnets easily.
How Long Does It Take For Clay Magnets To Dry?
Air-dry clay usually takes 24 to 48 hours to dry fully. Drying time depends on the thickness and room humidity.
Can I Use Homemade Clay For Making Magnets?
Yes, homemade clay works but may be less durable. Air-dry clay is preferred for better strength and easier crafting.
How Do I Attach Magnets Securely To Clay Shapes?
Use strong glue like E6000 or hot glue to fix magnets. Ensure the clay is fully dry before attaching magnets for best results.
Conclusion
Making clay magnets at home is a fun and simple craft. You only need a few basic supplies to start. Each magnet can be unique and show your creativity. These magnets make great gifts or decorations. Try different shapes and colors to keep it interesting.
Enjoy the process and share your creations with friends. Crafting at home brings joy and relaxation. Start your clay magnet project today and see what you create!






