

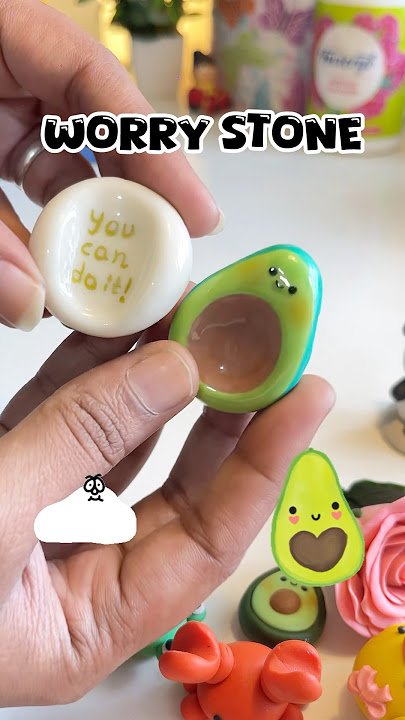
Have you ever wanted to create something unique with your own hands? Making clay figurines at home is a fun and rewarding way to bring your ideas to life.
Whether you’re a beginner or just looking for a new hobby, this guide will show you simple steps to craft beautiful clay figures. Imagine turning a lump of clay into a tiny character or an adorable animal—all in your own space.
Keep reading, and you’ll discover how easy and enjoyable it can be to make your very own clay creations. Your creativity is waiting to come alive!
Materials Needed
Making clay figurines at home is fun and creative. To start, you need the right materials. This guide helps you know what to get.
Choosing good materials makes your clay work easier and better. Let’s look at the main types of clay and the tools you will need.
Types Of Clay
There are many clays to choose from. Each clay type has different features. Pick the one that fits your project and skill level.
- Air-Dry Clay:Easy to use and dries without baking.
- Polymer Clay:Hardens in a home oven, good for detailed work.
- Modeling Clay:Soft and reusable, but does not harden permanently.
- Natural Clay:Needs kiln firing and is great for serious projects.
Essential Tools
Having the right tools helps you shape and detail your figurines. Keep these basic tools ready before you start.
| Tool | Purpose |
| Sculpting Knives | Cut and carve clay shapes |
| Rolling Pin | Flatten clay evenly |
| Modeling Tools | Add texture and fine details |
| Wire Cutter | Cut clay blocks or wire armatures |
| Work Surface | Protect your table and work clean |
Optional Supplies
Optional supplies can improve your work or make it easier. You can add these as you get more comfortable.
- Paints and Brushes – to color your finished figurines
- Sealants – to protect and add shine
- Gloves – to keep your hands clean
- Wire Armature – to support larger clay models
- Sanding Paper – to smooth dry clay surfaces
Preparing Your Workspace
Making clay figurines at home needs a clean and organized workspace. This helps you work smoothly and keeps your materials safe.
Setting up well also saves time and avoids mess. Let’s look at how to prepare your area for clay crafting.
Choosing A Suitable Area
Pick a spot with good light and enough space for your tools. A flat table or desk works best. Try to find a quiet place to focus on your work.
Protecting Surfaces
Clay can stain or damage tables. Use a cover to protect your surface before starting. This keeps your furniture clean and safe.
- Use plastic sheets or old newspapers as a base
- Place a cutting mat or board on top for shaping clay
- Keep a damp cloth nearby to wipe spills quickly
- Avoid working on carpets or fabric surfaces
Organizing Materials
Keep your clay, tools, and paints in one place. This saves time and helps you find items easily. Label containers if needed to stay neat.
| Material | Storage Tip |
| Clay | Store in airtight boxes to keep moist |
| Sculpting tools | Use a small tray or cup for easy access |
| Paints and brushes | Keep upright in jars to avoid spills |
| Work surface covers | Fold and store for reuse after cleaning |
Basic Clay Techniques
Making clay figurines at home is fun and easy. Learning basic clay techniques helps you create better shapes.
These techniques include preparing the clay, shaping it, and joining pieces together. Each step is important for good results.
Conditioning The Clay
Conditioning clay means making it soft and easy to work with. Fresh clay can be stiff and hard to shape.
To condition clay, knead it with your hands until it feels smooth. This removes air bubbles and makes it more flexible.
- Cut clay into small pieces
- Warm pieces in your hands
- Knead and stretch repeatedly
- Keep kneading until soft and smooth
Shaping And Molding
Shaping clay is like sculpting. You can pinch, roll, and press clay to make different forms.
Use simple tools or your fingers to create shapes. Start with basic shapes like balls and cylinders to build your figure.
- Roll clay to make cylinders or coils
- Pinch clay to form curves and edges
- Press clay flat for slabs or details
- Use tools to carve or smooth surfaces
Joining Clay Pieces
Joining clay pieces helps you build bigger figures from smaller parts. You need to connect them well to avoid cracks.
Score the surfaces to be joined by making small cuts. Add a bit of water or slip to make the pieces stick better.
- Score both surfaces with a toothpick or knife
- Apply slip or water on the scored areas
- Press pieces firmly together
- Smooth the joint with your finger or tool

Creating Simple Figurines
Making clay figurines at home is a fun and creative hobby. You only need a few tools and some clay to start shaping your own art.
This guide helps you create simple figurines step by step. Focus on easy shapes and details to build your skills.
Basic Shapes
Start by forming the main parts of your figurine using simple shapes. Circles, ovals, and cylinders work well for heads, bodies, and limbs.
- Roll small balls for heads and joints
- Shape ovals for the torso
- Make thin cylinders for arms and legs
- Press flat shapes for feet or hands
Adding Details
After making the base shapes, add small details to bring your figurine to life. Use tools or your fingers for this step.
| Detail | How to Make |
|---|---|
| Eyes | Use a toothpick to make small holes or dots |
| Mouth | Press a thin line gently with a tool |
| Clothes | Add thin sheets of clay on the body |
| Hair | Roll small coils and attach on the head |
Smoothing And Finishing
Finish your figurine by smoothing rough areas. Use water or a soft brush to make the surface even.
- Dip your finger in water and gently rub the clay surface
- Use a soft brush to remove small cracks
- Let your figurine dry completely before painting or sealing
Drying And Curing
Drying and curing are important steps when making clay figurines at home. These steps help your figurine harden and keep its shape.
Different clays need different drying methods. Choose the right one to avoid cracks and damage.
Air Drying Tips
Air drying is simple and works well with air-dry clay. Place your figurine in a cool, dry spot away from sunlight.
Turn the figurine every few hours. This helps it dry evenly and stops one side from cracking.
- Keep figurines away from heat sources
- Use a soft cloth to cover loosely
- Allow 24 to 72 hours to dry fully
- Thin parts dry faster than thick parts
Baking Clay Figurines
Baking clay figurines works for polymer clay. Use an oven to harden the clay quickly.
Set the oven to the clay’s recommended temperature. Bake for the time given on the package.
- Preheat oven before baking
- Place figurine on a baking sheet
- Use parchment paper to prevent sticking
- Do not exceed recommended temperature
- Let figurine cool before touching
Troubleshooting Cracks
Cracks can happen if clay dries too fast or unevenly. Fix cracks before the clay hardens completely.
Use a small amount of water or clay slip to smooth cracks. Let the figurine dry slowly to stop new cracks.
- Dry clay slowly in a cool place
- Cover loosely to keep moisture
- Repair cracks with fresh clay or water
- Avoid thick parts that dry unevenly

Painting And Decorating
Painting and decorating your clay figurines can be fun. You can make them look bright and beautiful. With the right paints and techniques, your figurines will shine.
This guide will help you choose the best paints, apply colors nicely, and seal your figurines. Let's get started!
Choosing Paints
Picking the right paint is important. Different paints give different looks. Some are shiny, others are matte.
- Acrylic paints are easy to use and dry fast.
- Watercolors give a soft and light finish.
- Oil paints provide rich and deep colors.
Applying Colors
Applying colors can be like coloring a picture. Think about how you want your figurine to look. Start with lighter colors and build up to darker ones.
Use small brushes for details. Large brushes cover bigger areas. Mix colors to create new shades.
Sealing Your Figurine
Sealing your figurine protects the paint. It makes the colors last longer. There are different sealants you can use.
- Spray sealants are quick and even.
- Brush-on sealants let you control the thickness.
- Glossy sealants add shine, while matte sealants keep it dull.
Advanced Tips
Creating clay figurines can be a fun and rewarding hobby. With advanced techniques, you can make detailed and intricate designs.
Learn how to use molds, stamps, and mixed media to enhance your clay creations.
Creating Complex Designs
Complex designs require patience and precision. Start by sketching your design on paper. This gives you a clear plan to follow.
- Sketch your design first.
- Use fine tools for detail work.
- Keep your clay moist for flexibility.
Using Molds And Stamps
Molds and stamps can add texture and detail to your figurines. Choose molds that match the theme of your project for best results.
Pro tip: Press gentlywith stamps to avoid distorting the clay shape.
Incorporating Mixed Media
Mixed media can add color and texture to your clay figurines. Consider using paints, beads, or fabric to enhance your work.
| Material | Use |
| Paint | Add color |
| Beads | Decorative accents |
| Fabric | Clothing or texture |
Common Mistakes To Avoid
Making clay figurines at home is fun but can be tricky. Small errors can break your work or make it look bad.
Knowing what mistakes to avoid helps you create better figurines with less frustration.
Handling Fragile Pieces
Clay figurines have thin parts that break easily. Touch these parts gently to keep them safe.
Do not press hard or bend fragile sections. Use tools carefully to shape delicate details.
- Hold figurines by thick, strong parts
- Avoid dropping or knocking them
- Support thin areas while working
- Use soft brushes or tools on small parts
Preventing Warping
Clay can bend or warp if it dries unevenly. This changes the shape of your figurine.
Keep your work flat and turn it often while drying. Dry clay slowly to keep its shape.
- Dry figurines on a flat surface
- Turn pieces regularly to dry all sides
- Do not dry near heat or direct sunlight
- Keep clay thickness even to avoid warping
Maintaining Clean Tools
Dirty tools ruin your clay work. Old clay bits cause lumps and rough surfaces.
Clean your tools after every use. This keeps your figurines smooth and shapes sharp.
- Wipe tools with a damp cloth
- Use a brush to remove small clay pieces
- Dry tools before storing
- Keep a separate tool for each clay color

Frequently Asked Questions
What Materials Do I Need To Make Clay Figurines At Home?
You need air-dry clay, sculpting tools, water, and a smooth work surface. Optional items include paint and sealant for finishing.
How Long Does It Take For Clay Figurines To Dry?
Air-dry clay usually takes 24 to 48 hours to fully dry, depending on thickness and humidity.
Can Beginners Easily Create Clay Figurines?
Yes, beginners can start with simple shapes and gradually improve skills with practice and patience.
How Do I Prevent Cracks In Homemade Clay Figurines?
Keep clay moist while sculpting and dry figurines slowly at room temperature to avoid cracking.
Conclusion
Creating clay figurines at home brings joy and sparks creativity. You can shape simple or detailed designs with ease. Practice helps improve your skills over time. Using basic tools and materials keeps the process fun and affordable. Enjoy making gifts or decorations that show your personal touch.
Keep experimenting with colors and shapes to make unique pieces. Remember, the best art comes from patience and imagination. Start today and watch your ideas take form in clay.






