

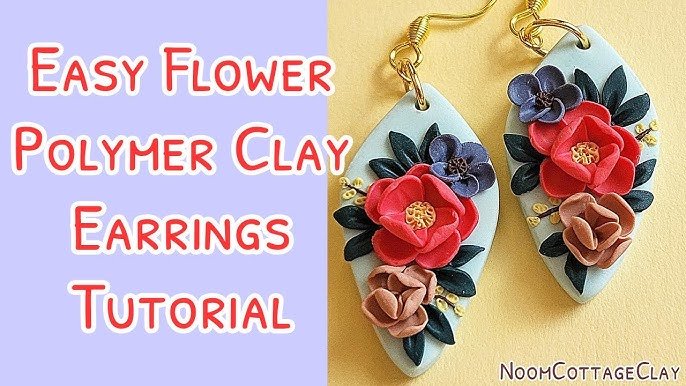
Are you looking for a fun and creative way to make your own jewelry? Making clay earrings at home is easier than you think, and it lets you design unique pieces that match your style perfectly.
Imagine wearing earrings that no one else has, made by your own hands. In this guide, you’ll discover simple steps and tips to create beautiful clay earrings without any special tools or experience. Ready to turn your ideas into stunning accessories?
Let’s get started!
Materials Needed
Making clay earrings at home is fun and easy. You only need a few materials to start crafting your own designs.
This guide explains the types of clay, tools, and accessories required for your project.
Types Of Clay
Choosing the right clay is important for your earrings’ look and durability. Here are common clay types used for earrings:
- Polymer Clay: Easy to mold and bake in a home oven.
- Air-Dry Clay: Dries without baking but is less durable.
- Cold Porcelain Clay: Smooth texture, air-dries hard.
Essential Tools
These tools help shape and finish your clay earrings. Keep them handy during crafting.
| Tool | Purpose |
| Rolling Pin | Flatten clay evenly |
| Clay Cutters | Create shapes |
| Needle or Pin | Make holes for hooks |
| Sanding Paper | Smooth edges after baking |
| Baking Tray | Hold clay pieces in oven |
Optional Accessories
These extras can enhance your earring design or make crafting easier.
- Earring Hooks: To turn clay pieces into wearable earrings.
- Gloss or Matte Sealant: Protect and finish the clay surface.
- Paints or Markers: Add color and details.
- Tweezers: Handle small pieces safely.
- Clay Extruder: Create thin shapes or textures.
Preparing Your Workspace
Making clay earrings is fun and creative. A clean and organized workspace helps you work better. Prepare your area before starting.
Good preparation saves time and keeps your materials safe. Here are key tips for setting up your workspace.
Choosing A Suitable Area
Select a quiet place with enough light. A table near a window works well. Make sure the area is free from dust and pets.
Choose a spot where you can leave your clay and tools out if needed. This avoids constant packing and unpacking.
Protecting Surfaces
Clay can stain or damage furniture. Cover your workspace with a material that is easy to clean. Use items that protect well.
- Place a silicone mat or baking sheet on the table
- Use parchment paper under your work area
- Keep old cloths or paper towels handy for spills
- Avoid working directly on wooden or fabric surfaces
Organizing Materials
Keep your clay, tools, and accessories in order. This saves time and keeps your space tidy. Sort your items before starting.
| Material | Storage Tip |
| Polymer clay | Store in airtight containers |
| Cutting tools | Use a small box or tray |
| Paints and glazes | Keep in a separate caddy |
| Beads and findings | Sort in divided containers |
Basic Clay Techniques
Making clay earrings at home is fun and creative. You can use simple tools and clay to create beautiful designs.
Understanding basic clay techniques helps you shape your earrings easily. These skills improve your final look.
Conditioning The Clay
Conditioning clay means softening it before use. This process makes the clay easier to shape and less likely to crack.
To condition clay, knead it with your hands. Press, fold, and roll it until smooth and flexible.
- Cut clay into small pieces
- Warm it by pressing with your fingers
- Knead until it feels soft and even
- Remove any air bubbles by pressing firmly
Shaping And Molding
Shape the clay into the form you want for your earrings. Use tools or your hands to create different shapes.
You can make circles, squares, or abstract shapes. Keep your pieces thin and even for better results.
- Roll clay into a flat sheet
- Use cookie cutters or knives to cut shapes
- Smooth edges with fingers or tools
- Make holes for earring hooks with a toothpick
Creating Textures
Adding texture makes your earrings look unique and interesting. You can press objects or use tools to add patterns.
Try different materials to create designs. Textures add depth and style to plain clay shapes.
- Press fabric or leaves into clay
- Use toothpicks or needles for fine lines
- Stamp patterns with textured items
- Use a brush to create rough or smooth surfaces

Design Ideas
Making clay earrings at home is fun and creative. You can try many designs easily.
Choosing the right design makes your earrings stand out. Here are some ideas to try.
Simple Shapes
Start with basic shapes like circles, squares, or triangles. These are easy to cut and shape.
Simple shapes look clean and stylish. You can make pairs or mix different shapes together.
- Use cookie cutters or shape tools
- Keep edges smooth for a neat look
- Try matching or contrasting shapes
Layering And Patterns
Layer different clay pieces to add depth and interest. Small shapes on big ones create cool patterns.
Patterns can be simple dots, stripes, or abstract designs. Use tools to make textures on the clay.
- Stack shapes in different colors
- Create patterns with a toothpick or knife
- Press textures like leaves or fabric
Adding Color
Use colored clay or paint your earrings after baking. Bright colors make earrings eye-catching.
Mix colors to create marbled or gradient effects. Play with color combinations to find what you like.
- Mix two or more clay colors before shaping
- Use acrylic paint for details after baking
- Seal paint with clear varnish for shine
Assembling Earrings
Making clay earrings at home is fun and creative. Assembling them requires some simple steps.
Once the clay shapes are ready, putting them together is easy. You only need some basic supplies.
Attaching Findings
Findings are the metal parts of earrings. They help in connecting and holding pieces together.
Use pliers to attach the findings. Grip them tightly to ensure they stay in place.
- Choose findings that match your earring style
- Ensure they are the right size for your clay pieces
- Use a firm grip to attach them securely
Using Jump Rings
Jump rings are small metal circles. They help in connecting pieces like pendants and findings.
Open the jump ring with pliers. Slide the clay piece and findings onto it. Close it tightly.
- Choose strong jump rings for durability
- Use two pairs of pliers for better control
- Check that the ring is completely closed
Securing Hooks And Posts
Hooks and posts allow earrings to be worn. They need to be attached firmly to avoid falling off.
Use a dab of glue for extra security. Let it dry completely before wearing the earrings.
- Pick hooks that are comfortable for the ears
- Ensure the posts are straight and aligned
- Test the attachment before wearing

Curing And Finishing
Curing and finishing clay earrings are key steps to make them strong and shiny. Proper curing hardens the clay. Finishing gives a smooth and polished look.
These steps help your earrings last longer and look professional. Let’s explore how to bake, sand, and seal your clay earrings at home.
Baking Instructions
Baking cures the clay and makes it hard. Follow the baking time and temperature on your clay package. Use an oven that heats evenly.
- Preheat the oven to the recommended temperature.
- Place earrings on a baking tray lined with parchment paper.
- Bake for the time suggested, usually 15 to 30 minutes.
- Let earrings cool completely before touching.
Sanding And Smoothing
After baking, the earrings might feel rough. Sanding makes them smooth and soft to touch. Use fine sandpaper or sanding sponges.
Sand gently in small circles. Clean off dust with a soft cloth. This step prepares the surface for sealing or painting.
- Start with 400-grit sandpaper for rough edges.
- Use 600 to 800-grit sandpaper for a smooth finish.
- Wipe dust away before sealing.
Sealing And Glazing
Sealing protects your earrings from water and dirt. It also adds shine or a matte look. Use a clear acrylic sealer or glaze made for clay.
Apply thin coats with a brush or spray. Let each coat dry fully before adding another. Avoid heavy layers to stop stickiness.
- Choose a matte or glossy finish sealer.
- Apply 1 to 3 thin coats.
- Dry completely between coats.
- Handle earrings carefully after sealing.
Tips For Beginners
Making clay earrings at home is a fun and creative hobby. You can design unique pieces that match your style.
Start simple and learn the basics to avoid frustration. This guide gives helpful tips for beginners.
Avoiding Common Mistakes
Many beginners use too much clay or do not bake it correctly. These errors can ruin your earrings.
Work on a clean surface and keep your hands dry. This helps prevent dust and fingerprints on your clay.
- Use small amounts of clay to avoid thick earrings
- Follow baking instructions carefully for your clay type
- Keep your workspace free from dust and dirt
- Use tools gently to avoid unwanted marks
Maintaining Clay
Clay can dry out or crack if not stored well. Keep your clay soft and ready to use.
Store unused clay in an airtight container. This stops it from hardening before your next project.
- Wrap clay in plastic wrap to keep moisture in
- Use airtight boxes or bags for storage
- If clay gets hard, try kneading it or adding a small amount of clay softener
- Keep baked earrings away from water to avoid damage
Experimenting Safely
Trying new shapes and colors makes your earrings unique. Test new ideas carefully to avoid wasting materials.
Use small clay pieces when trying new techniques. This saves clay and helps you learn faster.
- Test colors by mixing small clay amounts
- Shape small pieces first before making big designs
- Use safe tools designed for clay work
- Work in a well-ventilated area when baking clay
Care And Storage
Keeping your clay earrings in good condition is easy. Follow these simple care and storage tips.
Learn how to clean, store, and handle your clay earrings. This ensures they last for a long time.
Cleaning Earrings
Cleaning your clay earrings is important for maintaining their beauty. Use gentle methods to avoid damage.
- Use a soft, damp cloth to wipe off dirt.
- Avoid using harsh chemicals or soap.
- Let them air dry completely before storing.
Proper Storage Methods
Storing your earrings correctly prevents damage. Use these methods to keep them safe.
| Storage Method | Benefit |
| Use a jewelry box | Prevents dust accumulation |
| Keep in individual pouches | Avoids scratches |
| Hang on a jewelry stand | Prevents tangling |
Handling Fragile Pieces
Clay earrings can be fragile. Handle them with care to avoid breaking.
- Always pick up by the base, not the decoration.
- Avoid dropping or knocking against hard surfaces.
- Consider removing them before sleeping or exercising.
Frequently Asked Questions
What Materials Do I Need To Make Clay Earrings At Home?
You need polymer clay, earring hooks, jump rings, a craft knife, sandpaper, and an oven for baking. Optional tools include a rolling pin and clay cutters for shaping.
How Do I Bake Polymer Clay Earrings Properly?
Preheat your oven to 265°F-275°F (130°C). Bake earrings on a baking sheet for 15-30 minutes, following the clay brand's instructions. Avoid overbaking to prevent burning or discoloration.
Can I Use Any Type Of Clay For Earrings?
Polymer clay is best for earrings because it hardens when baked. Air-dry clay is less durable and may break easily. Choose polymer clay for long-lasting, wearable earrings.
How Do I Add Earring Hooks To Clay Earrings?
Insert a small eye pin or jump ring into the clay before baking. After baking, attach the earring hook to the eye pin or jump ring for secure closure.
Conclusion
Making clay earrings at home is fun and simple. You need just a few tools and some clay. Experiment with shapes and colors to find your style. Dry and bake the clay carefully to keep it strong. Add hooks or studs to finish your earrings.
Handmade earrings make great gifts or accessories. Keep practicing to improve your skills. Enjoy creating unique jewelry that shows your personality. Try new designs and have fun with each pair you make. Crafting clay earrings brings joy and a sense of pride.






