Have you ever wanted to create something beautiful and useful with your own hands? Making clay cups at home is easier than you might think, and it’s a fun way to bring a personal touch to your kitchen.
Imagine sipping your favorite drink from a cup you made yourself—there’s something truly satisfying about that. In this guide, you’ll learn simple steps to shape, mold, and finish your very own clay cups. Whether you're a beginner or just looking for a new hobby, this easy-to-follow process will inspire you to get creative and craft something unique.
Ready to make your own clay cup? Let’s dive in!
Materials Needed
Making clay cups at home is fun and creative. You need the right materials to start your project.
Gathering everything before you begin makes the process easier and more enjoyable.
Choosing The Right Clay
Clay comes in different types. Some are better for making cups because they hold water well and dry strong.
- Earthenware clay: soft and easy to shape, good for beginners
- Stoneware clay: stronger and waterproof after firing
- Porcelain clay: smooth and fine but harder to work with
Essential Tools
| Tool | Use |
| Potter's wheel or flat board | To shape the clay cup |
| Clay knife or wire cutter | To cut and trim clay |
| Sponge | To smooth the surface |
| Rolling pin | To flatten clay if hand-building |
| Slip (liquid clay) | To join pieces of clay together |
| Brushes | To apply slip or decorations |
Optional Decorative Supplies
You can decorate your clay cups with colors and textures. These supplies help add style.
- Colored glazes for a shiny finish
- Stamps or carving tools for patterns
- Acrylic paints for after firing
- Sealant to protect painted designs

Credit: potterycrafters.com
Preparing The Clay
Preparing the clay is the first step in making clay cups at home. Good preparation makes shaping easier and avoids cracks.
This process involves conditioning the clay and removing air bubbles. Both help create strong and smooth cups.
Conditioning The Clay
Conditioning softens the clay and makes it easy to shape. It also helps mix the clay evenly.
- Cut the clay into small pieces.
- Press and fold the pieces together using your hands.
- Work the clay until it feels soft and smooth.
- If the clay is too dry, add a few drops of water.
- If it is too sticky, sprinkle some dry clay powder.
Removing Air Bubbles
Air bubbles can cause cracks when the cup dries or fires. Removing them makes the clay stronger.
| Method | How to Do It |
| Wedging | Knead the clay on a clean surface to push out air pockets. |
| Slamming | Lift and slam the clay block onto the table repeatedly. |
| Rolling | Roll clay into a log shape, then slice and stack it several times. |
Shaping The Cup
Shaping a clay cup is an important step in making your cup look nice and hold liquids well. You can use different ways to shape the cup depending on your tools and skills.
In this section, we will talk about hand-building techniques, using molds, and forming the handle. These tips will help you create a strong and beautiful cup.
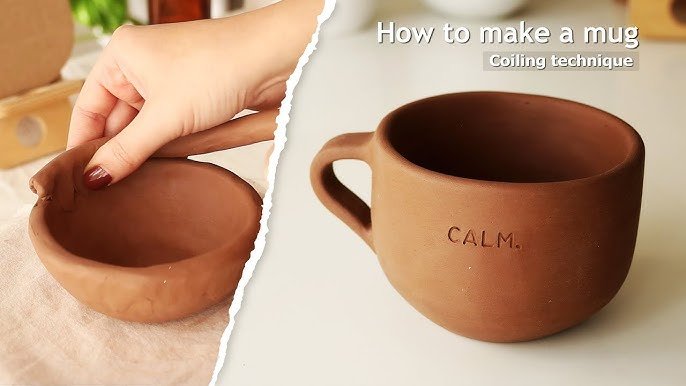
Hand-building Techniques
Hand-building means shaping the clay by hand without a potter's wheel. You can pinch, coil, or slab the clay to form your cup.
Pinching is simple. You start with a ball of clay and press your thumb inside while pinching the outside to make walls. Coiling uses rolled clay ropes stacked to build walls. Slabbing means rolling clay flat and cutting shapes to join together.
- Pinch to create small and simple cups
- Coil for taller or wider cups
- Slab for square or unusual shapes
Using Molds
Molds help shape your cup quickly and evenly. You press clay into or around a mold to get the cup form.
You can use plastic, silicone, or plaster molds made for pottery. Lightly dust the mold with dry clay powder to stop sticking. After shaping, carefully remove the cup and smooth the edges before drying.
- Choose a mold that fits the size you want
- Press clay evenly into the mold
- Remove the cup gently to keep the shape
- Smooth rough edges with a damp sponge
Forming The Handle
Handles make your clay cup easy to hold. You can shape the handle by rolling a clay coil or cutting a slab strip and bending it.
Attach the handle by scoring the cup and handle where they meet. Use water or slip (liquid clay) to join them. Press gently to secure the handle without breaking the clay.
- Roll a clay coil or cut a slab strip for the handle
- Score and apply slip to join handle and cup
- Press gently to attach the handle firmly
- Smooth connection points to avoid cracks
Credit: www.hestershandmadehome.com
Smoothing And Detailing
Making clay cups at home is fun and creative. Smoothing and detailing help your cup look neat and beautiful.
These steps improve the cup’s feel and design. They prepare your cup for drying and firing.
Refining The Surface
After shaping your cup, use your fingers or tools to smooth the surface. This removes bumps and cracks.
Wet a sponge slightly and rub the cup gently. This helps even out the texture without removing details.
- Use a soft sponge or cloth for smoothing
- Work slowly to avoid damaging the shape
- Check the surface for any rough spots
- Fix cracks by adding small clay pieces and smoothing again
Adding Texture And Patterns
You can make your cup unique by adding textures or patterns. Use simple tools like toothpicks or forks.
Press or carve designs gently into the clay while it is soft. Patterns can be dots, lines, or shapes.
- Use a toothpick to draw fine lines or dots
- Press a fork to make parallel lines
- Stamp leaves or other objects for natural patterns
- Mix smooth and rough areas for a nice look
Drying And Firing
Drying and firing are key steps in making clay cups at home. They make your cups strong and ready to use.
Proper drying removes moisture from the clay. Firing heats the clay to harden it.
Proper Drying Tips
Dry your clay cups slowly to avoid cracks. Keep them in a cool, dry place with good air flow.
- Cover cups with plastic to slow drying if air is dry.
- Turn cups occasionally for even drying.
- Do not place cups in direct sunlight.
- Wait until cups feel room temperature dry before firing.
- Check for any soft spots before moving to firing.
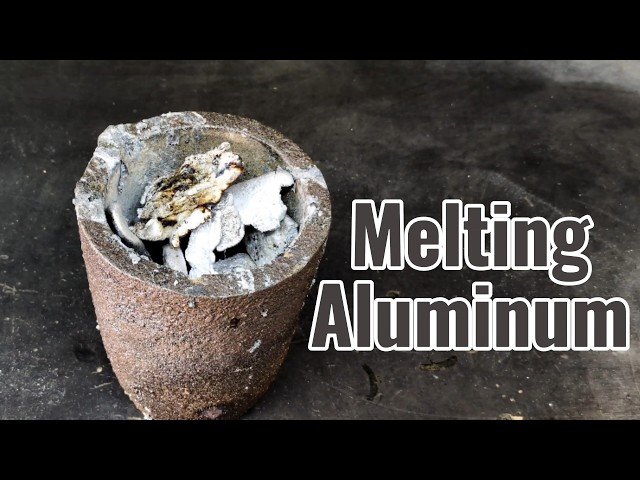
Home Firing Methods
You can fire your clay cups using simple home methods. Each method needs care and attention.
| Method | Description | Temperature | Time |
| Oven Firing | Use a kitchen oven on low heat. | 200°C (392°F) | 2-3 hours |
| Outdoor Kiln | Build a small kiln with bricks and charcoal. | 800-1000°C (1472-1832°F) | 4-6 hours |
| Campfire Firing | Place cups in hot campfire embers carefully. | 700-900°C (1292-1652°F) | 2-4 hours |

Credit: www.youtube.com
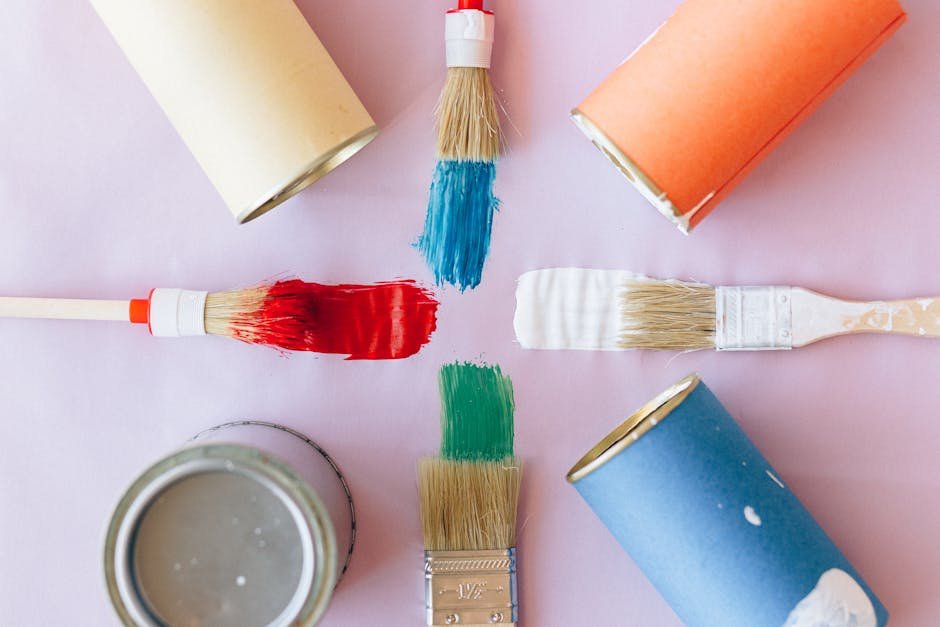
Painting And Glazing
Making clay cups at home is a fun and creative activity. Painting and glazing your cups adds color and shine.
Learn how to choose the right paints and glazes, apply finishes, and seal your clay cup effectively.
Choosing Paints And Glazes
Selecting the right paint and glaze is important for a good finish. Use acrylic paints for vivid colors. Choose food-safe glazes for cups.
- Ensure paints are non-toxic.
- Pick glazes that match your design.
- Consider the firing temperature of the glaze.
Applying Finishes
Apply paint evenly on the clay surface. Use a soft brush for smooth strokes. Allow the paint to dry completely before glazing.
Tip: Test your brush strokes on a spare piece of clay to practice before applying them to your cup.
Sealing The Cup
Sealing your cup is crucial to protect the paint and glaze. Use a clear, food-safe sealant. This will ensure durability and safety for drinking.
| Sealant Type | Features |
| Clear Acrylic | Easy to apply, dries quickly |
| Epoxy Resin | Highly durable, glossy finish |
| Polyurethane | Water-resistant, long-lasting |
Care And Maintenance
Clay cups need special care to stay beautiful and functional. These simple tips will help you keep them in great condition.
Follow these guidelines to ensure your handmade clay cups last a long time.
Cleaning Tips
Clean your clay cups gently to prevent damage. Use the right materials to keep them spotless.
- Use a soft sponge or cloth to clean the surface.
- Avoid harsh detergents; mild soap is best.
- Do not soak the cups in water for too long.
- Let them air dry completely before storing.
Handling And Storage
Proper handling and storage are key to preserving your clay cups. Keep them safe and secure with these tips.
Store clay cups in a dry, cool place. Avoid stacking them directly on top of each other. Use a cushion or soft cloth between each cup.
| Storage Tip | Benefit |
| Use a cupboard with stable shelves | Prevents tipping and breakage |
| Keep away from direct sunlight | Prevents fading and cracking |
| Check for chips and cracks regularly | Allows timely repairs |
Creative Ideas
Making clay cups at home is a fun way to express your creativity. You can design cups that fit your style and needs.
In this guide, learn how to personalize your cups and present them as special gifts.
Personalizing Your Cups
Adding personal touches makes your clay cups unique. Use colors, patterns, or textures that you like.
- Paint your cup with acrylic or ceramic paints after drying.
- Carve simple designs or initials into the clay before it dries.
- Use stamps or textured tools to create patterns.
- Add small clay shapes like flowers or leaves for decoration.
- Apply a clear glaze for a shiny and smooth finish.
Gift Presentation
Present your handmade cups in a way that shows care and creativity. A nice presentation makes your gift even better.
| Presentation Idea | Description |
| Decorative Box | Use a small box with soft fabric or paper inside to protect the cup. |
| Handmade Tag | Attach a tag with a personal message or the cup's story. |
| Natural Wrapping | Wrap the cup in brown paper tied with twine for a rustic look. |
| Gift Basket | Include the cup with coffee, tea, or small treats in a basket. |
| Reusable Bag | Place the cup in a cloth bag that the recipient can use again. |
Frequently Asked Questions
What Materials Do I Need To Make Clay Cups At Home?
You need air-dry clay or natural clay, a rolling pin, a cup mold, sculpting tools, and paint for decoration. These basic materials help you shape, smooth, and finish your clay cups easily at home.
How Long Does It Take To Make A Clay Cup?
Making a clay cup takes about 30 minutes to shape and detail. Drying time varies, usually 24 to 48 hours, depending on the clay type and thickness.
Can I Use Homemade Clay To Make Cups?
Yes, homemade clay can work if it’s sturdy and smooth. Ensure it dries evenly and is non-toxic for safe use in cups.
How Do I Make Clay Cups Waterproof?
To waterproof clay cups, apply a food-safe sealant or glaze after drying. This protects the cup and makes it safe for liquids.
Conclusion
Making clay cups at home is simple and fun. You only need a few materials and patience. Shaping the clay lets you be creative and personal. Drying and firing the cups make them strong and ready to use. Handmade cups add charm to your kitchen or gifts.
Try this craft to enjoy a hands-on, relaxing activity. Keep practicing to improve your skills over time. Anyone can create beautiful, useful clay cups with care. Give it a try and enjoy the process fully.