

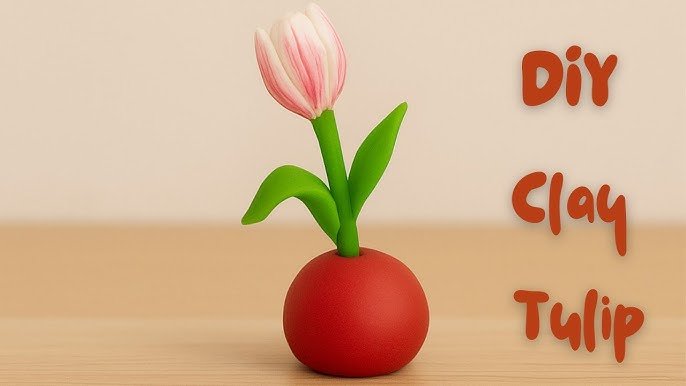
Have you ever wanted to create something beautiful with your own hands? Making clay crafts at home is a fun and simple way to bring your ideas to life.
Whether you’re a beginner or just looking for a relaxing hobby, this guide will show you easy steps to start crafting with clay. By the end, you’ll have the skills to make unique decorations, gifts, or even personalized keepsakes. Ready to discover how satisfying and creative clay crafting can be?
Let’s dive in and get your hands shaping something amazing today!
:strip_icc()/GettyImages-1734082247-4cc86e6e70b14f81a7ef60c37d051de6.jpg)
Choosing The Right Clay
Clay craft is a fun and creative hobby. Picking the right clay helps you enjoy making art at home. Different clays work well for different projects and skill levels.
This guide helps you find the best clay for beginners. It also shows where to buy clay and what tools you will need.
Types Of Clay For Beginners
Not all clay is the same. Some clays are soft, others dry hard. Beginners should try clays that are easy to shape and clean up.
- Air-dry clay: No oven needed. Dries in the air.
- Polymer clay: Soft and colorful. Bakes in a home oven.
- Natural clay: Traditional and needs a kiln to fire.
- Paper clay: Lightweight and easy to mold.
Where To Buy Clay
You can buy clay at art stores or online shops. Some stores sell clay by weight or in small packs. Check the clay type and price before buying.
| Place | Type of Clay Available | Price Range |
| Local Art Store | Air-dry, Polymer | Low to Medium |
| Online Retailers | All types | Low to High |
| Craft Fairs | Natural, Paper | Medium |
Tools Needed For Clay Craft
Some basic tools make clay craft easier. You do not need many tools to start. These help shape, cut, and smooth the clay.
- Sculpting tools: Small sticks, knives, or shaping tools.
- Rolling pin: To flatten the clay evenly.
- Work mat: Protects your table and makes cleanup easy.
- Water spray bottle: Keeps clay moist while working.
- Paintbrushes: For adding texture or paint after drying.
Preparing Your Workspace
Making clay crafts at home is fun and relaxing. You need a clean and organized space. This helps you work better and avoid messes.
Before you start, prepare your tools and safety measures. This makes crafting easier and safer for everyone.
Setting Up A Clean Surface
Choose a flat table or desk as your workspace. Clean the surface well to remove dust and dirt. Use a plastic mat or old newspaper to protect the table.
Organizing Tools And Materials
Keep your clay, tools, and accessories close by. This saves time and keeps your space tidy. Use containers or small boxes to hold items.
- Clay blocks or balls
- Sculpting tools like knives and rollers
- Water container for smoothing clay
- Plastic wrap to cover unused clay
- Paper towels for cleaning hands and tools
Safety Tips For Clay Crafting
| Safety Tip | Reason |
|---|---|
| Work in a well-ventilated area | Prevents inhaling clay dust |
| Wear an apron or old clothes | Keeps clothes clean |
| Wash hands after crafting | Removes clay residue |
| Keep tools away from children | Prevents accidents |
| Store clay properly | Keeps clay fresh and safe |
Basic Clay Techniques
Clay craft is a fun and creative hobby you can do at home. Learning basic clay techniques helps you make neat and strong shapes.
These simple skills let you shape, join, and add details to your clay projects easily.
Rolling And Shaping
Rolling clay makes it smooth and flat. Use a rolling pin or your hands to roll the clay evenly.
You can shape the clay by hand or use tools to cut or form it into the shape you want.
- Roll clay on a clean, flat surface
- Use even pressure to avoid cracks
- Shape with fingers or simple tools like knives
- Keep clay moist to prevent drying out
Joining Clay Pieces
Joining clay pieces helps you build bigger and more detailed projects. You need to connect pieces securely.
Scratch the surfaces where the pieces meet, add a bit of water or slip, and press them together gently but firmly.
- Scratch or score both joining surfaces
- Apply a small amount of slip or water
- Press pieces together carefully
- Smooth the joint with a tool or finger
Texturing And Detailing
Adding texture makes your clay craft look interesting and realistic. You can use many simple tools to create patterns.
Use toothpicks, forks, or stamps to add lines, dots, or shapes on the clay surface before it dries.
- Press tools gently for clear marks
- Work on soft clay for best results
- Add small shapes or designs with clay pieces
- Keep details simple and neat
Step-by-step Project Ideas
Clay crafting at home is a fun activity for all ages. It allows creativity and skill development.
With clay, you can create simple, beautiful pieces. Let's explore some project ideas.
Simple Clay Animals
Crafting clay animals is a great way to start. It's easy and enjoyable.
- Choose your favorite animal
- Mold the body and limbs separately
- Attach parts using water
- Let the clay dry completely
- Paint details after drying
Decorative Bowls And Plates
Decorative bowls and plates add charm to any table. They are also functional.
| Step | Action |
| 1 | Roll out the clay into a flat circle |
| 2 | Shape the edges to form a bowl or plate |
| 3 | Use a toothpick to add designs |
| 4 | Allow the piece to dry |
| 5 | Paint and seal with glaze |
Personalized Jewelry Pieces
Create unique jewelry with clay. It's perfect for gifts or personal use.
Use cookie cutters to shape pendants.
Attach earring hooks before drying.
Paint vibrant colors after drying.
Seal with a clear glaze for shine.
Drying And Curing Clay
Drying and curing are important steps in making clay crafts at home. Proper drying helps your craft keep its shape and last longer. Different types of clay need different drying methods.
This guide explains how to dry and cure clay using air, an oven, and ways to avoid cracks and breakage.
Air-drying Tips
Air-drying is the easiest way to harden clay without special tools. It needs patience and the right environment. Here are tips to help your clay dry well.
- Place your clay craft on a flat, clean surface.
- Keep it in a dry, well-ventilated room away from direct sunlight.
- Turn your craft gently to dry all sides evenly.
- Use a fan to speed up drying but do not point it directly.
- Allow at least 24 to 72 hours for complete drying, depending on size.
Using An Oven For Hardening
Some clays can dry faster when baked in an oven. This method is good for small or detailed crafts. Follow the clay package instructions for temperature and time.
| Clay Type | Oven Temperature | Bake Time |
| Polymer Clay | 265°F (130°C) | 15-30 minutes |
| Air-Dry Clay | Not recommended | N/A |
| Oil-Based Clay | Not recommended | N/A |
Avoiding Cracks And Breakage
Cracks and breakage can ruin your clay craft. Follow these tips to keep your work strong and smooth.
- Work with clay that is not too dry or too wet.
- Make thin parts thicker to avoid weak spots.
- Dry your craft slowly and evenly.
- Seal your clay with varnish or paint after drying.
- Handle your craft gently until fully hardened.

Painting And Finishing Touches
Painting your clay craft brings it to life with color and style. Finishing touches protect your work and add detail.
Use the right materials to make your craft last and look great. Small additions can make your piece unique.
Choosing The Right Paints
Pick paints that stick well to clay and dry quickly. Acrylic paints work well on most clay types.
Water-based paints are easy to use and clean up. Avoid oil-based paints as they may not dry properly on clay.
- Acrylic paints: bright colors, fast drying
- Tempera paints: good for kids, washable
- Watercolors: light and translucent but less durable
Sealing Your Creations
Seal your painted craft to protect the paint and clay from damage. Sealing also gives a nice finish.
Use a clear spray sealer or brush-on varnish. Choose matte or glossy finish based on your style.
- Spray sealers: quick and even coverage
- Brush-on varnish: more control for small areas
- Matte finish: soft and natural look
- Glossy finish: shiny and bright look
Adding Accessories And Embellishments
Add small items like beads, glitter, or ribbons to decorate your clay craft. These make your work stand out.
Attach accessories carefully with glue made for crafts. Avoid heavy items that may fall off or damage your clay.
- Beads and buttons for texture
- Glitter for sparkle
- Ribbons or strings for detail
- Paint pens for fine lines and dots
Troubleshooting Common Issues
Making clay crafts at home can be fun and creative. Sometimes, problems happen with the clay. Fixing these issues helps your craft look better.
This guide will help you solve common clay problems. Learn how to fix cracks, stop clay from drying too fast, and handle sticky or dry clay.
Fixing Cracks And Breaks
Cracks and breaks happen when clay dries unevenly or is too thin. Fix small cracks by smoothing them with wet fingers. For bigger breaks, use fresh clay to join the parts.
- Lightly wet the cracked area.
- Press fresh clay over the crack.
- Smooth the surface with a damp tool or finger.
- Let the clay dry slowly to avoid new cracks.
Preventing Clay From Drying Too Fast
Clay dries fast in warm or dry rooms. Dry clay can crack or become hard before you finish your craft. Keep clay moist to work longer.
| Method | Tip |
| Covering | Wrap clay with plastic wrap or place in a sealed bag. |
| Storage | Keep clay in a cool, shaded place. |
| Spraying | Lightly mist clay with water to keep it moist. |
Handling Sticky Or Dry Clay
Sticky clay can be hard to shape. Dry clay may crack or crumble. Adjust the clay’s feel for better crafting.
Try these tips:
- If clay is sticky, dust it with a little dry flour or cornstarch.
- If clay is too dry, knead in small drops of water carefully.
- Use a smooth surface to roll and shape the clay easily.

Inspiration And Next Steps
Creating clay crafts at home is a fun activity. It lets you explore creativity and discover new skills. The journey can start with simple designs and lead to advanced techniques.
To get inspired, consider exploring different clay styles. This can help you find what excites you and what steps to take next in your crafting journey.
Exploring Advanced Techniques
Once you are comfortable with basics, try advanced techniques. This helps you improve your skills and create more complex designs.
- Experiment with glazing to add color and shine.
- Learn about sculpting tools for detailed work.
- Practice with different types of clay for varied textures.
Joining Clay Craft Communities
Being part of a community can be rewarding. It offers support, feedback, and inspiration. You can learn from others and share your own experiences.
Showcasing Your Work
Sharing your creations boosts confidence and invites feedback. You can showcase your work in various ways to reach a wider audience.
| Platform | Benefits |
| Visual showcase to a broad audience | |
| Etsy | Sell your crafts to enthusiasts |
| Local Art Shows | Engage with community and receive direct feedback |
Frequently Asked Questions
What Materials Do I Need For Clay Crafting At Home?
You need air-dry or polymer clay, sculpting tools, a clean workspace, and paint for finishing. Basic tools include a rolling pin, shaping knives, and modeling sticks.
How Do I Prevent Clay From Cracking While Drying?
Keep your clay pieces evenly thick and avoid thin edges. Dry them slowly at room temperature to minimize cracking and ensure durability.
Can Children Safely Make Clay Crafts At Home?
Yes, with adult supervision, children can safely work with non-toxic clay. Choose air-dry clay and simple projects suited to their age for best results.
How Long Does Homemade Clay Craft Take To Dry?
Air-dry clay usually takes 24 to 48 hours to dry completely. Dry time depends on thickness and humidity, so plan accordingly.
Conclusion
Making clay crafts at home is fun and simple. You only need a few materials and some creativity. Practice shapes and designs step by step. Enjoy the process, not just the result. This hobby helps you relax and express ideas.
Share your creations with friends or family. Keep trying new styles to improve your skills. Crafting with clay brings joy to any day. Start today and see what you can create!






