Are you looking for a simple way to create strong, durable bricks right at home? Making clay bricks yourself can save you money and give you a hands-on project that’s both rewarding and practical.
Imagine building something with bricks you crafted—each one shaped by your own hands. In this guide, you’ll discover easy steps to turn ordinary clay into solid bricks without needing fancy equipment. Ready to get started? Let’s dive in and unlock the secrets to making your own clay bricks today.

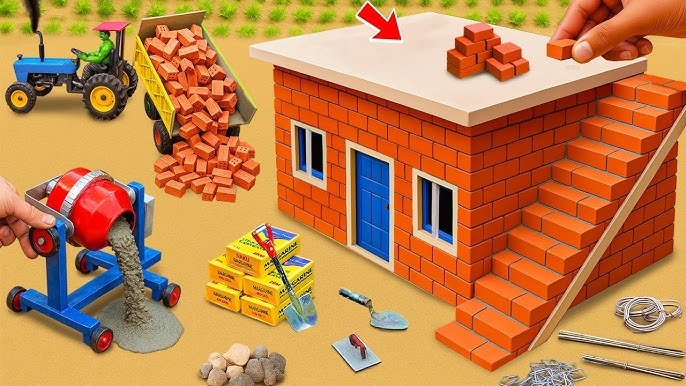
Credit: www.youtube.com
Materials Needed
Making clay bricks at home needs the right materials. You must gather clay, some extra ingredients, and tools.
This guide will explain the types of clay, other ingredients, and tools needed for brick making.
Types Of Clay
Clay is the main material for bricks. Different types of clay make different brick qualities.
- Alluvial Clay: Soft and smooth, easy to shape.
- Shale Clay: Harder, needs more water to mix.
- Limestone Clay: Contains lime, good for strong bricks.
- Fire Clay: Heat-resistant, used for special bricks.
Choose clay that is clean and free from stones or roots. This helps make strong bricks.
Additional Ingredients
Other ingredients improve the clay mix and brick quality. They help with strength and drying.
- Sand: Adds strength and stops bricks from shrinking.
- Water: Needed to mix and shape the clay properly.
- Straw or Grass: Helps hold the clay together and prevents cracking.
- Coal Dust or Ash: Sometimes added to make bricks lighter.
Use clean sand and fresh water. Avoid too much extra material to keep bricks strong.
Tools And Equipment
Some tools make brick making easier and more precise. You need basic tools to shape and dry bricks.
- Brick Molds: Shape the bricks into a standard size.
- Mixing Tools: Shovels or hoes to mix clay and ingredients.
- Water Container: To add water as you mix.
- Drying Racks or Flat Surfaces: For drying the bricks evenly.
- Protective Gloves: To keep your hands safe while working.
Using the right tools helps you make neat and strong bricks at home.
Preparing The Clay
Making clay bricks at home starts with preparing the clay. This step is important to get strong and durable bricks. You need to find good clay, clean it, and mix it properly. Each part affects how the bricks will turn out.
Good preparation helps the bricks dry well and hold their shape. Let’s look at the main parts of preparing the clay for brick making.
Sourcing And Testing Clay
Find clay near your home. It can be from a riverbank, garden, or any soft earth area. Test the clay to make sure it is good for bricks. You want clay that is not too sandy or full of stones.
- Take a small clay sample and roll it into a ball.
- Drop the ball from a height of about 3 feet.
- Check if the ball breaks or stays together.
- Good clay will stay mostly intact with small cracks.
- If it crumbles easily, the clay is not strong enough.
Cleaning And Mixing
Remove stones, sticks, and other bits from the clay. Cleaning helps make smooth bricks without holes or cracks. After cleaning, mix the clay well. You can add water slowly while mixing to make it soft and workable.
| Material | Purpose |
| Clay | Main material for bricks |
| Water | Softens clay for shaping |
| Sand | Prevents cracking during drying |
| Small stones | Remove to avoid weak spots |
Achieving The Right Consistency
The clay must feel like soft dough. It should not be too wet or too dry. If it is too wet, bricks will shrink and crack. If it is too dry, bricks will be hard to shape and break easily.
- Mix clay and water evenly until soft.
- Take a handful and squeeze it.
- If water oozes, add more dry clay.
- If it breaks apart, add a little water.
- Test by shaping a small brick and let it dry.
- Adjust water or clay for best feel and strength.
Molding Bricks
Molding bricks is a key step in making clay bricks at home. It shapes the clay into bricks ready for drying and firing.
Good molding helps create strong, even bricks that last long. The right tools and care make a big difference.
Choosing A Mold
Select a mold that fits the brick size you want. Molds are usually wood or metal and come in different shapes.
- Wood molds are easy to make and use.
- Metal molds last longer and keep shape better.
- Choose a mold size that matches your brick design.
- Make sure the mold has smooth edges to avoid rough bricks.
Shaping The Bricks
Fill the mold fully with wet clay to shape the bricks. Press the clay firmly to avoid air pockets.
Use a straight edge or trowel to level the clay at the top of the mold. This makes the brick flat and even.
- Wear gloves to keep hands clean and protect skin.
- Keep the clay moist but not too wet for better shaping.
- Work on a flat surface for better brick shape.
- Tap the mold gently to remove trapped air.
Ensuring Uniform Size
Bricks must have the same size for easy stacking and strong walls. Use the mold size as a guide.
| Tip | Reason |
|---|---|
| Use a ruler or tape measure | Check brick length, width, and height |
| Trim excess clay after molding | Keep bricks even and neat |
| Make all bricks with the same mold | Ensure consistent size and shape |
| Dry bricks on flat surfaces | Prevent warping or uneven drying |
Drying Process
Drying is a key step in making clay bricks at home. It removes moisture from the bricks before firing.
Proper drying helps bricks keep their shape and strength. It stops cracks and breaks.
Initial Sun Drying
Place fresh clay bricks in the sun to start drying. The sun warms the bricks and dries water slowly.
Turn the bricks often to dry all sides evenly. Avoid stacking bricks during this stage.
Avoiding Cracks
Cracks happen when bricks dry too fast or unevenly. Slow and steady drying keeps bricks strong.
Cover bricks with a thin cloth if the sun is too hot. This helps control the drying speed.
- Turn bricks regularly
- Keep drying area shaded when very hot
- Do not stack bricks too early
Optimal Drying Duration
Drying time depends on weather and brick size. Usually, it takes 5 to 10 days.
Check bricks for hardness and no dampness before firing. Longer drying gives better results.
- Small bricks dry faster than large ones
- Dry on sunny, dry days
- Keep bricks away from rain
Firing Bricks
Firing is a key step in making clay bricks at home. It turns soft clay into hard, durable bricks.
The firing process needs heat, time, and careful handling to avoid cracks or breakage.
Building A Kiln
A kiln is a special oven used to fire bricks. You can build a simple one using bricks and clay.
Make sure the kiln has good airflow to burn fuel efficiently and reach high temperatures.
- Use firebricks or regular bricks for the kiln walls
- Leave holes near the bottom for air intake
- Create a chimney or opening at the top for smoke to escape
- Build a firebox where you place the wood or fuel
Firing Temperature And Time
Bricks need to be heated to around 900 to 1100 degrees Celsius. This hardens the clay.
The firing usually takes 8 to 12 hours, depending on the kiln size and brick thickness.
- Start with a low heat to dry bricks slowly
- Increase temperature gradually to avoid cracks
- Keep the heat steady for several hours to harden bricks
- Use a thermometer to check the kiln temperature
Cooling Down Safely
After firing, let the bricks cool slowly inside the kiln. Sudden cooling can cause cracks.
Keep the kiln closed and reduce heat gradually over 12 to 24 hours until bricks reach room temperature.
- Do not remove bricks while still hot
- Avoid water or cold air on hot bricks
- Check bricks for cracks after cooling

Credit: www.heifer.org
Tips For Success
Making clay bricks at home can be fun and rewarding. With the right techniques, you can create durable and attractive bricks. Here are some tips to help you succeed in this craft.
Pay close attention to the materials and process. This ensures you get high-quality bricks every time.
Common Mistakes To Avoid
Errors can ruin your brick-making experience. Avoid these common mistakes to improve your results.
- Using too much water makes bricks weak.
- Not mixing the clay well leads to uneven texture.
- Skipping the drying process causes cracks.
Improving Brick Quality
Better bricks come from using the right materials and methods. Here are ways to enhance brick quality.
- Use fine sand for smoother texture.
- Mix clay thoroughly for uniform strength.
- Allow bricks to dry slowly to prevent cracks.
Safety Precautions
Safety is important when making clay bricks. Follow these precautions to keep yourself safe.
- Wear gloves to protect your hands.
- Use a mask to avoid inhaling dust.
- Keep children away from the work area.
Creative Uses For Homemade Bricks
Making clay bricks at home can be a fun and useful activity. These bricks have many creative uses in various projects.
Explore how you can use homemade bricks in your garden, home decor, and small construction tasks.
Garden Projects
Homemade bricks can add charm and structure to your garden. They are durable and can withstand weather changes.
| Project | Description |
| Garden Pathway | Create a rustic pathway with bricks. |
| Raised Beds | Use bricks to build elevated planting areas. |
| Garden Edging | Line flower beds with bricks for neat edges. |
Home Decor Ideas
Transform your home with creative brick decor. These bricks can bring warmth and texture to any room.
- Build a cozy fireplace with clay bricks.
- Create a feature wall for visual interest.
- Design unique bookends or candle holders.
Small Construction Tasks
Clay bricks are perfect for small construction tasks around your home. They are sturdy and easy to work with.

Credit: www.youtube.com
Frequently Asked Questions
How Do You Prepare Clay For Making Bricks At Home?
To prepare clay, remove stones and debris first. Then, soak it in water for 24 hours. Knead the clay until smooth and consistent before molding.
What Materials Are Needed To Make Clay Bricks?
You need clay, water, sand, and straw or grass for binding. A mold and a flat surface to dry bricks are also essential.
How Long Does It Take For Clay Bricks To Dry?
Clay bricks typically take 7 to 14 days to dry fully. Drying time varies with weather conditions and brick thickness.
Can Homemade Clay Bricks Be Used For Construction?
Yes, homemade clay bricks are suitable for small construction projects. Ensure they are well-dried and properly fired for durability.
Conclusion
Making clay bricks at home is simple and rewarding. You need basic materials and patience. Follow each step carefully for best results. Handmade bricks save money and give a personal touch. This process helps you understand brick making better. Try it yourself and enjoy the satisfaction of creating.
Small effort leads to strong, durable bricks. Perfect for small projects or learning new skills. Start today and see how easy it can be.