Have you ever wanted to add a personal touch to your home decor? Making a lampshade at home is easier than you think, and it can transform any room instantly.
Imagine having a unique lampshade that fits your style perfectly and brightens your space just the way you like. In this guide, you’ll discover simple steps to create your own beautiful lampshade without needing special skills or expensive tools. Ready to light up your home with a design that’s truly yours?
Let’s get started!

Credit: momspark.net
Choosing The Right Materials
Making a lamp shade at home starts with picking the right materials. Good materials help your lamp look great and last long.
Think about what fits your style and how you will use the lamp. This guide explains fabric, frame, and adhesives.
Fabric Options
Choose fabric that lets light shine softly. Cotton and linen are good for a warm glow. Silk is elegant but needs care.
Use light colors to brighten a room. Dark colors give a cozy feel but block more light.
- Cotton – easy to work with and affordable
- Linen – durable and natural-looking
- Silk – smooth and shiny, but delicate
- Paper or parchment – for a modern, simple look
Frame Choices
The frame holds your fabric in place. It needs to be strong but light. Metal frames last long and hold shape well.
Wire frames are easy to find. You can also make a frame from wood or use an old lamp shade frame.
- Metal wire – strong and flexible
- Wood – sturdy but heavier
- Plastic – light but less durable
- Old lamp shade frame – reuse and save time
Adhesives And Tools
You need the right glue and tools to attach fabric to the frame. Fabric glue works well and dries clear.
Besides glue, scissors and clips help you cut and hold fabric tight while gluing. A hot glue gun is also useful.
- Fabric glue – strong and clear drying
- Hot glue gun – quick and easy
- Scissors – for precise cuts
- Clips or clothespins – to hold fabric in place
- Measuring tape – to get the right size
Measuring And Preparing The Frame
Making a lamp shade at home starts with the right frame preparation. Measuring and cleaning the frame helps the fabric fit well.
Proper assembly creates a sturdy base for your lamp shade. Follow simple steps to get started.
Measuring For Size
Measure the diameter and height of your frame. These numbers guide you in cutting the fabric correctly.
- Use a tape measure to find the top diameter.
- Measure the bottom diameter of the frame.
- Check the height from top to bottom edge.
- Write down all measurements clearly.
Cleaning The Frame
A clean frame helps glue and fabric stick better. Remove dust, dirt, and old adhesive.
- Wipe the frame with a dry cloth first.
- Use mild soap and water for sticky spots.
- Dry the frame completely before moving on.
- Check for rust or damage and fix if needed.
Assembling The Base
Put together the parts of your frame to form a solid base. This step holds the shape of your lamp shade.
| Part | Action |
|---|---|
| Top Ring | Place it flat on a clean surface |
| Bottom Ring | Align under the top ring |
| Vertical Supports | Attach evenly between rings |
| Fasteners | Tighten securely to hold frame |
Cutting And Attaching Fabric
Making a lampshade at home needs careful fabric cutting and attaching. This guide helps you get clean edges and a smooth finish.
Follow simple steps to measure, cut, glue, and secure fabric well on your lampshade frame.
Cutting Fabric To Fit
Measure the lampshade frame’s height and circumference. Add extra fabric for overlap and folding.
- Measure the height of the frame from top to bottom.
- Measure around the frame to find the circumference.
- Add 1 to 2 inches to the height and length for folding edges.
- Mark these measurements on the fabric with chalk or pencil.
- Cut the fabric carefully with sharp scissors along the marks.
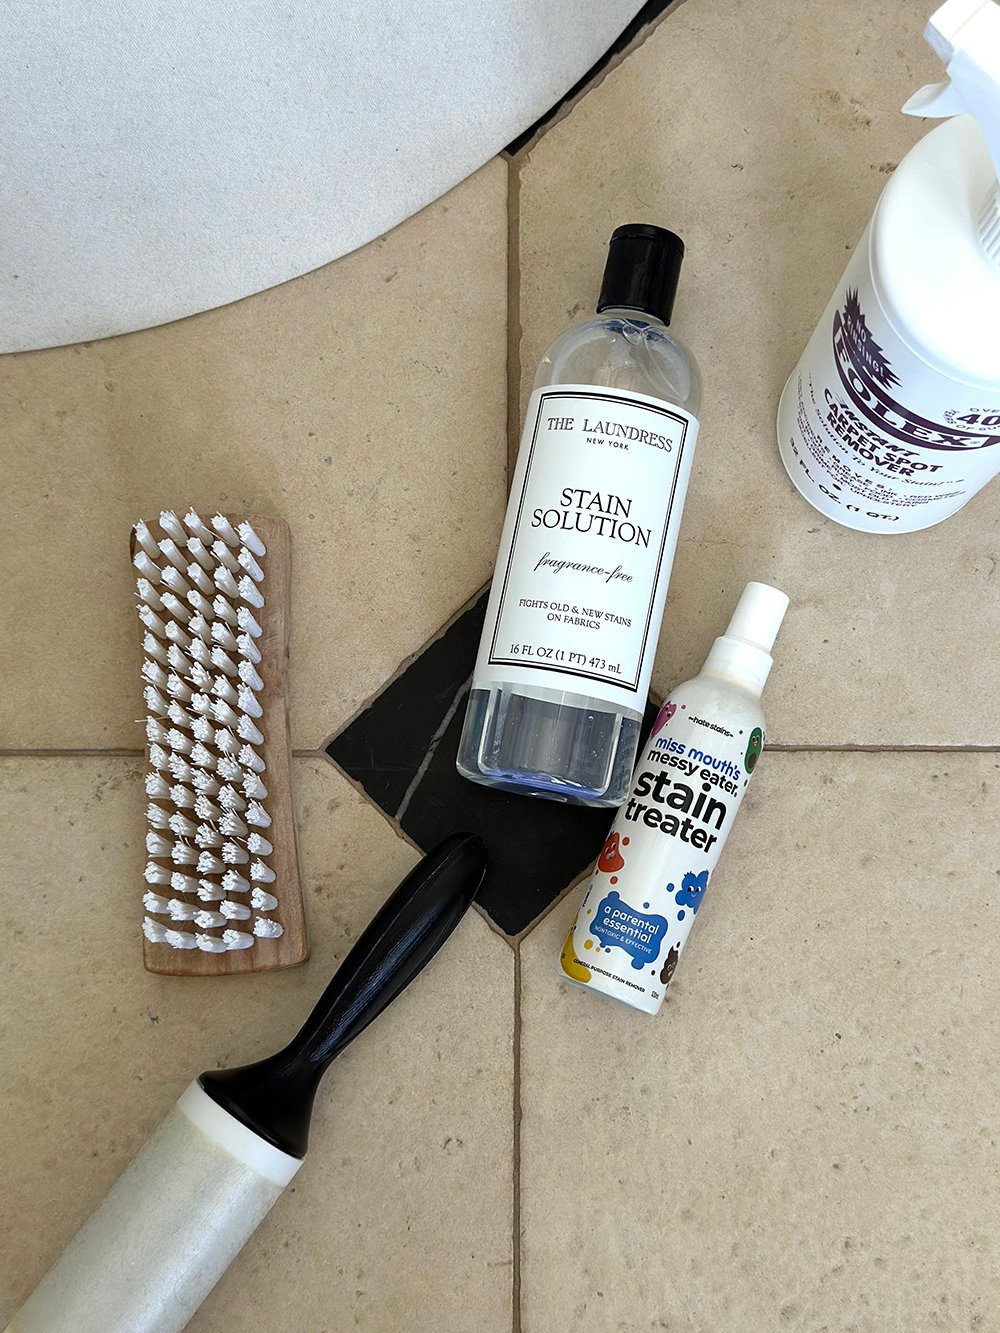
Applying Adhesive
Use the right glue that works on fabric and the lampshade frame. Apply it evenly for a strong hold.
| Adhesive Type | Best Use |
|---|---|
| Spray Adhesive | Even coat, quick drying |
| Fabric Glue | Strong hold, flexible |
| Hot Glue | Fast bond, good for edges |
Apply glue to small sections to avoid drying before you attach fabric. Press fabric firmly onto glued areas.
Securing The Fabric
Secure fabric edges with folding and pressing. Use clips or pins before final fixing.
- Fold fabric edges inward to hide raw sides.
- Press folded edges with glue for a clean look.
- Use small clips or clothespins to hold fabric while drying.
- Check for smoothness and remove wrinkles by gently stretching fabric.
- Let glue dry fully before using the lampshade.

Credit: www.theadoredabode.com
Adding Finishing Touches
After shaping your lamp shade, the final details make it look great. These steps help your lamp shade last and look neat.
Pay close attention to trimming, decorating, and sealing. Each part adds to the shade's strength and style.
Trimming Excess Material
Remove any extra fabric or paper hanging beyond the frame. Use sharp scissors for clean edges. This makes the lamp shade look tidy and professional.
- Lay the lamp shade flat on a clean surface.
- Cut away loose or uneven edges carefully.
- Check all sides for uniform trimming.
- Use a small blade to trim near tight spots.
- Clean up small fibers or threads left behind.
Decorative Elements
Add ribbons, beads, or lace to give your lamp shade a unique look. Choose decorations that match your room's style. Glue or sew decorations carefully to avoid damage.
Use this simple table to pick decoration types based on style:
| Style | Decoration |
| Modern | Metallic trim or minimal ribbons |
| Classic | Lace edges or pearl beads |
| Bohemian | Colorful tassels or fabric flowers |
Sealing And Protecting
Seal your lamp shade to protect it from dust and light damage. Use a clear spray or brush-on sealant safe for your material. This keeps the fabric or paper strong and clean longer.
- Choose a sealant suitable for fabric or paper.
- Work in a well-ventilated area.
- Apply a thin, even coat over the entire shade.
- Let it dry completely before using the lamp.
- Repeat if extra protection is needed.
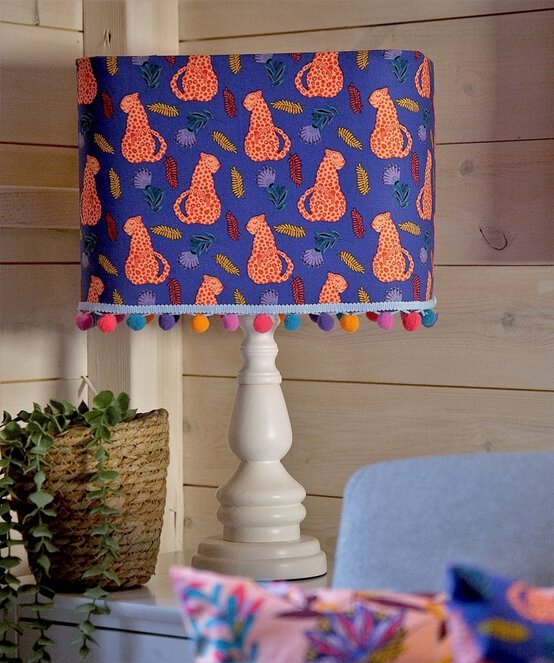
Tips For Custom Designs
Creating a lamp shade at home allows you to add a personal touch to your space. Custom designs make your lamp stand out and fit your style perfectly.
Use simple ideas to make your lamp shade unique. Focus on patterns, colors, and textures to create a beautiful result.
Using Patterns
Patterns give your lamp shade character and charm. Choose shapes and designs that match your room’s style. You can use stencils or freehand drawings to create these patterns.
- Geometric shapes for a modern look
- Floral prints for a soft, natural feel
- Stripes or dots for a playful design
- Abstract art for a creative touch
Incorporating Colors
Color changes how light flows through your lamp shade. Pick colors that match your room or add a pop of brightness. Try blending two or three colors for a layered effect.
| Color | Effect |
| White | Soft and clean light |
| Yellow | Warm and cozy glow |
| Blue | Cool and calm atmosphere |
| Red | Bold and energetic feel |
Experimenting With Textures
Textures add depth and interest to your lamp shade. Mix smooth and rough materials to create a unique look. Use fabric, paper, or even natural elements like leaves.
- Silk or satin fabric for smooth shine
- Burlap for a rustic feel
- Handmade paper for an artistic look
- Twine or rope for a natural touch
Common Mistakes To Avoid
Making a lampshade at home can be fun and creative. But, people often make mistakes that affect the final look. Here are some common pitfalls and how to avoid them.
Uneven Fabric Stretch
Uneven fabric stretch can ruin the look of your lampshade. It makes the fabric look wrinkled and unprofessional. Always ensure the fabric is stretched equally.
- Use a flat surface to lay the fabric
- Measure and cut the fabric carefully
- Apply even pressure when attaching the fabric
Poor Adhesion
Poor adhesion can cause the fabric to peel away. This happens when the glue is not applied properly. Make sure to use the right amount of adhesive.
| Adhesive Type | Use |
| Fabric Glue | Strong hold for fabrics |
| Spray Adhesive | Quick drying |
| Hot Glue | Easy to apply |
Ignoring Safety Precautions
Ignoring safety precautions can be risky. Always work in a well-ventilated area and wear protective gear. This keeps you safe from harmful fumes and injuries.

Credit: www.smorhome.com
Frequently Asked Questions
How Do I Choose Materials For A Homemade Lamp Shade?
Select lightweight, translucent fabrics or paper for even light diffusion. Use sturdy frames like wire or embroidery hoops. Choose materials that suit your lamp’s size and style for best results.
What Tools Are Needed To Make A Lamp Shade At Home?
You’ll need scissors, glue or adhesive tape, wire cutters, and a frame. Optional tools include a sewing kit for fabric shades and paint for decoration.
How Long Does It Take To Make A Diy Lamp Shade?
Typically, it takes 1 to 3 hours depending on complexity. Simple designs are quicker, while detailed decorations require more time and patience.
Can I Customize The Lamp Shade Design Easily?
Yes, customizing is easy. Use different fabrics, colors, and patterns. Add embellishments like ribbons, beads, or paint to match your decor.
Conclusion
Making a lamp shade at home can be fun and simple. You only need a few materials and some patience. This project lets you add a personal touch to your space. Try different colors and shapes to fit your style.
Crafting your own lamp shade saves money and feels rewarding. Enjoy the process and light up your room with your creation. Give it a try and see how easy it can be. Your home will look brighter and more unique.