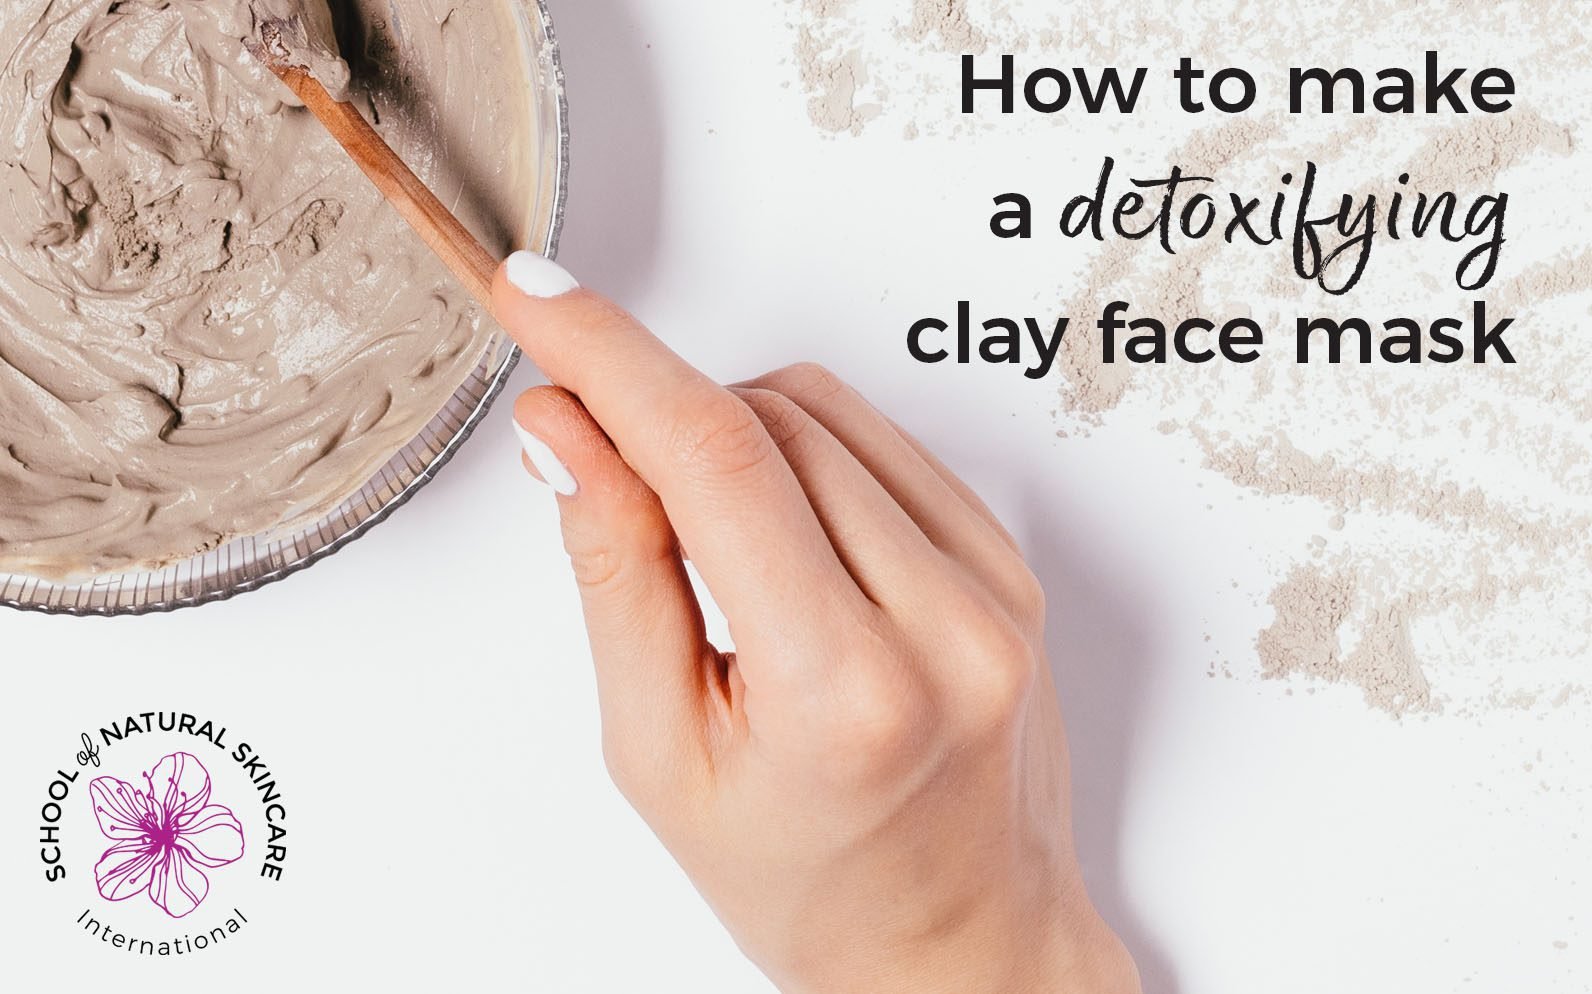
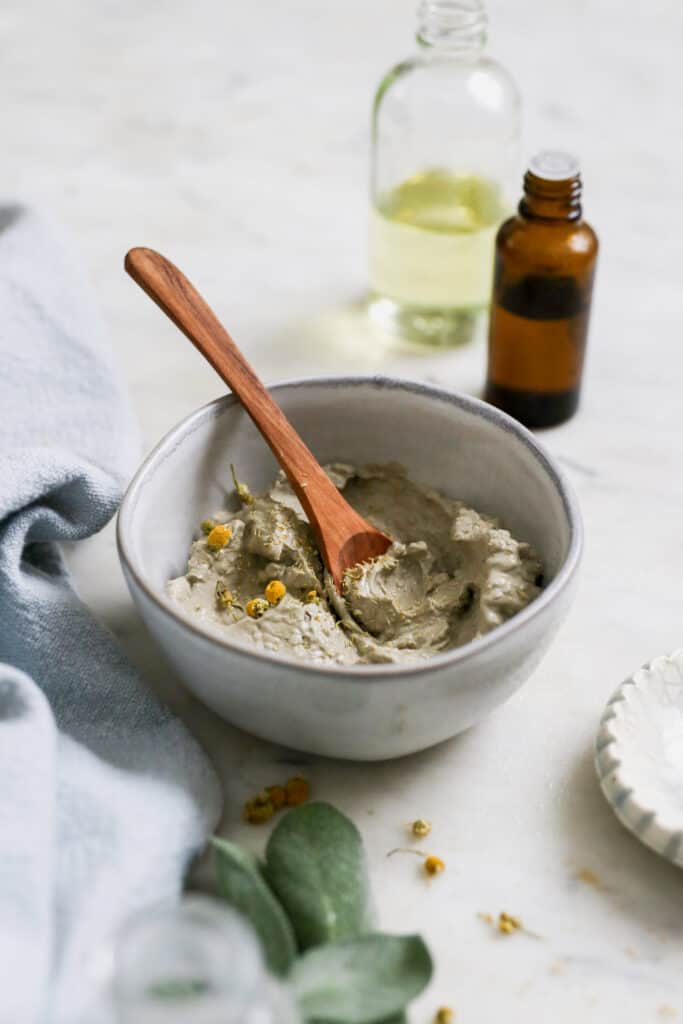
Are you ready to give your skin a fresh, natural boost without spending a fortune? Making a clay mask at home is easier than you think.
With just a few simple ingredients, you can create a powerful skincare treatment tailored to your needs. Imagine feeling the cool, soothing clay cleanse your pores and leave your skin glowing. Keep reading, and you’ll discover step-by-step instructions to make your own clay mask that works wonders for your skin.
Your glow-up starts here!

Credit: essentiallynatural.co.za
Benefits Of Clay Masks
Clay masks are easy to make at home with natural ingredients. They help clean and refresh your skin.
Using clay masks regularly can improve your skin’s health and appearance. They offer many benefits for all skin types.
Detoxifying Properties
Clay masks pull out dirt and toxins from your skin. They act like a magnet to remove impurities.
This detox effect helps reduce acne and leaves your skin feeling clean. It also helps clear clogged pores.
Improving Skin Texture
Clay masks gently exfoliate dead skin cells. This makes your skin smooth and soft.
Regular use can reduce roughness and improve the overall look of your skin. It also helps brighten dull skin.
Balancing Oil Production
Clay masks absorb extra oil from your skin. This helps control shine and reduces oily patches.
Balanced oil levels help prevent breakouts and keep your skin comfortable. It is great for oily and combination skin.
Types Of Clay For Masks
Clay masks are a popular choice for skincare. They help cleanse and rejuvenate the skin. Different clays offer various benefits. Each type suits different skin types and needs.
Here, we explore four types of clay. Discover which one is best for your skin.
Bentonite Clay
Bentonite clay is great for oily skin. It absorbs excess oil and unclogs pores. It is derived from volcanic ash. This clay is known for its ability to remove toxins.
Kaolin Clay
Kaolin clay is gentle and perfect for sensitive skin. It comes in various colors, each with unique benefits. White kaolin is the mildest, while red kaolin is more absorbent.
- White Kaolin: Ideal for dry skin
- Yellow Kaolin: Good for exfoliation
- Red Kaolin: Best for oily skin
French Green Clay
French green clay is known for its healing properties. It is suitable for all skin types. This clay helps tighten pores and tone the skin. It also promotes circulation and leaves skin refreshed.
Rhassoul Clay
Rhassoul clay is rich in minerals. It is sourced from the Atlas Mountains in Morocco. This clay is excellent for hydrating and softening the skin. It is suitable for both hair and skin treatments.
Essential Ingredients To Add
Making a clay mask at home is simple and fun. The right ingredients make your mask effective and gentle. These ingredients help cleanse, nourish, and soothe your skin.
This guide covers three key ingredient groups to add for a balanced clay mask. Learn about natural liquids, oils, and soothing agents to improve your mask.
Natural Liquids
Natural liquids help mix the clay and add hydration. They are the base of your mask and affect its texture and skin benefits.
- Water – Simple and pure, it thins the clay for easy application.
- Green tea – Rich in antioxidants, it refreshes and calms skin.
- Rose water – Adds a gentle floral scent and soothes irritation.
- Aloe vera juice – Hydrates deeply and cools inflamed skin.
Boosting With Oils
Oils add moisture and help repair the skin barrier. They also make the mask less drying.
| Oil | Skin Benefit |
|---|---|
| Jojoba oil | Balances oil production and softens skin |
| Argan oil | Rich in vitamin E for nourishment |
| Sweet almond oil | Calms and soothes dry, sensitive skin |
| Tea tree oil | Helps fight acne with antibacterial properties |
Adding Soothing Agents
Soothing agents reduce redness and irritation. They make your clay mask comfortable to wear.
Here are common soothing agents you can add:
- Chamomile extract – Calms sensitive skin and reduces redness.
- Oatmeal powder – Gently exfoliates and soothes inflammation.
- Honey – Moisturizes and has antibacterial effects.
- Calendula oil – Heals and soothes irritated skin.
Step-by-step Mask Preparation
Making a clay mask at home is easy and fun. You only need a few simple ingredients.
This guide will help you prepare your clay mask with clear steps. Follow them carefully for best results.
Measuring Ingredients
Start by measuring all ingredients accurately. Use a small bowl and measuring spoons for this.
Common ingredients include clay powder, water, and optional oils or honey. Measure each one before mixing.
- Use 2 tablespoons of clay powder
- Add 1 tablespoon of water or rose water
- Optional: 1 teaspoon of honey or oil
Mixing Techniques
Mix ingredients gently with a spoon or spatula. Stir until the mixture is smooth and lump-free.
Use slow circular motions to blend the clay and liquids well. Avoid adding too much water at once.
- Combine dry ingredients first
- Add liquids slowly while stirring
- Stop when the mask feels creamy
Adjusting Consistency
The mask should be thick but spreadable. Adjust by adding small amounts of water or clay.
If the mask is too runny, add more clay powder. If it is too thick, add a little water to soften it.
- For thicker mask: add ½ teaspoon clay
- For thinner mask: add ½ teaspoon water
- Mix well after each addition
Application Tips
Clay masks can enhance your skin's texture and glow. Applying them correctly maximizes their benefits.
Follow these simple steps to ensure your clay mask works effectively. They help you achieve the best results.
Preparing Your Skin
Before applying a clay mask, ensure your skin is clean. Remove any makeup or dirt from your face.
Use a gentle cleanser to wash your face. Pat it dry with a soft towel to avoid irritation.
- Avoid using hot water; it can dry out your skin.
- Exfoliate gently if needed, but not more than twice a week.
- Apply a warm towel to open up your pores.
Applying The Mask Evenly
Apply the clay mask evenly on your face. Use your fingers or a soft brush.
Start from the center of your face and move outwards. Avoid the eyes and mouth area.
- Apply a thin, even layer for best results.
- Ensure all areas, including the nose and chin, are covered.
- Do not layer too thickly; it may not dry properly.
Recommended Duration
Leave the clay mask on for 10 to 15 minutes. Do not let it dry completely if your skin is sensitive.
Rinse off with lukewarm water once it starts to tighten. Pat your face dry with a clean towel.
- Check the mask’s label for specific timing instructions.
- Use once a week for normal skin, twice for oily skin.
- Follow up with a light moisturizer to keep your skin hydrated.

Credit: www.nzherald.co.nz
Aftercare For Glowing Skin
After using a clay mask, your skin needs gentle care to stay healthy and bright. Proper aftercare helps keep your skin soft and glowing.
Taking the right steps after rinsing your mask supports your skin’s natural balance and hydration.
Rinsing Methods
Use lukewarm water to rinse off the clay mask. Hot water can dry out your skin and cause irritation.
Gently wash the mask away with your hands or a soft cloth. Avoid scrubbing, as this can hurt your skin.
- Use lukewarm water for rinsing
- Gently remove mask with hands or soft cloth
- Do not scrub or rub skin hard
Moisturizing Options
After rinsing, apply a light moisturizer to lock in hydration. Choose products that suit your skin type.
Natural oils like jojoba or almond oil work well for dry skin. For oily skin, use a water-based moisturizer to avoid clogging pores.
- Use light moisturizer after mask
- Try natural oils for dry skin
- Pick water-based lotions for oily skin
Frequency Of Use
Use a clay mask one to two times a week. Too often can dry your skin or cause irritation.
Adjust frequency based on how your skin feels. If skin feels tight, reduce how often you apply the mask.
- Apply mask 1-2 times weekly
- Watch skin’s reaction carefully
- Reduce use if skin feels tight
Common Mistakes To Avoid
Making a clay mask at home can be simple and safe. Yet, some mistakes may harm your skin or reduce the mask’s benefits. Avoid these common errors to get the best results.
Learn what to watch out for and how to make your clay mask safe and effective.
Overuse Risks
Using a clay mask too often can dry out your skin. It can cause redness, irritation, or breakouts. Limit use to avoid these problems.
- Apply the mask once or twice a week only.
- Listen to your skin's reaction after each use.
- Stop use if your skin becomes very dry or irritated.
Incorrect Mixing
Mixing clay with the wrong liquids or wrong amounts changes the mask’s effect. This can cause lumps or reduce benefits.
| Mistake | Effect | Tip |
| Using water only | Less skin nourishment | Use aloe vera or rose water |
| Too much liquid | Runny mask, hard to apply | Start with small amounts, add slowly |
| Too little liquid | Dry and crumbly mask | Mix until smooth paste forms |
Ignoring Skin Type
Clay masks suit different skin types in different ways. Using the wrong clay or ingredients can worsen skin problems.
- Oily skin:Bentonite or green clay to absorb oil.
- Dry skin:Kaolin clay with moisturizing additions.
- Sensitive skin:White clay, gentle and soothing.
Credit: helloglow.co
Customizing Masks For Skin Types
Clay masks can help your skin feel fresh and clean. You can make a mask at home with simple ingredients. Adjust the recipe to fit your skin type for the best results.
Different skin types need different care. Here are tips to customize clay masks for dry, oily, and sensitive skin.
For Dry Skin
Dry skin needs moisture and gentle cleansing. Use ingredients that add hydration and avoid harsh drying agents.
- Use white or pink clay for a gentle effect.
- Add honey or aloe vera gel to keep skin soft.
- Mix with milk or yogurt for extra moisture.
- Do not leave the mask on for too long to prevent dryness.
For Oily Skin
Oily skin needs deep cleansing and oil control. Clay masks can help remove excess oil and reduce shine.
| Ingredient | Benefit |
| Green clay | Absorbs oil |
| Tea tree oil | Fights bacteria |
| Lemon juice | Reduces shine |
| Apple cider vinegar | Balances pH |
Mix clay with a few drops of tea tree oil or lemon juice. Avoid using too much liquid to keep the mask firm.
For Sensitive Skin
Sensitive skin needs calming and mild ingredients. Avoid strong clays or irritants that can cause redness.
Try this soothing mask mix:
- Use white or kaolin clay
- Add chamomile tea (cooled)
- Include a teaspoon of oatmeal powder
- Mix gently to avoid lumps
Apply lightly and rinse off with cool water.
Frequently Asked Questions
What Ingredients Are Needed For A Homemade Clay Mask?
You need cosmetic clay, water or aloe vera gel, and optional additives like honey or essential oils. These ingredients cleanse and nourish skin naturally.
How Often Should I Use A Clay Mask At Home?
Use a clay mask 1-2 times per week to avoid drying out your skin. This frequency balances cleansing and hydration.
Can I Customize Clay Masks For Different Skin Types?
Yes, add soothing ingredients like oatmeal for sensitive skin or tea tree oil for oily skin. Customize based on your skin needs.
How Long Should I Leave A Clay Mask On My Face?
Leave the mask on for 10-15 minutes until it dries partially. Avoid over-drying to prevent skin irritation.
Conclusion
Making a clay mask at home is simple and fun. You only need a few natural ingredients. This mask helps clean and refresh your skin. It fits all skin types and is gentle to use. Try different ingredients to find what suits you best.
Enjoy clear, soft skin without harsh chemicals. Save money by making your own mask. Give your skin some care and feel the difference. Start your homemade skincare routine today and see the results.