Are you ready to upgrade your bathroom with a new vanity but worried about the plumbing part? Installing bathroom vanity plumbing might sound tricky, but with the right steps, you can do it yourself and save money.
This guide will walk you through each step clearly and simply, so you know exactly what to do. By the end, you'll feel confident handling your bathroom’s plumbing like a pro. Keep reading, and let’s make your bathroom project easier than you ever thought possible!

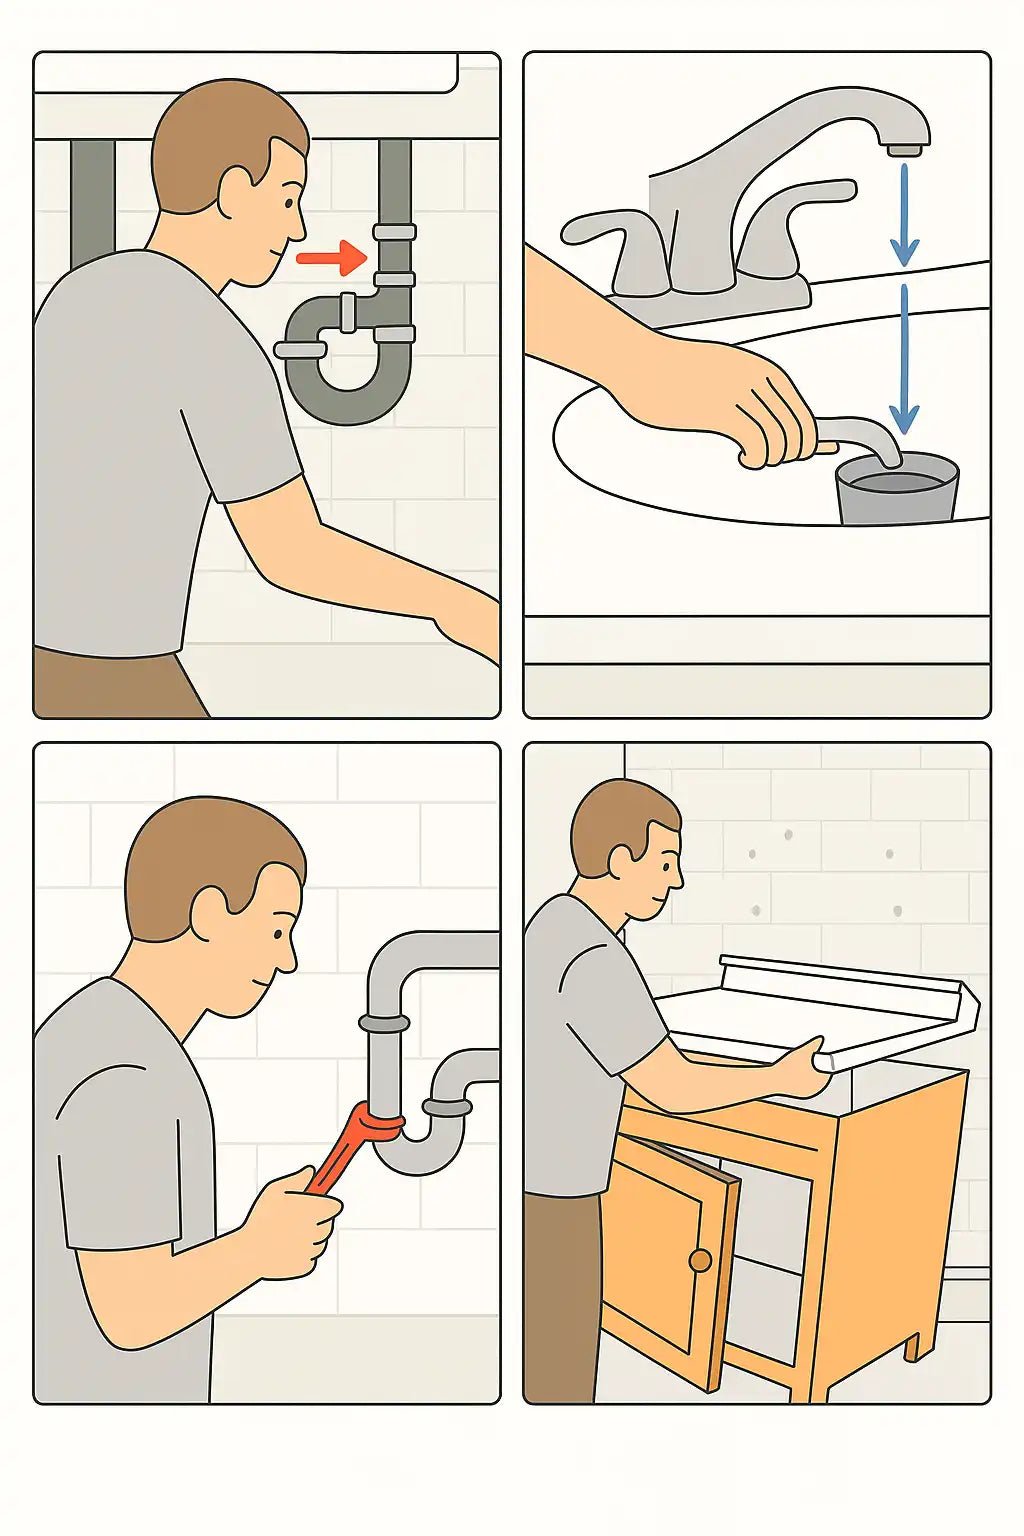
Credit: www.youtube.com
Tools And Materials Needed
Installing bathroom vanity plumbing requires the right tools and materials. Using proper items makes the job easier and safer.
This guide lists essential plumbing tools and common vanity fixture materials. Prepare these before starting your project.
Essential Plumbing Tools
Good plumbing tools help you fit pipes and fixtures without damage. They save time and reduce mistakes.
- Adjustable wrench: Tightens or loosens nuts and bolts of various sizes.
- Pipe wrench: Grips and turns metal pipes with strong force.
- Slip-joint pliers: Useful for gripping irregular shapes and tightening fittings.
- Pipe cutter: Cuts copper or PVC pipes cleanly and quickly.
- Plumber’s tape (Teflon tape): Seals threaded pipe joints to prevent leaks.
- Hacksaw: Cuts through metal or plastic pipes if needed.
- Bucket: Catches water when disconnecting pipes.
- Level: Ensures vanity and pipes are installed straight.
Vanity And Fixture Materials
Choose the right vanity and fixture materials to ensure durability and good performance. These parts connect your sink to the water supply and drain.
- Bathroom vanity cabinet: Holds the sink and provides storage.
- Sink basin: The bowl where water collects and drains.
- Faucet: Controls water flow and temperature.
- Drain assembly: Connects sink drain to plumbing pipes.
- P-trap: A curved pipe that prevents sewer gases from entering the bathroom.
- Water supply lines: Flexible tubes that bring water to the faucet.
- Pipe fittings (elbows, couplings): Connect pipes and change directions.
- Silicone caulk: Seals edges to prevent water leaks.
Prepare The Installation Area
Preparing the area is important before installing your bathroom vanity plumbing. It helps avoid problems later and makes the work easier.
Follow these steps to get your space ready for the new vanity plumbing installation.
Turn Off Water Supply
Start by turning off the main water supply to the bathroom. This stops water flow and prevents leaks during installation.
- Locate the main water shutoff valve.
- Turn the valve clockwise to close it.
- Open the bathroom faucet to drain any remaining water.
Remove Old Vanity And Fixtures
Remove the old vanity carefully to avoid damage to the plumbing lines. Also, take out all fixtures like faucets and drains.
- Disconnect water supply lines using a wrench.
- Unscrew mounting bolts holding the vanity.
- Lift the vanity away from the wall.
- Remove the sink and faucet.
Clean And Inspect Plumbing Lines
After removing the old vanity, clean the plumbing lines. Check for damage or leaks before installing new parts.
| Task | What to Check | Action Needed |
| Clean Pipes | Remove debris and old sealant | Use a rag or brush to clean |
| Inspect Valves | Look for cracks or corrosion | Replace if damaged |
| Check Drain Lines | Ensure no clogs or leaks | Clear blockages or repair leaks |
Assemble The Vanity Plumbing
Assembling the vanity plumbing is an important part of installing a bathroom vanity. It connects the sink to the water supply and drain system.
Follow clear steps to install the faucet, drain assembly, and attach the P-trap and drain pipes. Proper assembly prevents leaks and ensures good water flow.
Install Faucet And Drain Assembly
Start by installing the faucet on the sink. Place the faucet into the mounting holes and secure it with nuts underneath.
Next, attach the drain assembly. Insert the drain body through the sink drain hole. Use plumber’s putty to seal the drain flange.
- Tighten the locknut under the sink to hold the drain in place.
- Attach the drain tailpiece to the drain body.
- Make sure all connections are snug but do not overtighten.
Attach P-trap And Drain Pipes
Connect the P-trap to the drain tailpiece. Slide the slip nut over the pipe and tighten it to hold the trap in place.
Attach the other end of the P-trap to the wall drain pipe. Align the pipes so water flows smoothly without leaks.
- Use slip nuts and washers to connect pipes.
- Hand-tighten all connections, then give a quarter turn with a wrench.
- Check for leaks by running water after assembly.
Connect Water Supply Lines
Connecting water supply lines is a key part of installing bathroom vanity plumbing. It lets water flow to your sink faucet safely.
Use the right tools and parts to attach the supply lines correctly. This helps avoid leaks and water damage.
Attach Supply Tubes To Valves
Start by attaching the supply tubes to the shutoff valves under the sink. Make sure the tubes match the valve size.
Hand-tighten the connections first. Then use a wrench to secure them, but do not over-tighten to avoid damage.
- Check if washers are inside the fittings.
- Align tubes straight to valves before tightening.
- Tighten with a wrench gently after hand-tightening.
Check For Proper Fit And Tightness
After connecting the tubes, check if they fit well and feel secure. Loose connections can cause leaks.
Turn on the water supply and look for drips. Tighten any spots that leak slightly, but avoid overtightening.
- Look for water drops around connections.
- Use a cloth to dry and monitor leaks.
- Tighten only if leaks appear.
Mount The Vanity
Mounting the bathroom vanity properly keeps it stable and safe. You need to position it right and secure it firmly to the wall.
Follow the steps carefully to avoid damage and ensure a strong hold for your vanity.
Position Vanity Against Wall
Place the vanity flush against the wall where you want to install it. Make sure it is level and centered with the plumbing connections.
- Check that the vanity sits flat on the floor without rocking.
- Use a level tool to confirm it is even side to side and front to back.
- Adjust shims under the vanity if needed to fix any unevenness.
- Ensure the plumbing pipes fit through the openings at the back.
Secure Vanity With Anchors And Screws
Attach the vanity to the wall securely using anchors and screws. This prevents movement and holds the unit firmly in place.
| Tool or Material | Purpose |
| Wall anchors | Hold screws in drywall or plaster |
| Long screws | Attach vanity frame to wall studs |
| Drill | Make pilot holes for anchors and screws |
| Level | Check vanity alignment after securing |
Follow these steps to secure your vanity:
- Find wall studs behind the vanity location using a stud finder.
- Mark the stud positions on the vanity frame.
- Drill pilot holes through the vanity frame at marked spots.
- Insert wall anchors if you miss a stud or need extra support.
- Drive screws through the vanity frame into the studs or anchors.
- Check with the level to ensure the vanity is still even.
- Tighten screws fully but avoid over-tightening to prevent damage.
Test For Leaks And Functionality
Before adjusting the bathroom vanity plumbing, it's essential to test for leaks and functionality to ensure everything is working correctly.
Turn On Water And Inspect Connections
Turn on the water supply to the bathroom vanity and inspect the connections for any signs of leaks or damage.
- Check the water supply lines for any signs of cracks or damage.
- Inspect the faucet and drain connections for any leaks or corrosion.
- Verify that the water pressure is within the recommended range.
Adjust And Tighten As Needed
Adjust and tighten any loose connections or fittings as needed to prevent leaks and ensure proper functionality.
| Task | Instructions |
|---|---|
| Check and adjust water supply lines | Turn off the water supply and adjust the lines as needed to prevent leaks. |
| Inspect and tighten faucet and drain connections | Use a wrench to tighten any loose connections or fittings. |
| Verify water pressure | Check the water pressure gauge to ensure it's within the recommended range. |
Final Touches
After completing the plumbing installation for your bathroom vanity, it's essential to focus on the final touches to ensure a clean and professional finish.
Seal Around Vanity Edges
Apply a bead of caulk to the edges of the vanity, where it meets the countertop and walls. This will create a waterproof seal and prevent water damage.
| Area to Seal | Description |
| Vanity-to-Countertop Edge | Apply caulk to the joint where the vanity meets the countertop. |
| Vanity-to-Wall Edge | Apply caulk to the joint where the vanity meets the wall. |
| Drain-to-Vanity Edge | Apply caulk to the joint where the drain meets the vanity. |
Clean Up Work Area
Thoroughly clean the work area, removing any debris, tools, and materials used during the installation process.
- Dispose of any hazardous materials, such as chemicals or adhesives.
- Wipe down surfaces with a damp cloth to remove any dirt or grime.
- Organize tools and materials for future use or storage.

Credit: www.familyhandyman.com

Credit: www.youtube.com
Frequently Asked Questions
How Do I Prepare Plumbing For A Bathroom Vanity?
Start by turning off the water supply. Remove old fixtures and clean the area. Check pipes for leaks and measure pipe locations accurately before installation.
What Tools Are Needed For Bathroom Vanity Plumbing?
Common tools include a pipe wrench, adjustable wrench, plumber’s tape, hacksaw, basin wrench, and plumber’s putty. Having these ensures smooth installation and proper sealing.
How Do I Connect Water Supply Lines To The Vanity?
Attach flexible water supply lines to shut-off valves. Use plumber’s tape on threads to prevent leaks. Tighten connections securely but avoid overtightening.
How To Install A Drain Pipe For Bathroom Vanity?
Connect the drain tailpiece to the sink drain. Attach the P-trap to the tailpiece and wall drain pipe. Ensure all connections are tight and sealed to avoid leaks.
Conclusion
Installing bathroom vanity plumbing can seem tricky at first. Take your time and follow each step carefully. Check all connections for leaks before finishing. A properly installed vanity saves water and avoids damage. You can handle this project with patience and care.
Remember, safety comes first—turn off water before starting. Soon, you will enjoy a neat and functional bathroom space. Keep tools ready and instructions close by. Small efforts now lead to big benefits later. Ready to try it yourself? You’ve got this!