

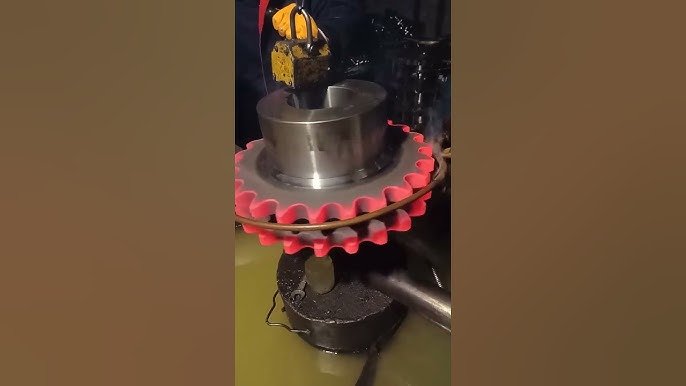
Have you ever wanted to make your steel tools or knives stronger and more durable without spending a fortune? Hardening steel at home is easier than you might think, and it can transform your worn-out metal into something tough and reliable.
In this guide, you’ll discover simple steps you can follow to harden steel safely and effectively. Whether you're a hobbyist, DIY enthusiast, or just curious, learning this skill will give you more control over your projects and help you get the most out of your materials.
Keep reading, and you’ll unlock the secrets to making your steel last longer and perform better.

Choosing The Right Steel
Hardening steel at home starts with picking the right type of steel. Not all steels can be hardened well.
Choosing steel with the right properties helps you get the best results. Knowing what to look for saves time and effort.
Types Suitable For Hardening
Steels with higher carbon content are easier to harden. Low carbon steels do not harden well.
Common types of steel that you can harden include tool steels and some carbon steels. These steels change their hardness after heating and cooling.
- High carbon steel (0.6% to 1.0% carbon)
- Medium carbon steel (0.3% to 0.6% carbon)
- Tool steels like O1 and W1
- Some alloy steels designed for heat treatment
Identifying Carbon Content
Carbon content determines if steel can harden. More carbon means harder steel after heat treatment.
You can check carbon content by reading steel grades or testing with simple tools.
- Look for steel marked with grades like 1095 or 1080
- Use a file test: high carbon steel resists filing
- Ask your supplier for carbon percentage
- Use a carbon test kit for more accuracy
Essential Tools And Materials
Hardening steel at home needs the right tools and materials. These help you heat, cool, and protect the steel.
Using proper tools makes the process safe and effective. You will learn about heat sources, quenching mediums, and safety gear.
Heat Source Options
You need a strong heat source to reach high temperatures. The steel must get hot enough to change its structure.
Common heat sources include tools you can find or use at home or in a workshop.
- Propane torch: easy to control and heats small areas well
- Charcoal forge: good for heating larger steel pieces
- Oxy-acetylene torch: very hot, used for quick heating
- Electric kiln or furnace: holds steady heat for even heating
Quenching Mediums
Quenching cools the hot steel quickly. This step hardens the metal by changing its internal structure.
You can use different liquids to quench steel. Each liquid cools at a different speed and affects hardness.
- Water: cools very fast but may cause cracks
- Oil: cools slower and reduces cracking risk
- Brine (salt water): cools faster than plain water
- Air: slowest cooling, used for softer steel
Safety Gear
Safety gear protects you from heat, sparks, and hot metal. Always wear it during hardening.
Using the right gear lowers the chance of burns, eye injury, and breathing problems.
- Heat-resistant gloves to protect your hands
- Safety goggles or face shield for eye protection
- Long sleeves and pants made of natural fibers
- Respirator or mask if fumes are present
- Closed-toe shoes to protect your feet
Preparing Steel For Hardening
Preparing steel correctly is key for effective hardening. It helps the steel gain strength and durability.
This guide covers cleaning, shaping, and marking heat zones before hardening steel at home.
Cleaning And Shaping
Remove all dirt, oil, and rust from the steel. Clean steel ensures even heating during hardening.
- Use a wire brush or sandpaper to clean the surface.
- Wash with warm soapy water and dry thoroughly.
- Shape the steel to the desired form using files or grinders.
- Remove sharp edges and burrs for safety and better heat treatment.
Marking Heat Zones
Marking heat zones helps control heating areas during hardening. It ensures you heat only needed parts.
| Heat Zone | Description | Marking Method |
| Hardening Zone | The part to be hardened by heat | Use heat-resistant marker or chalk |
| Non-Hardening Zone | Areas to keep soft or flexible | Cover with fire-resistant paint or tape |
| Transition Zone | Area between hard and soft zones | Mark lightly with pencil or thin lines |
Heating Process
Hardening steel needs careful heating to the right temperature. This process changes the steel's structure and makes it stronger.
Understanding how to heat steel properly helps you get the best results at home. Watch for clear signs that show the steel is ready.
Achieving Proper Temperature
Heat the steel evenly to avoid weak spots. Use a reliable heat source like a forge or a propane torch.
- Bring the steel slowly to the target temperature.
- Keep the steel at the right heat for a few minutes.
- Use a magnet to test the steel’s temperature.
- A bright red color usually means the steel is hot enough.
Signs Steel Is Ready
Knowing the signs helps you stop heating at the perfect time. This avoids damage to the steel.
| Sign | Description | What It Means |
| Color Change | Steel glows bright red or orange. | Steel reached hardening temperature. |
| Magnet Test | Magnet no longer sticks to steel. | Steel is above its Curie point and ready. |
| Uniform Heat | Steel glows evenly without dark spots. | Steel is heated properly and evenly. |
Quenching Techniques
Quenching is a key step in hardening steel at home. It cools the metal quickly to make it harder.
Choosing the right quench and timing affects the steel's strength and durability.
Choosing The Right Quench
Different liquids cool steel at different speeds. Water cools very fast, oil cools slower, and air cools the slowest.
- Water: Use for fast cooling but watch for cracks.
- Oil: Safer and less likely to crack steel.
- Air: Use for delicate or thin steel pieces.
- Brine: Salt water cools faster than plain water.
Timing And Method
Cool the steel just long enough to harden it. Too long or too short affects the results.
| Cooling Time | Effect on Steel |
| Too short | Steel stays soft, no hardening |
| Just right | Steel hardens with good strength |
| Too long | Steel becomes brittle or cracks |
Tempering The Steel
Tempering steel at home makes it stronger and less likely to break. This process involves heating the steel to a specific temperature and then cooling it.
Proper tempering changes the steel's properties, improving its toughness. It is an essential step after hardening steel.
Reducing Brittleness
Steel becomes brittle after hardening. Tempering reduces this brittleness. Use consistent heat to achieve the desired toughness.
- Heat the steel to the right temperature.
- Hold the temperature for a specific time.
- Cool the steel slowly.
Temperature Guidelines
Each type of steel needs a different tempering temperature. Follow guidelines to ensure the best results.
| Steel Type | Temperature (°C) |
| Carbon Steel | 150-200 |
| Alloy Steel | 300-350 |
| Tool Steel | 200-250 |
Testing Hardness
Hardening steel at home requires testing its hardness. This ensures the steel is strong and durable.
There are simple tests to measure steel hardness. These tests help you know if the hardening process worked.
Simple Hardness Tests
One easy test is the file test. Rub a metal file over the steel's surface.
If the file slides and does not bite, the steel is hard. If it bites, the steel needs more hardening.
- File test for quick results
- Surface scratch test for beginners
- Use a magnet to check changes
Interpreting Results
Understanding test results helps improve the hardening process. If the steel is too soft, repeat the heating.
Compare the steel's reaction to tests with known samples. This can guide adjustments in your hardening technique.
- Soft steel means reheat and quench
- Hard steel passes the file test
- Use known samples for comparison

Common Mistakes To Avoid
Hardening steel at home can be tricky. Avoiding mistakes helps get better results.
Here are common errors to watch out for when hardening steel yourself.
Overheating And Cracking
Overheating steel can cause cracks. Steel must be heated carefully to the right temperature.
If steel gets too hot, its surface can burn or crack. Cracks weaken the metal and ruin the piece.
- Use a reliable thermometer or color guide to check heat
- Heat steel evenly to avoid hot spots
- Do not hold steel in fire too long
Improper Quenching
Quenching is cooling steel quickly in water or oil. Doing it wrong can cause warping or cracks.
Using the wrong liquid or cooling too slowly stops hardening. Cooling too fast can also break steel.
- Choose the right quenching liquid for your steel type
- Cool steel evenly by fully submerging it
- Avoid sudden temperature changes that stress the metal
Maintenance For Hardened Steel
Hardened steel needs care to keep its strength and shape. Proper maintenance stops damage and extends its life.
This guide covers simple ways to protect your steel from rust and check it often for problems.
Preventing Rust
Rust weakens hardened steel and ruins its surface. You can stop rust by keeping the steel dry and clean.
- Wipe the steel with a dry cloth after use
- Apply a thin layer of oil to block moisture
- Store steel in a dry place away from water
- Use rust-resistant sprays or coatings if needed
- Avoid touching steel with wet or dirty hands
Regular Inspection
Check hardened steel often to find cracks, rust, or wear early. This helps fix problems before they get worse.
| Inspection Task | What to Look For | How Often |
|---|---|---|
| Visual Check | Rust spots, cracks, scratches | Weekly |
| Surface Cleaning | Remove dirt and moisture | After each use |
| Oil Application | Even coat to prevent rust | Monthly |
| Deep Inspection | Check hardness and shape | Every 6 months |

Frequently Asked Questions
How Long Should Steel Be Heated For Hardening?
Steel should be heated evenly for about 30 minutes. This ensures the steel reaches the right temperature. Heating time depends on steel thickness and type. Use a thermometer or color change as a guide. Proper heating is crucial for effective hardening.
What Cooling Method Is Best For Steel Hardening?
Quenching in oil or water is common for steel hardening. Water cools faster but can cause cracks. Oil cools slower, reducing stress and cracking. Choose the method based on steel type and desired hardness. Controlled cooling improves steel toughness and durability.
Can I Harden Steel Without Special Equipment?
Yes, basic tools like a propane torch and a metal container can work. Safety gear is essential to handle heat and quenching liquids. Monitoring temperature visually or with a thermometer is critical. While not professional, home hardening is possible with care.
What Type Of Steel Is Suitable For Hardening At Home?
Medium-carbon steels like 1045 or 1095 are ideal for home hardening. They respond well to heat treatment and harden effectively. Low-carbon steels do not harden well. Knowing your steel type ensures successful hardening and improved performance.
Conclusion
Hardening steel at home takes care and the right steps. Start with heating the steel evenly until it glows red. Then, cool it quickly by dipping it in oil or water. This process makes steel harder and more durable. Always be safe and use protective gear.
Practice helps you get better results each time. Keep your tools clean and ready for the next project. With patience and care, you can improve your metalwork skills. Try these steps and see the difference in your steel.






