Hanging art on your walls can instantly brighten up any room, but nails aren’t always the best option. Maybe you’re renting and want to avoid damage, or perhaps you simply don’t want holes in your freshly painted walls.
What if you could display your favorite pieces without using a single nail? Imagine transforming your space quickly, cleanly, and without worry. You’ll discover simple, effective ways to hang art that protect your walls and keep your style intact. Keep reading to find out how easy it can be to showcase your creativity—no nails required.

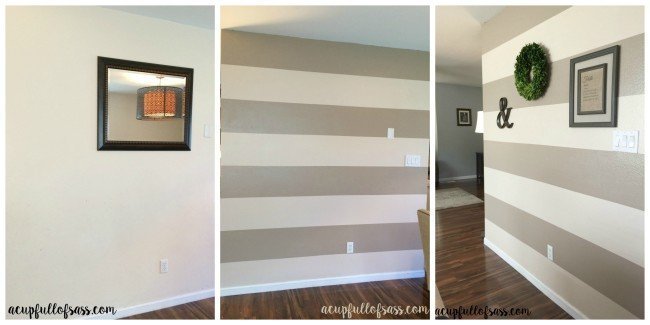
Credit: www.reddit.com
Choose The Right Wall Surface
Hanging art without nails needs a wall that can hold weight safely. Picking the right wall surface helps keep your art secure and your walls damage-free.
Not all walls work well for nail-free hanging. Knowing which surfaces are suitable makes the process easier and safer for your art pieces.
Identify Suitable Wall Materials
Some walls hold nail-free hangers better than others. Smooth, hard surfaces usually give the best results. Common good surfaces include:
- Painted drywall
- Plaster walls with smooth finishes
- Wood paneling
- Concrete or brick walls (using special adhesive hooks)
These surfaces allow adhesives or hooks to stick well. They also support the weight of most framed art and decorations.
Avoid Delicate Or Textured Walls
| Wall Type | Reason to Avoid |
|---|---|
| Wallpapered Walls | Adhesives may peel wallpaper off |
| Textured Walls | Hooks may not stick well on uneven surfaces |
| Delicate Plaster | Surface can crack or crumble under pressure |
| Brick or Stone (without proper hooks) | Adhesives fail on rough, porous textures |
Choosing these walls risks damage or failure of your hanging method. It is best to test a small area first or use alternative display options.
Use Adhesive Hooks And Strips
Hanging art without nails is easy with adhesive hooks and strips. These tools hold frames firmly without damaging walls.
They work well on smooth surfaces and allow for quick changes in your decor. Follow the tips below to use them correctly.
Select Strong, Removable Options
Choose hooks and strips that support your art’s weight. Look for products labeled as removable to avoid wall damage.
- Check the weight limit on the package
- Pick strips with strong adhesive backing
- Use hooks designed for picture hanging
- Avoid permanent adhesives that might peel paint
Prepare The Wall For Application
Clean the wall surface before attaching hooks or strips. Dirt and dust reduce the adhesive’s strength.
- Wipe the area with rubbing alcohol
- Let the wall dry completely
- Avoid using cleaners with oils or wax
Tips For Proper Placement
Position your art carefully for the best look. Measure and mark spots lightly before sticking hooks or strips.
| Tip | Explanation |
| Use a Level | Keep your art straight by checking with a level tool |
| Mark Lightly | Use pencil marks to guide placement without leaving permanent spots |
| Press Firmly | Hold hooks or strips against the wall for 30 seconds to secure |
| Wait Before Hanging | Allow adhesive to set for an hour before hanging art |
Try Picture Hanging Strips
Picture hanging strips let you hang art without using nails. They stick to your wall and frame. This keeps your walls safe from holes.
These strips come in different sizes and strengths. Choose the right ones for your art. They hold your frames firmly in place.
Weight Limits And Sizes
Each type of hanging strip has a weight limit. You must check this before buying. Using the wrong size can cause your art to fall.
| Strip Size | Weight Limit |
| Small | 1 pound (0.45 kg) |
| Medium | 3 pounds (1.36 kg) |
| Large | 5 pounds (2.27 kg) |
| Extra Large | 7.5 pounds (3.4 kg) |
Step-by-step Application
- Clean the wall and frame surface with rubbing alcohol.
- Separate the strips and press two strips together until they click.
- Stick one side of the strip to the frame edge firmly.
- Press the other side of the strip on the wall at the desired spot.
- Hold firmly for 30 seconds to make sure it sticks well.
- Wait one hour before hanging the art on the wall.
Removing Without Damage
To remove strips without damage, pull the tab slowly downwards. Keep it parallel to the wall. Do not pull it outward or fast.
- Pull the tab gently and slowly.
- Do not yank or tear the strip off quickly.
- Use a hairdryer if adhesive feels too sticky.
- Check the wall for any leftover residue and clean it.

Credit: www.goodhousekeeping.com
Explore Command Hooks And Clips
Hanging art without nails is easy with Command hooks and clips. They stick to walls and hold frames securely.
These tools protect your walls from holes and damage. They come in many sizes and styles for different artwork.
Different Styles For Various Art
Choose hooks or clips based on your art’s weight and frame type. Light prints work well with small hooks.
Heavier frames need larger hooks with higher weight limits. Clips are best for canvas or frameless art.
- Small hooks hold up to 1 pound, good for photos or posters
- Medium hooks hold 3-5 pounds, great for framed prints
- Large hooks can hold over 7 pounds, perfect for heavy frames
- Clips grip canvas edges without piercing the material
Installation Tips
Clean the wall surface before applying hooks or clips. Use rubbing alcohol for best results.
Press the hook firmly for 30 seconds. Wait one hour before hanging your art for strong hold.
- Remove dust and grease from the wall
- Apply the adhesive strip to the hook or clip
- Press the hook or clip on the wall firmly
- Wait at least 60 minutes before hanging art
Best Practices For Removal
Remove hooks carefully to avoid wall damage. Pull the adhesive strip slowly straight down.
Do not pull the strip outward or at an angle. This prevents paint from peeling off the wall.
- Hold the hook gently while pulling the strip
- Stretch the adhesive strip slowly down the wall
- Keep pulling until the strip releases completely
- If needed, use a hairdryer to soften the adhesive
Use Wire And Tension Rods
Hanging art without nails is easy with wire and tension rods. This method protects your walls from damage.
You can create a strong support system for your artwork. It works well for different wall types and sizes.
Setting Up Wire Across Walls
Attach tension rods inside the wall frame or window frame. Use a strong wire stretched between rods.
Make sure the wire is tight but not too stretched. This helps hold the weight of your art safely.
- Place rods at the top and bottom of the wall or frame
- Secure wire tightly between rods
- Check for stability before hanging art
Hanging Multiple Pieces Easily
Use hooks or clips on the wire to hang many art pieces. This allows easy changes without wall damage.
You can adjust each piece's height and position quickly. It is great for galleries or changing displays.
- Install multiple hooks or clips on the wire
- Hang art pieces by their frames or wires
- Move pieces without removing the wire system
Consider Leaning And Shelving
Hanging art without nails keeps your walls safe. Leaning and shelving are great methods. They are easy and do not damage the wall.
These techniques offer flexibility. You can change your art display often. Let's explore how to use them effectively.
Leaning Art Against Walls Safely
Leaning art is simple. Place your art on the floor against the wall. This method suits large pieces well.
Ensure the surface is flat. Use small rubber pads to prevent slipping. Keep the art stable and safe.
- Choose a sturdy wall
- Use rubber pads for grip
- Check stability regularly
Using Shelves For Display
Shelves make art display easy. They allow for different heights and styles. You can use a single shelf or multiple shelves.
Install shelves securely. Arrange art pieces by size and theme. This creates an organized and appealing look.
- Install shelves at eye level
- Group similar art together
- Mix different frame sizes
Apply Reusable Putty Or Tack
Using reusable putty or tack is a smart way to hang art without nails. These options keep your walls intact and are easy to apply.
Reusable putty and tack work well with lightweight art. They leave no holes and are simple to remove.
Best Types For Lightweight Art
Some types of putty and tack are better suited for lightweight pieces. They hold firm but are gentle on surfaces.
- Poster putty for posters and thin frames
- Adhesive tack for small canvases and prints
- Removable mounting squares for photo collages
Avoiding Residue And Stains
Preventing residue or stains from putty is important. Choose the right product to keep your walls clean.
Consider these factors when choosing putty:
| Type | Residue Level |
| White putty | Low |
| Blue tack | Medium |
| Clear adhesive | None |
Safety And Maintenance Tips
Hanging art without nails can protect your walls from damage. It also makes it easier to change or move your art.
To keep your art safe and secure, you need to follow some simple safety and maintenance tips.
Checking Adhesive Strength Regularly
Adhesive strips or hooks can lose strength over time. Check them every few weeks to avoid accidents.
Look for signs like slipping or loosening. Replace any adhesive that looks worn out or weak.
- Gently test if the art feels loose
- Clean the wall and art surface before reapplying
- Use fresh adhesive if needed for strong hold
Protecting Art From Damage
Keep your art safe by avoiding direct sunlight. Sunlight can fade colors and damage materials.
Make sure the art hangs away from moisture and heat sources. These can cause warping or mold.
- Place art away from windows with strong sun
- Avoid hanging near heaters or vents
- Dust the art gently with a soft cloth

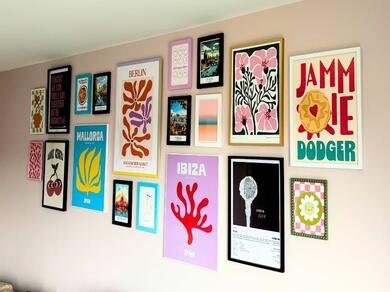
Credit: www.reddit.com
Frequently Asked Questions
What Are The Best Alternatives To Nails For Hanging Art?
Command strips, adhesive hooks, and poster putty are great alternatives. They hold art securely and avoid wall damage. These options are easy to use and remove without leaving marks, making them ideal for renters or those who dislike wall holes.
How To Hang Heavy Art Without Nails Safely?
Use strong adhesive hooks or picture hanging strips rated for heavy weights. Ensure the wall surface is clean and dry before applying. For very heavy pieces, consider leaning art on furniture or using floor stands to avoid damage.
Can I Hang Art Without Nails On Textured Walls?
Yes, but adhesive products may have reduced hold on textured surfaces. Use heavy-duty hooks or specialized wall-friendly adhesives designed for uneven textures. Test a small area first to ensure the product sticks properly without causing damage.
Are Damage-free Hanging Strips Reusable For Wall Art?
Most damage-free strips are designed for one-time use only. They lose adhesive strength after removal. However, some brands offer reusable options. Always check the product details for reusability before purchasing to ensure it suits your needs.
Conclusion
Hanging art without nails keeps your walls safe and clean. You can use hooks, tapes, or strips for easy mounting. These methods save time and avoid damage. Changing your decor becomes simple and quick. Choose the best option for your wall type and art size.
Enjoy your beautiful space without worry or fuss. Art can brighten any room, no nails needed. Try these ideas and see how easy it is.