

Have you ever wondered how to fire a clay pot at home and bring your handmade creation to life? Firing clay is the crucial step that transforms soft, fragile clay into a strong, durable pot you can use or display proudly.
But without the right know-how, the process can feel tricky or even risky. In this guide, you’ll discover simple, clear steps to fire your clay pots safely and effectively—no fancy kiln needed. Keep reading, and you’ll gain the confidence to turn your pottery dreams into reality right in your own space.
Choosing The Right Clay
Firing a clay pot at home starts with picking the right clay. The clay you choose affects how your pot looks and lasts.
Some clays work better for home kilns and low temperatures. Knowing your options helps you get good results.
Types Of Clay For Home Firing
There are many types of clay for pottery. Each type has different firing needs and textures.
- Earthenware Clay:Fires at low temperatures. It is soft and easy to shape.
- Stoneware Clay:Strong and durable. It fires at medium to high temperatures.
- Porcelain Clay:Smooth and white. It fires at very high temperatures.
- Fire Clay:Used for high heat. It is good for kiln shelves and heat-resistant pots.
For home firing, earthenware and stoneware clays are popular. They work well in small kilns.
Preparing Clay For Pottery
Before shaping, clay must be ready. It should be soft and free of air bubbles.
Wedging is a way to prepare clay. It removes air and makes clay smooth.
- Cut the clay into pieces.
- Press and fold the clay repeatedly.
- Remove any hard bits or stones.
- Keep the clay moist but not wet.
Properly prepared clay helps prevent cracks during drying and firing.

Shaping Your Clay Pot
Shaping a clay pot is a key part of pottery making. It changes soft clay into a useful form.
You can shape your pot by hand or use simple tools. This helps make smooth walls and even shapes.
Basic Pottery Techniques
Start by kneading the clay to remove air bubbles. Then form a ball and press the center down to make a hollow.
- Pinching: Use your thumb and fingers to pinch the clay walls.
- Coiling: Roll clay into long ropes, then stack them to build walls.
- Slabbing: Flatten clay into slabs to cut and join shapes.
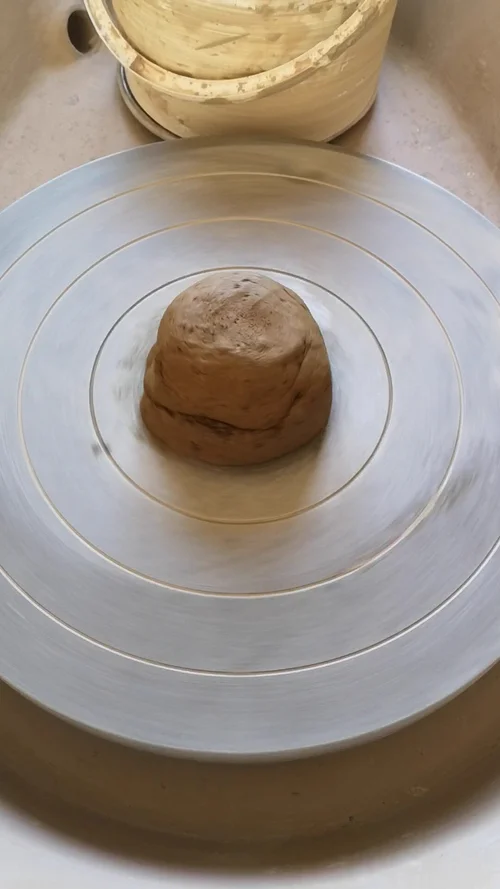
- Wheel Throwing: Spin the clay on a wheel to shape it evenly.
Each method needs practice to shape pots evenly and avoid cracks.
Tools Needed For Shaping
| Tool | Use |
|---|---|
| Pottery Needle | Cut and score clay for shaping |
| Rib Tool | Smooth and shape pot surfaces |
| Wire Cutter | Cut clay from blocks or wheels |
| Sponge | Moisten and smooth clay walls |
| Loop Tool | Trim and hollow out areas |
Drying Your Pot
Drying your clay pot properly is important before firing. It helps the pot keep its shape and avoid damage.
Slow and even drying is the key to a strong and beautiful pot. Let’s look at the right ways to dry your pot.
Proper Drying Conditions
Choose a warm, dry place with good air flow for drying your pot. Avoid direct sunlight or heat sources that dry the pot too fast.
- Place the pot on a flat surface with good air circulation
- Keep the pot away from heaters and windows
- Maintain room temperature between 65°F and 75°F (18°C to 24°C)
- Turn the pot occasionally to dry evenly on all sides
Avoiding Cracks And Warping
Cracks and warping happen when drying is too fast or uneven. Control the drying speed to keep the pot intact.
| Cause | Effect | Prevention |
| Drying too fast | Surface cracks | Dry in shade, avoid heat |
| Uneven drying | Warping or bending | Turn pot regularly |
| Thick walls | Internal stress | Make walls uniform |
Preparing For Firing
Firing a clay pot at home requires careful preparation. This process makes your pottery strong and durable.
Before you start, you must choose the right equipment and follow safety steps. This guide covers what you need to know.
Selecting A Kiln Or Alternative
Choosing the right kiln or alternative firing method is important. Your choice depends on space, budget, and experience.
- Electric kilns are easy to use and control temperature well.
- Gas kilns offer higher heat but need more skill to operate.
- Raku firing uses quick heating and cooling for unique effects.
- Pit firing is a simple outdoor method using wood or charcoal.
- Alternative methods like pit firing require careful monitoring.
Safety Precautions
Firing pottery involves high heat and can be dangerous. Always follow safety rules to protect yourself and others.
| Safety Tip | Reason |
|---|---|
| Wear heat-resistant gloves | Protect your hands from burns |
| Use safety goggles | Shield eyes from heat and debris |
| Keep area well-ventilated | Avoid inhaling harmful fumes |
| Never leave kiln unattended | Prevent accidents and fires |
| Follow kiln manufacturer instructions | Ensure safe and proper use |
Firing Methods At Home
Firing clay pots at home lets you create beautiful pottery. There are different ways to fire your pots depending on your tools and space.
This guide covers three common firing methods you can try at home. Each has its own steps and benefits.
Using An Electric Kiln
An electric kiln is a popular choice for home potters. It heats evenly and reaches high temperatures needed to fire clay.
To use an electric kiln, place your pots inside and set the temperature according to your clay type. The kiln slowly heats up, holds the heat, then cools down.
- Place dry pots inside the kiln on kiln shelves.
- Close the kiln door securely.
- Set a slow temperature ramp to avoid cracks.
- Hold the peak temperature as required for the clay.
- Let the kiln cool before opening the door.
Pit Firing Techniques
Pit firing is an ancient method using an open fire pit. It creates unique colors and textures on your pots.
In a pit firing, pots are placed in a hole filled with combustible materials. The fire burns around them for several hours.
- Dig a shallow pit in the ground.
- Line the pit with small stones or sand.
- Place pots inside the pit, spaced apart.
- Add wood, leaves, and other burnable materials.
- Light the fire and let it burn until cool.
Using A Homemade Kiln
You can build a simple kiln at home with bricks or metal parts. It gives more control than a pit fire but is less costly than an electric kiln.
| Material | Purpose |
|---|---|
| Firebricks | To build kiln walls and retain heat |
| Metal drum or barrel | Acts as the kiln body |
| Firewood or charcoal | Fuel for the fire |
| Thermometer | To monitor temperature inside the kiln |
| Grates or shelves | Hold pots above the fire |
Light the fire and slowly increase heat. Watch the temperature to avoid damaging your pots. Cool the kiln fully before removing pottery.

Firing Temperature And Timing
Firing a clay pot at home can be exciting. It's important to understand the right temperature and timing. These factors affect the strength and look of the final piece.
Knowing the ideal temperature for your clay type is crucial. You also need to monitor the firing process carefully.
Ideal Temperatures For Different Clay
Different clays need different firing temperatures. Earthenware, stoneware, and porcelain each have their own needs. This ensures the pot is strong and doesn't crack.
Earthenware is fired at lower temperatures. Stoneware and porcelain require higher temperatures. This affects the final color and durability.
- Earthenware: 1,832°F to 2,102°F (1,000°C to 1,150°C)
- Stoneware: 2,192°F to 2,372°F (1,200°C to 1,300°C)
- Porcelain: 2,282°F to 2,552°F (1,250°C to 1,400°C)
Monitoring The Firing Process
Monitoring the firing process is important. You need to control the kiln temperature. This helps prevent accidents and ensures even firing.
Keep an eye on the temperature throughout. Use a pyrometer to check the heat levels. This tool helps you adjust the kiln if needed.
- Check temperature regularly with a pyrometer
- Adjust kiln settings as necessary
- Ensure consistent heat distribution
Cooling And Finishing Touches
Firing a clay pot is not complete without proper cooling and finishing. These steps help protect your pot and make it look great.
Taking care during cooling and finishing improves the pot’s strength and appearance.
Proper Cooling Techniques
Cooling your clay pot slowly prevents cracks and breaks. Sudden temperature changes can damage the pot.
Keep the pot inside the kiln until it cools to room temperature. Avoid opening the kiln early.
- Turn off the kiln and let it cool naturally.
- Do not remove the pot until it is cool to touch.
- Keep the kiln door closed to keep temperature steady.
- Cool the pot in a dry, dust-free place after removal.
Sanding And Glazing Options
After cooling, sanding smooths the pot’s surface. Use fine sandpaper to remove rough spots.
Glazing protects the pot and adds shine or color. You can choose from many glaze types.
- Use wet sanding to avoid dust.
- Apply glaze evenly with a brush or dip method.
- Fire the pot again if the glaze requires it.
- Choose matte or glossy glaze based on your style.
Troubleshooting Common Issues
Firing a clay pot at home can be tricky. Sometimes, things don't go as planned. Knowing how to troubleshoot common issues is helpful.
Let's look at common problems you might face. We'll explore handling cracks and fixing uneven firing.
Handling Cracks And Breakage
Cracks can appear in clay pots during or after firing. These can be frustrating, but are often fixable.
- Ensure even thickness of clay walls
- Avoid rapid temperature changes during firing
- Patch small cracks with slip before refiring
Fixing Uneven Firing
Uneven firing can cause a pot to have different colors or textures. This is usually due to temperature variations.
| Issue | Solution |
| Dark spots | Check kiln temperature consistency |
| Uneven color | Rotate pot during firing |
| Warping | Use kiln shelves for support |

Frequently Asked Questions
How Do You Prepare A Clay Pot For Firing At Home?
To prepare a clay pot, first let it dry completely to avoid cracks. Smooth the surface, remove dust, and place it on a kiln shelf or fire-safe area before firing.
What Is The Ideal Temperature To Fire A Clay Pot?
The ideal firing temperature ranges between 1,800°F to 2,100°F (982°C to 1,149°C). This temperature ensures the clay hardens without cracking or melting.
Can I Fire A Clay Pot In A Home Oven?
No, a regular home oven cannot reach the high temperatures needed. Use a kiln or specialized outdoor pit for proper firing.
How Long Does It Take To Fire A Clay Pot?
Firing typically takes 8 to 12 hours, including heating and cooling. Slow temperature changes prevent cracks and ensure even firing.
Conclusion
Firing a clay pot at home can be simple and fun. You just need the right tools and patience. Always watch the temperature carefully to avoid cracks. Let your pot cool slowly for the best results. Practice helps you improve each time you fire.
Enjoy making your own pottery with confidence. This skill adds a special touch to your creative projects. Give it a try and see how your pots turn out!






