

Have you ever wanted to create something beautiful with your own hands but didn’t know where to start? Making clay at home is easier than you think, and it’s a fun way to unleash your creativity.
Whether you want to make decorations, gifts, or simple crafts, this guide will show you exactly how to do clay at home with simple ingredients you already have. By the end, you’ll have all the tips and tricks to create amazing clay projects that will impress everyone.
Ready to get your hands a little messy and make something special? Let’s dive in!
Choosing The Right Clay
Working with clay at home is a fun and creative activity. Picking the right clay helps you enjoy your project more. Different clays work best for different crafts.
This guide shows you the main types of clay for beginners, where to find clay, and how to store it properly.
Types Of Clay For Beginners
There are many clay types, but some are easier for new crafters. Here are common beginner-friendly clays:
- Air-Dry Clay:No oven needed. Dries hard in air.
- Polymer Clay:Hardens by baking in a home oven.
- Modeling Clay:Soft and reusable, but does not harden.
- Natural Clay:Can be fired in a kiln. More advanced use.
Where To Buy Clay
You can buy clay from many places. It depends on the type you want and your budget.
| Place | Type of Clay | Notes |
| Craft Stores | Air-Dry, Polymer | Good variety, easy to find |
| Online Shops | All types | Wide selection, delivery to home |
| Art Supply Stores | Natural, Polymer | Higher quality clays |
| Local Markets | Natural clay | Check for freshness |
Storing Clay At Home
Keep your clay fresh by storing it right. This stops it from drying out or getting hard before use.
- Wrap clay tightly in plastic wrap or a sealable bag.
- Store in an airtight container to keep moisture in.
- Keep clay in a cool, dry place away from sunlight.
- If using air-dry clay, use it quickly once opened.

Setting Up Your Workspace
Working with clay at home is fun and relaxing. Setting up a good workspace helps you enjoy your clay projects.
A neat and organized area keeps your tools safe and your clay clean. Let’s look at how to prepare your space.
Essential Tools And Materials
Having the right tools makes clay work easier and more enjoyable. You don’t need many items to get started.
- Clay blocks or air-dry clay
- Rolling pin or smooth bottle
- Clay shaping tools or household items like toothpicks
- Cutting tools such as plastic knives or craft blades
- Work surface like a plastic mat or tile
- Water container for smoothing clay
- Old cloth or paper towels for cleanup
Creating A Clay-friendly Area
Choose a flat, clean table with good light for your clay area. It should be easy to clean and free from dust.
Cover the workspace with a plastic sheet or a washable mat. This protects your table and helps with cleanup.
- Pick a spot with natural or bright light
- Keep your tools and clay within reach
- Use containers to store small tools and scraps
- Clear the area of food and drinks
- Have a trash bin nearby for waste
Safety Tips For Clay Work
Safety is important when working with clay. Some clays and tools need careful handling to avoid harm.
Wash your hands after working. Avoid eating or drinking near the clay to keep it clean.
- Use non-toxic clay for home projects
- Keep sharp tools out of children’s reach
- Wear an apron or old clothes to protect your clothing
- Work in a well-ventilated area
- Clean your workspace after each session
Basic Clay Techniques
Working with clay at home can be fun and relaxing. You can create many shapes and designs. Learning some basic techniques helps you start easily.
This guide covers three main steps: kneading and conditioning clay, shaping and molding, and adding texture and details.
Kneading And Conditioning Clay
Kneading clay makes it soft and easy to work with. It removes air bubbles that can cause cracks later. Conditioning clay warms it up and improves its texture.
- Cut a piece of clay
- Press and fold it repeatedly
- Roll it between your hands to warm it
- Check for smoothness and flexibility
Shaping And Molding
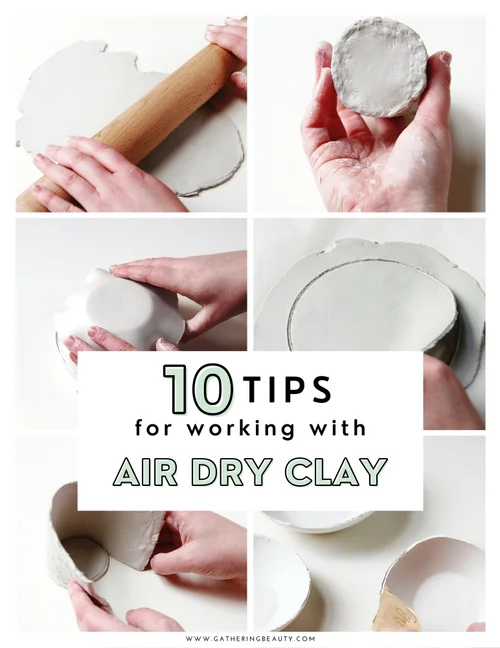
Shaping clay is about forming the basic shape you want. Use your fingers and simple tools to mold the clay. Keep the clay moist to avoid cracks.
- Start with a small ball or slab
- Pinch or roll to create shapes
- Use tools to cut or smooth edges
- Join pieces by scoring and adding slip (water and clay mix)
Adding Texture And Details
Textures make your clay piece more interesting. You can add fine details using simple objects or tools. This step brings your creation to life.
| Tool | Use |
| Toothpick | Draw fine lines or patterns |
| Fork | Create parallel lines or rough texture |
| Fabric | Press to add cloth-like texture |
| Sponges | Make soft, dimpled surfaces |
Simple Clay Projects
Clay is a fun material to work with at home. You can make many simple projects using just a few tools.
These projects help you learn how to shape, paint, and finish clay items easily.
Making Clay Jewelry
Clay jewelry is small and easy to create. You can make rings, pendants, and earrings with clay.
- Roll clay into small shapes
- Use cutters to make designs
- Make holes for strings or hooks
- Bake the clay to harden it
- Paint or glaze for color
Creating Small Sculptures
Small sculptures let you practice shaping clay in 3D. You can make animals, people, or abstract shapes.
| Project | Tools Needed | Drying Time |
| Clay Animal | Clay tools, toothpicks | 24 hours |
| Mini Figure | Sculpting tools, paintbrush | 12 hours |
| Abstract Shape | Hands, smoothing tool | 18 hours |
Crafting Decorative Items
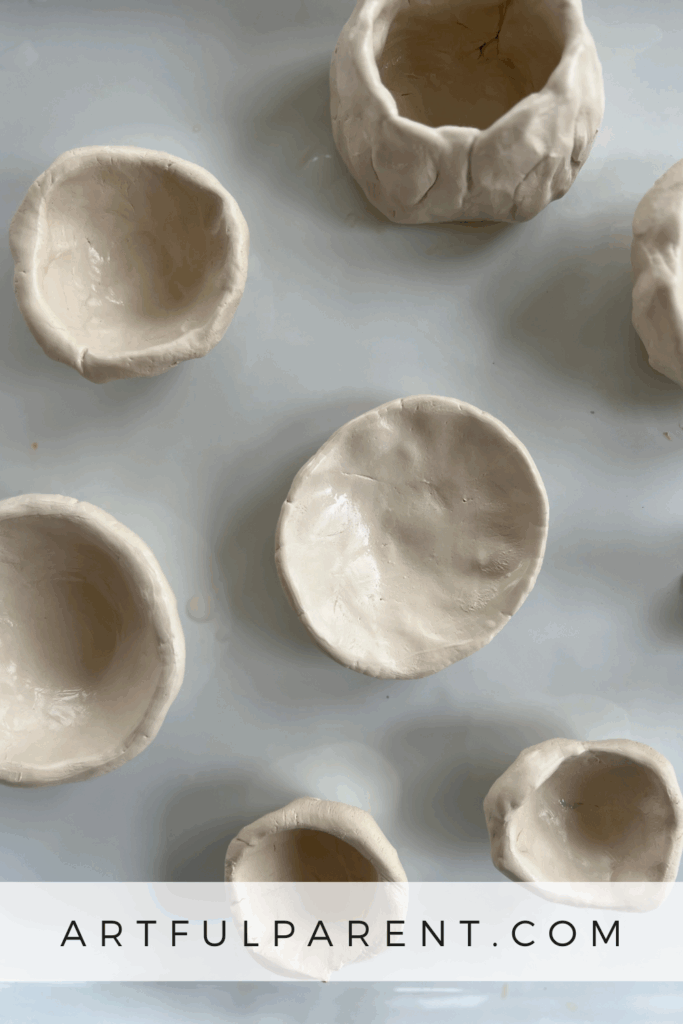
Decorative items add charm to your home. You can make bowls, coasters, or wall hangings from clay.
Here are tips for crafting decorative clay items:
- Keep the clay thickness even
- Use texture tools for patterns
- Let the clay dry fully before painting
- Seal finished pieces with varnish
Drying And Curing Clay
Clay crafting at home is fun and rewarding. Drying and curing are key steps in making your clay creations last. Proper techniques ensure your clay pieces stay strong and beautiful.
Whether you use air-drying clay or polymer clay, knowing how to dry and cure them is important. Let's explore some tips and methods for each type.
Air-drying Tips
Air-drying clay is easy to use and doesn't need heat. Make sure your clay pieces dry evenly for the best results.
Place your clay on a flat surface. Turn it occasionally to ensure all sides dry evenly. Keep it in a warm room with good air circulation.
- Use a wire rack for better air flow
- Avoid direct sunlight to prevent cracks
- Check dryness by gently tapping the clay
Using An Oven For Polymer Clay
Polymer clay needs baking to harden. Use your home oven for this process. Follow the instructions on the clay package for the right temperature and time.
Place clay pieces on a baking sheet covered with parchment paper. Preheat the oven before baking. Keep an eye on the clay to avoid burning.
- Bake at a low temperature
- Check frequently to prevent overcooking
- Let cool completely before handling
Avoiding Cracks And Breaks
Cracks can ruin your clay projects. Use the right techniques to prevent them. Moisture is key to keeping clay smooth and crack-free.
Keep clay wrapped when not in use. Add water or conditioner to dry spots. Smooth out any cracks before drying or baking.
- Store clay in a sealed bag
- Work with small amounts at a time
- Repair cracks with a little water
Painting And Finishing Touches
Clay projects are fun and creative. Adding paint makes them more special. Finishing touches help your creations shine.
Learn how to paint, seal, and decorate your clay pieces. This guide will help you with each step.
Choosing The Right Paints
Picking the right paints is important for clay projects. Some paints work better on clay than others.
Acrylic paints are popular. They dry fast and come in many colors. Watercolors can also be used for a softer look.
- Acrylics for bold colors
- Watercolors for soft effects
- Try a test patch first
Sealing Your Creations
Sealing protects your clay work. It keeps the paint from chipping or fading.
Choose a clear sealant. Spray or brush it on for an even coat. Let it dry completely.
- Use a clear spray sealant
- Apply after painting
- Ensure even coverage
Adding Accessories And Embellishments
Embellishments add character to your clay. Accessories can make your creations more unique.
Consider using beads, ribbons, or small charms. Attach them with strong glue. Be creative with your designs.
- Beads for texture
- Ribbons for color
- Charms for personalization
Troubleshooting Common Issues
Working with clay at home can be fun but sometimes problems arise. Knowing how to fix these issues saves time and frustration.
This guide covers common clay problems and easy ways to solve them. Follow these tips to keep your clay projects smooth.
Fixing Cracks And Breaks
Cracks happen when clay dries too fast or is too thin. Small breaks can also occur if the clay is not handled gently.
To fix cracks, lightly dampen the area with water and smooth it with your finger or a clay tool. For breaks, press the pieces together and blend the edges.
Preventing Clay From Drying Out
Clay dries quickly in open air. To keep it soft and workable, store it properly when not in use.
- Wrap clay tightly in plastic wrap
- Store wrapped clay inside an airtight container
- Add a damp cloth inside the container for extra moisture
- Keep clay away from direct sunlight and heat sources
- Use clay within a few days for best results
Dealing With Sticky Or Hard Clay
Clay can become sticky if it is too wet or hard if it dries out. Both make shaping difficult.
| Issue | Cause | Fix |
|---|---|---|
| Sticky Clay | Too much moisture or humidity | Sprinkle dry flour or cornstarch, then knead gently |
| Hard Clay | Dried out from air exposure | Add small drops of water and knead until soft |

Tips For Ongoing Creativity
Clay crafting at home is fun and relaxing. You can keep your creativity alive by trying new ideas often.
Use simple tips to explore different ways to work with clay. This helps you enjoy the process and grow your skills.
Experimenting With Colors And Tools
Mixing colors and using different tools can make your clay pieces unique. Try new colors and shapes to see what you like.
- Combine two or three colors for a marbled look
- Use household items like toothpicks or forks as tools
- Try different clay textures such as smooth or rough
- Apply paint or glaze after baking for extra color
Inspiring Ideas To Try Next
Trying new projects keeps your interest alive. Look for simple ideas that challenge you just enough to learn.
- Create small animal figures using basic shapes
- Make jewelry like beads and pendants
- Design decorative items such as coasters or magnets
- Try making miniature food for dollhouses
- Build simple bowls or plates with your hands
Joining Clay Craft Communities
Joining groups helps you learn from others and share your work. Online or local clubs can give you new ideas and support.
| Community Type | Benefits | How to Join |
|---|---|---|
| Online Forums | Ask questions anytime, share photos | Search for clay art forums or Facebook groups |
| Local Workshops | Meet others, learn new techniques | Check community centers or craft stores |
| Social Media Groups | Follow artists, get daily ideas | Use hashtags or join groups on Instagram or Pinterest |
Frequently Asked Questions
What Materials Do I Need To Make Clay At Home?
You need flour, salt, water, and cream of tartar. These ingredients mix easily to form a soft, moldable clay. Optional food coloring adds color. The recipe is simple and affordable for all ages.
How Long Does Homemade Clay Last?
Homemade clay lasts up to two weeks if stored properly. Keep it airtight in a sealed container or plastic wrap. Avoid moisture and direct sunlight to maintain its softness and prevent drying out.
Can I Bake Homemade Clay To Harden It?
No, most homemade clays like flour-based ones are air-dry only. Baking can cause cracking or burning. For hardening, let the clay air-dry for 24-48 hours until firm.
Is Homemade Clay Safe For Kids To Use?
Yes, homemade clay made from edible ingredients is safe for kids. It contains no harmful chemicals and is non-toxic. Always supervise young children during play to avoid ingestion.
Conclusion
Making clay at home is simple and fun. You only need a few basic ingredients. Mixing them carefully creates a soft, moldable dough. You can shape it into anything you like. Let your creativity guide you. This activity suits all ages and skill levels.
It’s a great way to relax and enjoy art. Try different colors and textures for variety. Keep your clay airtight to stay fresh longer. Enjoy crafting with homemade clay anytime you want. It’s a rewarding and easy project to try.






