Are you looking to improve the strength and durability of your stainless steel tools or kitchenware? Knowing how to temper stainless steel at home can save you money and give you a sense of accomplishment.
Tempering is a simple process that changes the metal’s hardness and flexibility, making it tougher and longer-lasting. You’ll discover easy-to-follow steps that anyone can do with basic tools. By the end, you’ll have the confidence to bring new life to your stainless steel items.
Keep reading to unlock the secrets of tempering stainless steel right in your own home.

Credit: www.reliance-foundry.com
Basics Of Stainless Steel Tempering
Tempering stainless steel changes its strength and hardness. It makes the metal easier to work with and less likely to break. You can temper stainless steel at home with the right tools and care.
Understanding the types of stainless steel and why tempering matters helps you get good results. This guide explains the basics you need to know before starting.
Types Of Stainless Steel
There are many types of stainless steel. Each type has different properties that affect how you temper it. The main types are:
- Martensitic Stainless Steel: This type is hard and magnetic. It is good for knives and tools.
- Austenitic Stainless Steel: This type is softer and not magnetic. It is common in kitchenware and appliances.
- Ferritic Stainless Steel: This type has good corrosion resistance and is magnetic. It is used in automotive parts.
- Duplex Stainless Steel: This type combines features of ferritic and austenitic steel. It is strong and resistant to corrosion.
Why Tempering Matters
Tempering stainless steel improves its performance. It reduces brittleness and increases toughness. This process is important for making tools safe and long-lasting.
| Benefit | Description |
| Improved Strength | Tempering makes the steel stronger and less likely to crack. |
| Better Toughness | The metal can absorb impact without breaking. |
| Controlled Hardness | You can adjust hardness based on the tempering temperature. |
| Reduced Stress | Tempering lowers internal stress from hardening or welding. |
Tools And Materials Needed
Tempering stainless steel at home requires specific tools and materials. These help you heat and cool the metal properly.
Using the right equipment keeps the process safe and effective. Prepare all items before starting the tempering.
Essential Equipment
You need tools that can heat stainless steel evenly and cool it quickly. A heat source with good control is important.
- Propane torch or small forge for heating
- Heat-resistant tongs to hold the steel
- Fireproof surface or brick to work on
- Metal container with oil or water for cooling
- Thermometer or temperature test strips
- Wire brush to clean the steel before tempering
Safety Gear
Tempering steel involves heat and hot materials. Wearing safety gear protects you from burns and injuries.
- Heat-resistant gloves to protect your hands
- Safety goggles to shield your eyes
- Long-sleeve shirt and pants made of natural fibers
- Closed-toe shoes to protect your feet
- Face mask if working in a poorly ventilated area
Preparing Stainless Steel For Tempering
Tempering stainless steel needs good preparation to get the best results. Clean and check the steel before heating it.
Proper preparation helps avoid problems and makes the steel stronger and more durable after tempering.
Cleaning And Inspection
Remove all dirt, grease, and rust from the stainless steel surface. Use a mild detergent and warm water to clean it well. After washing, dry the steel completely.
- Use a soft brush to scrub off stubborn dirt.
- Apply rust remover if needed, then rinse thoroughly.
- Check for any oil or grease spots and clean them carefully.
Inspect the steel for cracks, dents, or other damage. Any defects can affect the tempering process and final strength. Use a magnifying glass for a close look.
Marking The Steel
Mark the steel to guide your tempering process. Use a permanent marker or scribe to note important spots or areas for heating.
| Mark Type | Purpose |
| Heat Zones | Show where to apply heat |
| Measurement Lines | Help with positioning and size |
| Defect Marks | Highlight cracks or dents |
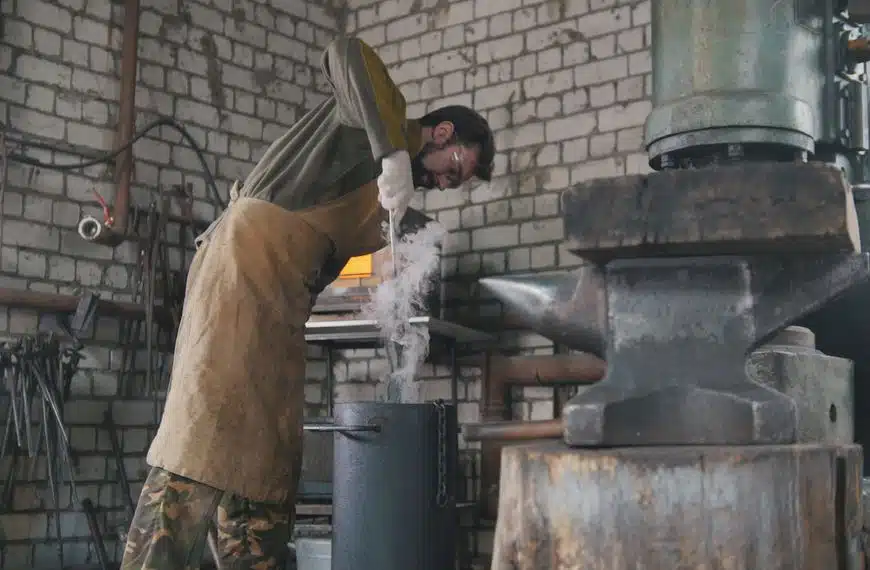
Heating Process
Tempering stainless steel at home requires careful control of heat. Heating changes the steel's properties to make it stronger and less brittle.
Using the right temperature and heating method ensures the best results for your project.
Choosing The Right Temperature
Stainless steel needs a specific temperature range to temper correctly. Too hot or too cold will not work well.
- Temper between 350°F and 1100°F (175°C to 600°C).
- Lower temperatures improve toughness but reduce hardness.
- Higher temperatures increase ductility but lower strength.
- Keep heating time short to avoid damage.
- Use a heat source with a reliable temperature control.
Methods To Heat Stainless Steel
You can heat stainless steel using several tools. Each method has benefits depending on your setup.
| Heating Method | Advantages | Considerations |
| Oven | Even heating, easy to control | Needs high temperature range |
| Propane Torch | Portable, quick heating | Difficult to keep uniform heat |
| Electric Heat Gun | Safe and easy for small parts | Limited max temperature |
| Forge | High heat, good for large items | Requires skill and safety gear |
Cooling Techniques
Tempering stainless steel requires careful cooling to get the best results. Cooling affects the steel's strength and hardness.
This guide explains different cooling methods and how to use them safely at home.
Air Cooling Vs Quenching
Air cooling lets the steel cool slowly by exposing it to room temperature air. Quenching cools the steel quickly by dipping it in water or oil.
- Air cooling reduces the chance of cracks but takes longer.
- Quenching makes the steel harder but can cause warping or cracks.
- Choose air cooling for thin or delicate parts.
- Use quenching for thicker pieces that need high hardness.
Best Practices For Cooling
| Practice | Description | Benefits |
| Uniform Cooling | Cool steel evenly on all sides. | Prevents warping and stress. |
| Control Temperature | Use a thermometer to monitor cooling. | Ensures correct hardness and toughness. |
| Avoid Sudden Changes | Do not expose hot steel to extreme cold. | Reduces risk of cracks. |
| Use Clean Quenching Medium | Replace water or oil regularly. | Improves cooling consistency. |
Testing Tempered Steel
Tempering stainless steel at home can improve its strength. Testing the steel after tempering is important to ensure quality.
This process involves checking hardness and evaluating durability. These steps help ensure the steel is ready for use.
Checking Hardness
Hardness indicates how resistant the steel is to scratching. It shows if the tempering process was effective.
You can use a simple test at home. Scratch the steel with a nail to see if it leaves a mark.
- No mark means the steel is hard.
- A light mark suggests moderate hardness.
- A deep mark shows the steel is too soft.
Evaluating Durability
Durability refers to how long the steel can last under stress. Testing this ensures the steel will perform well in real use.
To test durability, bend the steel gently. Check if it returns to its original shape.
- If it returns fully, the steel is durable.
- If it bends slightly, it has medium durability.
- If it does not return, it may need more tempering.
Common Mistakes To Avoid
Tempering stainless steel at home can be tricky. Many make common mistakes. Avoid these for better results.
Understanding the process helps prevent errors. Let's look at some frequent issues.
Overheating Risks
Overheating stainless steel is a common mistake. It can weaken the metal. This happens when the temperature is too high.
Always use a thermometer. Keep track of the heat levels carefully. Avoid direct flames for better control.
- Use a controlled heat source
- Monitor temperature regularly
- Avoid glowing red heat
Improper Cooling
Cooling the steel too quickly is another mistake. Sudden cooling can cause cracks. It also affects the metal's strength.
Let the steel cool slowly. Use air cooling for best results. Avoid using water or oil baths.
- Allow natural air cooling
- Avoid water quenching
- Ensure gradual temperature decrease

Credit: ssalloy-steel.com
Maintaining Tempered Stainless Steel
Tempered stainless steel lasts longer with proper care. Keeping it clean and rust-free protects its strength.
Use simple methods to keep your stainless steel in good shape. This guide helps you maintain your tempered steel at home.
Cleaning Tips
Clean tempered stainless steel often to remove dirt and stains. Use gentle cleaners that do not damage the surface.
- Use warm water and mild soap for daily cleaning
- Dry with a soft cloth to avoid water spots
- Remove fingerprints with a mixture of vinegar and water
- Avoid abrasive pads that scratch the steel
- Polish with a stainless steel cleaner for shine
Preventing Corrosion
Corrosion can weaken tempered stainless steel. Prevent rust by controlling moisture and chemicals around the steel.
| Cause | Prevention |
| Salt exposure | Rinse with fresh water after contact |
| Moisture buildup | Dry steel thoroughly after cleaning |
| Harsh chemicals | Use mild cleaning agents only |
| Scratches | Handle steel carefully to avoid damage |

Credit: knifesteelnerds.com
Frequently Asked Questions
What Is Tempering Stainless Steel At Home?
Tempering stainless steel at home involves heating and cooling the metal. This process improves toughness and reduces brittleness. Proper heating temperature and controlled cooling are key. It enhances durability for tools and kitchenware.
How Hot Should Stainless Steel Be Tempered?
Heat stainless steel to around 400-600°F (204-316°C) for tempering. The exact temperature depends on the steel grade. Maintaining this range prevents damage and achieves optimal hardness. Use an accurate thermometer for best results.
Can I Temper Stainless Steel Without Special Tools?
Basic tempering can be done with a kitchen oven and heat-resistant gloves. Precise temperature control is essential for good results. Avoid open flames or uncontrolled heating. Safety precautions are necessary to prevent injury or damage.
How Long Does Tempering Stainless Steel Take?
Tempering typically takes 1 to 2 hours depending on steel thickness. Consistent temperature and cooling times are important for uniform hardness. Rushing the process may lead to uneven temper and reduced strength.
Conclusion
Tempering stainless steel at home is a simple skill to learn. Follow safety steps carefully to avoid accidents. Control heat and cooling for the best results. Practice helps improve your technique over time. This process makes your steel stronger and more durable.
Small efforts lead to better metal performance. Try it yourself and see the difference. Keep your tools ready and stay patient. Tempering can extend the life of your steel items. Give it a try with confidence and care.