Setting your Xbox One as your home console can unlock amazing benefits you don’t want to miss. Imagine sharing your games and subscriptions with family or friends, enjoying instant access to your digital library, and saving money on multiplayer gaming.
If you’ve ever wondered how to set your Xbox One as your home console but felt unsure where to start, you’re in the right place. This guide will walk you through simple steps that anyone can follow, helping you get the most out of your Xbox One right now.
Ready to make your gaming experience better and easier? Let’s dive in!
Choosing The Right Spot
Setting your Xbox One home means picking a place that works well. The right spot helps your console run smoothly and keeps your gaming space neat.
Think about space, power, and screen setup before you decide where to put your Xbox One.
Space And Ventilation
Your Xbox One needs space around it to cool down. Poor airflow can make the console overheat and slow down.
- Keep at least 4 inches of space on all sides
- Do not block vents or fans
- Avoid putting the console inside closed cabinets
- Choose a flat, stable surface
Power Outlet Access
Make sure the spot is near a power outlet. This avoids using long extension cords that can be unsafe.
| Power Outlet Location | Recommended |
| Within 3 feet | Best |
| 3 to 6 feet | Acceptable |
| More than 6 feet | Use with caution |
Screen Placement
Position your screen to avoid glare and provide a clear view. The console should be close enough to connect easily.
Tips for screen placement:
- Place the screen at eye level for comfort
- Keep cables tidy and short between Xbox and screen
- Avoid placing the screen near windows with direct sunlight
Credit: screenrant.com
Connecting Your Xbox One
Connecting your Xbox One is easy and fast. This guide helps you set up the main cables and network. You will also learn how to link your audio system.
Follow these instructions to enjoy your Xbox One with the best picture and sound quality. Make sure all devices are powered off before starting.
Hdmi And Power Cables
Start by connecting the HDMI cable from your Xbox One to your TV. This cable transmits both video and audio signals. Next, plug the power cable into your console and then into a power outlet.
- Connect one end of the HDMI cable to the Xbox One HDMI Out port.
- Plug the other end into your TV’s HDMI input.
- Attach the power supply cable to the Xbox One.
- Plug the power supply into a wall socket or power strip.
- Turn on your TV and Xbox One after all connections are secure.
Internet Setup Options
You can connect your Xbox One to the internet using Wi-Fi or Ethernet cable. A wired connection often gives a better and stable connection. Use Wi-Fi if you want to avoid cables.
| Connection Type | Advantages | Setup Tips |
|---|---|---|
| Ethernet Cable | Stable and fast connection | Plug cable into Xbox and router |
| Wi-Fi | No cables needed | Choose your network and enter password |
Audio System Integration
To connect your Xbox One to an audio system, use the HDMI cable or optical audio port. This gives you richer sound for games and movies. Check your audio system inputs before connecting.
Use this list to match your audio system and connection type:
- If your system supports HDMI ARC, connect Xbox to TV, then TV to audio system via HDMI ARC.
- If your audio system has an optical input, use an optical audio cable from Xbox to the system.
- For stereo systems, connect using RCA audio cables from the TV audio output.
Initial Console Setup
Setting up your Xbox One for the first time is simple. This guide helps you get started quickly.
Follow these steps to power on, update, and customize your console for the best experience.
Powering On And Updates
Connect your Xbox One to a power source and your TV. Press the Xbox button on the console or controller to turn it on.
The console will check for updates. Make sure your internet is connected to download the latest software. This keeps your system secure and adds new features.
- Plug in the power cable and HDMI cable
- Press the Xbox button on the console or controller
- Connect to Wi-Fi or Ethernet for updates
- Download and install any available system updates
Creating Or Signing In To An Account
To use your Xbox One, sign in with your Microsoft account. You can create a new account if you don't have one.
Your account saves your games, settings, and friends list. Signing in also gives you access to online features.
- Press the Xbox button and select "Sign in"
- Choose "Add new" to create an account or enter your existing email and password
- Follow the on-screen instructions to verify your account
- Set up security options, like two-step verification
Configuring Preferences
Adjust your Xbox One settings to fit your needs. You can change language, privacy, and display options.
| Setting | Description |
|---|---|
| Language | Choose your preferred language for menus and voice commands |
| Privacy | Control who can see your profile and activity |
| Display & Sound | Adjust screen resolution and audio output |
| Notifications | Manage alerts for messages and game invites |
Optimizing Display Settings
Setting up your Xbox One for the best display is crucial for an immersive gaming experience. Here, we will explore key settings to enhance your visual experience.
Follow these guidelines to adjust resolution, color, and screen size to get the most out of your Xbox One.
Resolution And Refresh Rate
Adjusting the resolution and refresh rate ensures smoother gameplay and clearer visuals. It is essential to match these settings with your TV's capabilities.
- Navigate to the 'Display & sound' settings.
- Select 'Video output'.
- Choose the appropriate resolution (e.g., 1080p or 4K).
- Set the refresh rate to 60Hz for most TVs.
Hdr And Color Calibration
HDR and color calibration enhance the richness and depth of colors. Proper calibration can significantly improve visual quality.
Access the 'Advanced video settings'. Enable HDR for supported games and apps. Follow the on-screen instructions for color calibration to adjust brightness and contrast.
Adjusting Screen Size
Ensuring your screen size is correctly set prevents image cutoff and maintains aspect ratio. This setting is vital for an optimal display.
| Setting | Description |
| Calibrate TV | Fine-tune the screen size using on-screen guides. |
| Safe Zone | Ensure all game elements are visible on the screen. |
Setting Up Controllers
Setting up your Xbox One controllers is important for a smooth gaming experience. Here, you will learn how to pair controllers, customize button layouts, and manage battery life.
These steps will help you enjoy your games without interruptions. Follow the instructions to get started with your controllers.
Pairing Controllers
First, turn on your Xbox One console. Press the power button on the controller to turn it on. Next, press the sync button on the console and then on the controller.
Wait for the lights to stop blinking. This means your controller is now paired. If it does not work, try again or check the batteries.
Customizing Button Layouts
Customizing the button layout lets you play the way you like. Go to Settings on your Xbox One. Select Devices & Accessories.
Choose your controller, then select Configure. Here, you can change how each button works. Save your settings when you are done.
Managing Battery Life
To keep your controller working, manage its battery life. Use rechargeable batteries if possible. They save money and are eco-friendly.
Turn off the controller when not in use. Go to Settings and set the controller to turn off after a period of inactivity. This extends battery life.
- Use rechargeable batteries
- Turn off the controller when not in use
- Set auto-off in settings
Installing Games And Apps
Setting your Xbox One as your home console allows you to install games and apps easily. This helps you access your content without needing an internet connection all the time.
Understanding how to install games and apps is important to get the best experience on your Xbox One. Let's explore key points about installing and managing your content.
Using Physical Discs Vs Digital Downloads
Physical discs require you to insert the game disc into your Xbox One to play or install. Digital downloads let you install games directly from the Xbox Store without discs.
With physical discs, you must keep the disc in the console to play. Digital downloads stay on your console and are ready anytime you want.
- Physical discs need the disc to play and install
- Digital downloads install directly on your console
- Digital downloads are available anytime without discs
- Physical discs can be shared or resold
Managing Storage Space
Your Xbox One has limited storage. Games and apps can take up a lot of space, so managing storage is important. You can delete old games or move them to an external drive.
Check your storage often to see what uses the most space. This helps keep your console running smoothly and lets you install new games without problems.
- Delete games or apps you no longer use
- Use an external hard drive for extra storage
- Check storage settings to see space details
- Move large games to free up space on the internal drive
Organizing Your Library
Organizing your game and app library makes it easier to find what you want. You can sort by name, installation date, or last played.
You can also create groups or favorites to keep your most played games handy. This keeps your library neat and saves time.
- Sort games by name, date, or usage
- Create groups to organize similar games
- Add favorites for quick access
- Remove old games to keep your library clean
Enhancing Network Performance
Setting your Xbox One as a home console helps improve your gaming experience. A strong network connection reduces lag and keeps downloads fast.
Choosing the right connection type and enabling settings can boost your network stability and speed.
Wired Vs Wireless Connections
A wired connection uses an Ethernet cable to link your Xbox One directly to the router. This offers a steady and fast connection. Wireless connections use Wi-Fi, which can vary in speed and stability.
| Connection Type | Advantages | Disadvantages |
| Wired (Ethernet) | Stable and fast speeds | Less mobility, cable needed |
| Wireless (Wi-Fi) | Easy to set up, no cables | Signal may drop, slower speeds |
Improving Wi-fi Stability
Wi-Fi signals can be weak or interrupted by walls and other devices. You can take steps to make your Wi-Fi stronger and more reliable for your Xbox One.
- Place the router close to your Xbox One.
- Keep the router away from metal objects and microwaves.
- Use the 5 GHz Wi-Fi band if your router supports it.
- Restart your router regularly to clear issues.
- Limit other devices using the network during gaming.
Enabling Network Features
Your Xbox One has settings that help improve network performance. Turning these on can reduce connection problems and improve game downloads.
- Set as Home Xbox:Allows multiple users to share games and Xbox Live Gold.
- Enable UPnP:Lets your console open ports automatically for better connectivity.
- Use Static IP:Assign a fixed IP address to avoid network conflicts.
- Port Forwarding:Manually open ports to improve online game stability.
Credit: spottyrainstorm.mylearndash.com
Enabling Parental Controls
Setting parental controls on your Xbox One helps protect kids from inappropriate content. You can limit what they see and play.
This guide explains how to set up restrictions, manage screen time, and use content filters.
Setting Up Restrictions
You can set age limits for games, apps, and videos on Xbox One. This stops kids from accessing unsuitable content.
Restrictions work by linking a child’s account to a family group on Xbox.
- Go to Settings and open the Family section
- Add your child's account to your family group
- Set content restrictions based on age
- Save your settings to apply restrictions
Managing Screen Time
You can control how long your child uses the Xbox each day. This helps balance gaming with other activities.
Screen time limits reset every day and can be adjusted anytime.
- Open Settings and select Family
- Choose your child’s profile
- Set daily time limits for Xbox use
- Decide allowed play hours for each day
Content Filters
Content filters block access to games, movies, or apps that are not age-appropriate. You control what your child can see.
Filters also help prevent online communication with strangers.
- Access the Family settings in Xbox Settings
- Select your child’s account
- Choose content filters for games, apps, and movies
- Turn on communication and multiplayer restrictions if needed
Customizing Your Gaming Experience
Setting your Xbox One as your home console lets you tailor your gaming experience. It helps you control audio, profiles, and accessibility options.
Adjusting these settings makes playing games easier and more fun. You can create a setup that fits your needs and style.
Adjusting Audio Settings
You can change audio settings to suit your listening preferences. This includes game sounds, chat volume, and headset options.
Using the audio menu, adjust volume levels and sound modes for clear and balanced sound. This helps you hear every detail in games.
- Set game and chat volume separately
- Choose surround sound or stereo output
- Enable headset chat mixer for better voice clarity
- Use volume normalization to balance loud sounds
Personalizing Profiles
Each player can create a unique profile on the Xbox One. Personalize your profile with your gamer picture, background, and privacy settings.
Profiles save your game progress, achievements, and friends list. This makes it easy to switch between users without losing data.
- Change your gamer picture and theme
- Set privacy and communication preferences
- Manage saved games and achievements
- Switch profiles quickly on the home console
Using Accessibility Options
Accessibility settings help make gaming easier for all players. Xbox One offers tools for vision, hearing, and mobility support.
Turn on these options to improve your comfort and control. Customize settings like text size, color filters, and controller shortcuts.
- Enable narrator for spoken text
- Use high contrast or colorblind modes
- Adjust subtitle size and background
- Customize controller layout and sensitivity

Credit: www.polygon.com
Frequently Asked Questions
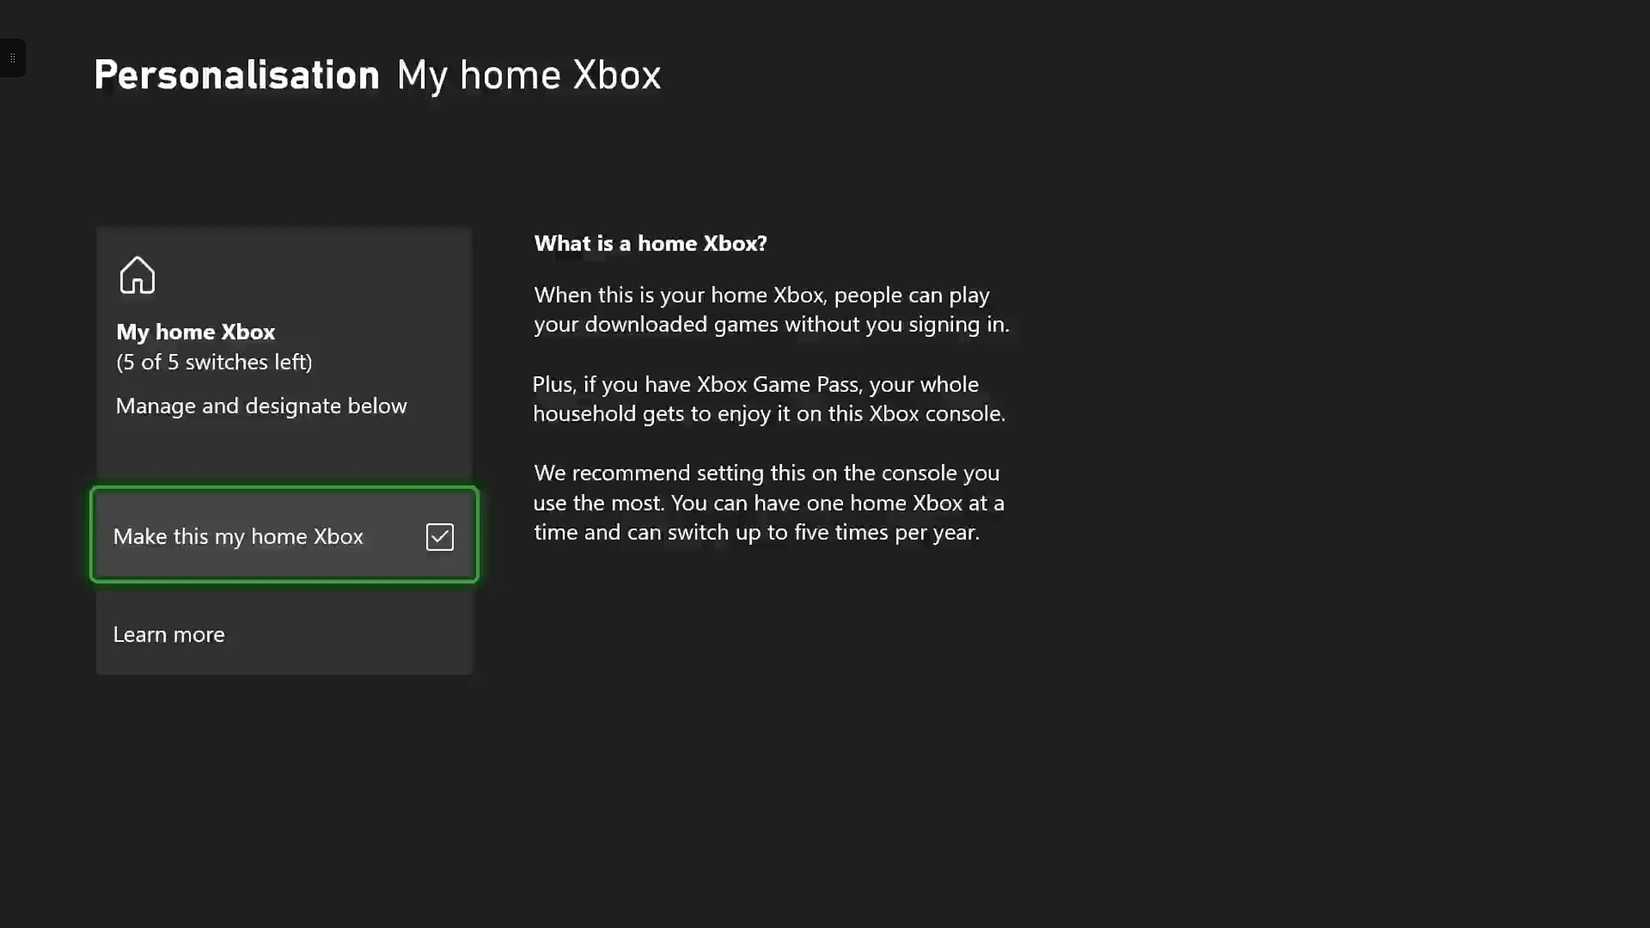
What Does Setting A Home Xbox One Mean?
Setting a home Xbox One designates your console as your primary device. It enables sharing games and subscriptions with other users on the same console. This feature allows offline play and access to digital content without re-downloading.
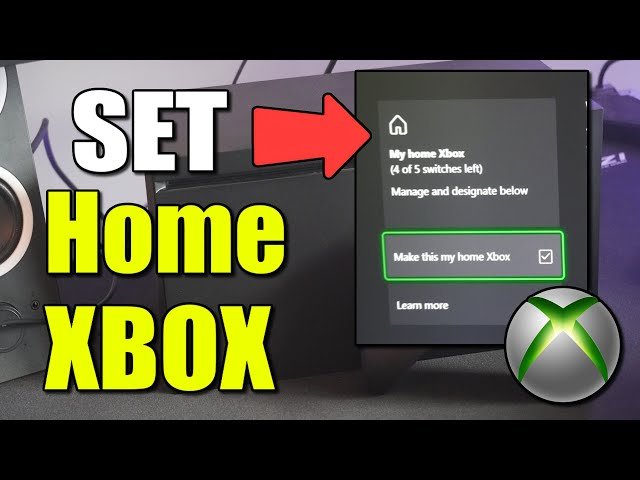
How To Set Home Xbox One Step-by-step?
Go to Settings > General > Personalization > My home Xbox. Select “Make this my home Xbox. ” Confirm your choice. This sets your Xbox as the home console, allowing game sharing and offline access.
Can I Change My Home Xbox One Console?
Yes, you can change your home Xbox up to five times per year. To switch, simply set a new console as your home Xbox in settings. Previous consoles lose the home status automatically.
What Benefits Come From Setting Home Xbox One?
Setting your Xbox as home allows offline game play, sharing games, and subscriptions with other users. It also enables playing downloaded games without internet and sharing Xbox Live Gold benefits.
Conclusion
Setting your Xbox One as your home console saves money and shares games easily. It lets you play offline and share with family members. Follow the steps carefully to avoid mistakes. Keep your console updated for the best experience. Enjoy your games without extra costs or limits.
This simple setup makes gaming more fun and easy. Try it today and see the difference yourself.