

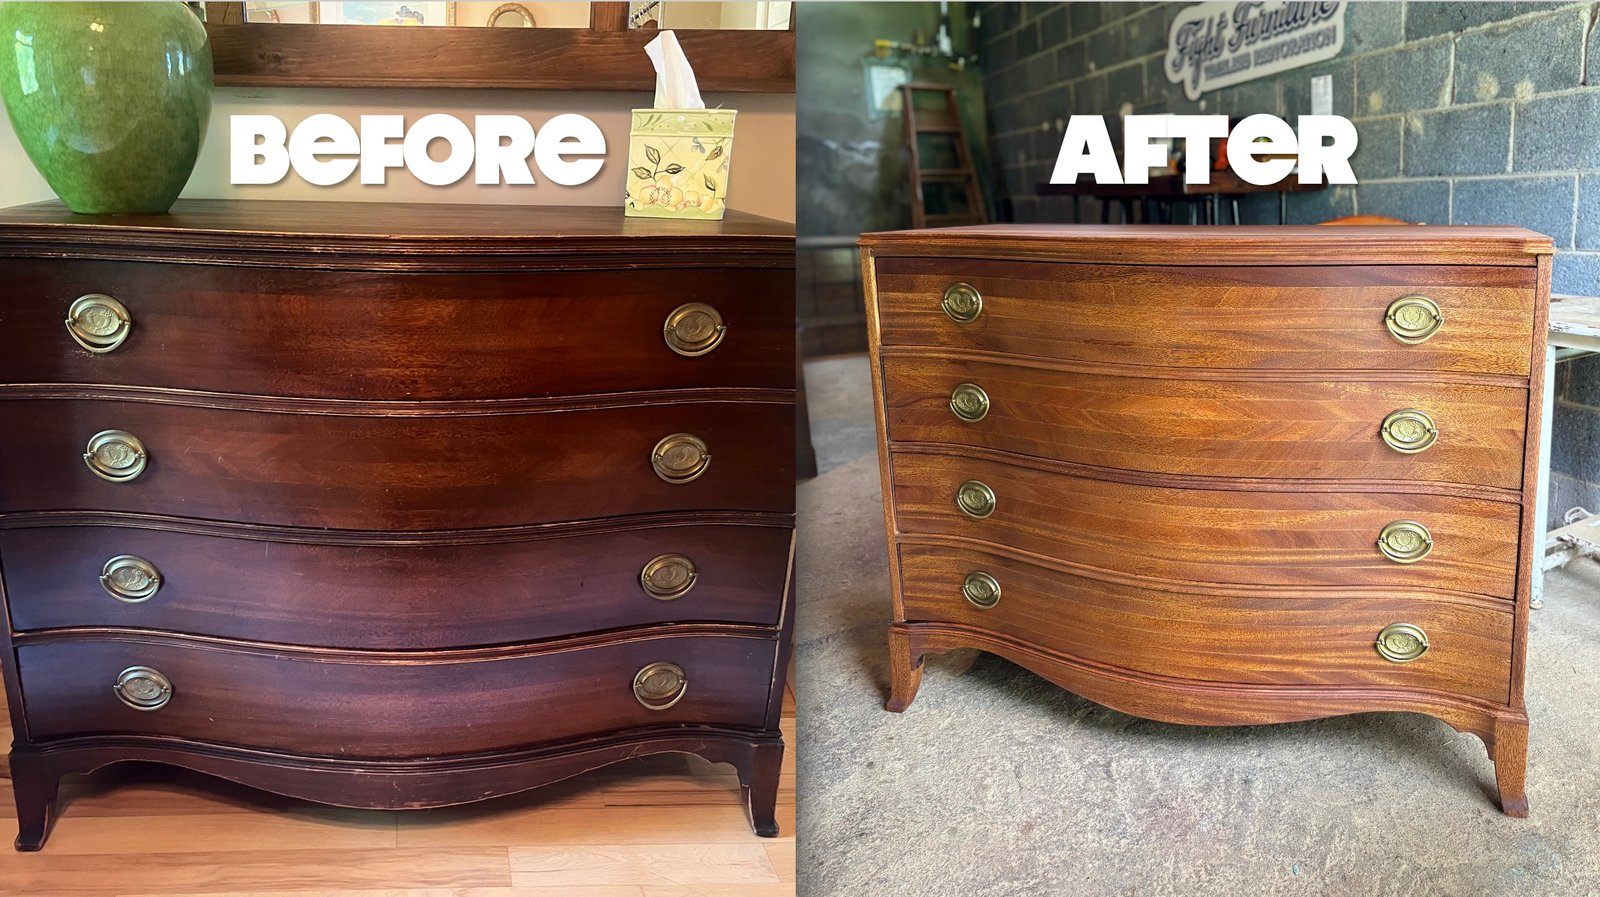
Is your bedroom dresser looking worn out or outdated? Imagine transforming it into a stunning piece that fits perfectly with your style—all without spending a fortune on a new one.
Refinishing your dresser is easier than you think, and you don’t need to be an expert to get great results. In this guide, you’ll discover simple steps to breathe new life into your furniture. Ready to unlock the secret to a beautiful, refreshed dresser that you’ll love every day?
Keep reading, because your next project starts here.
Preparing Your Workspace
Refinishing a bedroom dresser needs a clean and organized workspace. Preparing well helps you finish the job safely and neatly.
Take time to set up before you start. This saves time and keeps your home clean.
Gathering Necessary Tools
Collecting all tools before you begin makes the work easier. You do not want to stop and look for things later.
- Sandpaper or sanding block
- Paint stripper or remover
- Putty knife or scraper
- Clean cloths or rags
- Paintbrushes or foam brushes
- Drop cloth or old sheets
- Gloves and safety goggles
- Mask or respirator
Choosing A Well-ventilated Area
Choose a space with good airflow. This lowers the chance of breathing in dust and fumes.
Open windows and doors. Use a fan to move air outside if possible.
- A garage with open doors
- A covered porch with windows
- A room with windows open and fans
Protecting Surrounding Surfaces
Cover floors and furniture near the dresser. This stops paint, dust, or chemicals from causing damage.
Use thick drop cloths or old sheets. Tape edges to keep covers in place.
- Lay drop cloths on the floor
- Cover nearby furniture
- Use painter’s tape on edges
- Remove small items from the area
Removing Hardware And Cleaning
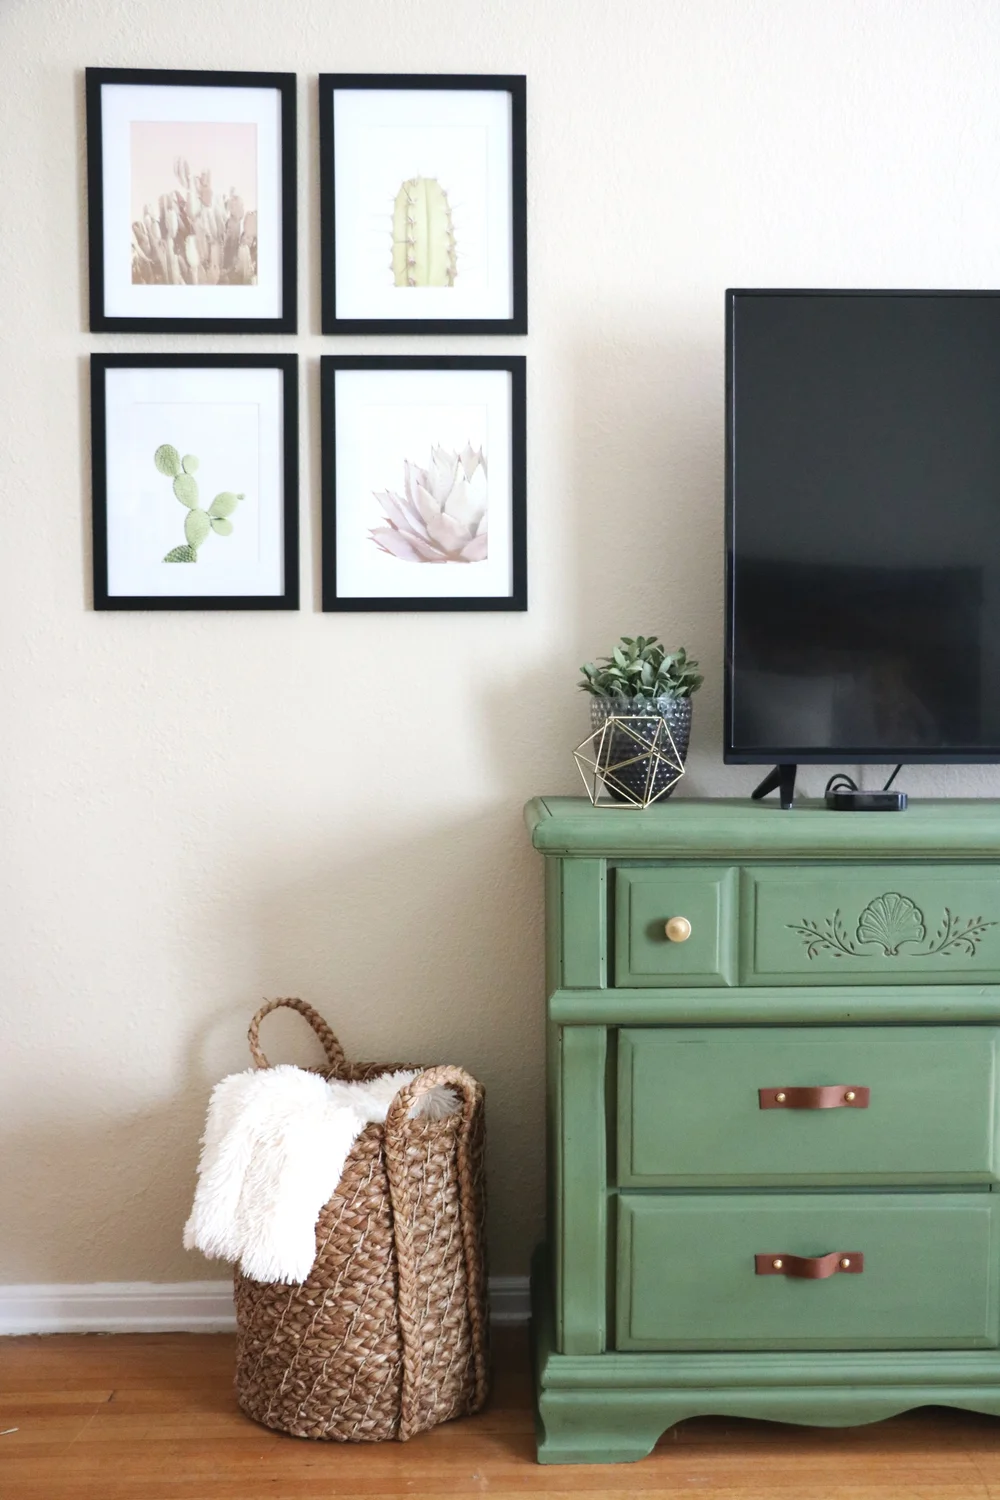
Refinishing a bedroom dresser starts with removing its hardware. Taking off handles and knobs helps you work on the wood surface safely. Cleaning the dresser well is also important to get rid of dust and dirt.
This guide covers how to remove hardware and clean your dresser. Follow simple tips to prepare your furniture for refinishing.
Taking Off Handles And Knobs
Use a screwdriver to remove all screws holding handles and knobs. Place the hardware in a safe spot to avoid losing any pieces. If screws are tight, try turning slowly to prevent damage.
- Check each drawer for screws on the inside
- Turn screws counterclockwise to loosen
- Lift off knobs and handles carefully
- Store all hardware together in a container
Cleaning Dust And Dirt
After hardware removal, clean the dresser to remove dust and dirt. Use a soft cloth or microfiber towel. Lightly dampen the cloth with water or mild soap solution.
- Wipe the surface gently to avoid scratches
- Clean corners and edges well
- Dry the surface with a clean cloth
- Let the dresser air dry completely before refinishing
Dealing With Sticky Residue
Sticky residue from old tape or labels can be hard to remove. Use one of these safe methods:
| Method | Description |
|---|---|
| Warm Soapy Water | Apply with cloth and rub gently until residue lifts |
| White Vinegar | Dab on residue and wait a few minutes before wiping |
| Rubbing Alcohol | Use sparingly on a cloth to break down sticky spots |
Test each method on a small hidden area first. Avoid harsh chemicals that damage wood.
Stripping Old Finish
Refinishing a bedroom dresser starts with removing the old finish. This step clears the surface for a new look. It needs care and the right tools for best results.
Using a chemical stripper makes the process easier. You will also need tools for scraping and sanding. Safety is key during this work.
Selecting The Right Stripper
Choose a stripper that fits the finish type on your dresser. Some strippers work better on lacquer, others on varnish or paint. Check the label before buying.
- Use a gel stripper for vertical surfaces to prevent drips.
- Choose a citrus-based stripper for a safer, low-odor option.
- Pick a solvent-based stripper for thick or multiple finish layers.
- Wear gloves and eye protection when handling chemical strippers.
Applying Stripper Safely
Apply stripper in a well-ventilated area. Use a brush to spread a thick, even coat. Follow the time instructions on the product label.
| Safety Tip | Reason |
| Wear gloves | Protect skin from chemicals |
| Use eye protection | Prevent splashes from harming eyes |
| Ventilate room | Avoid inhaling fumes |
| Keep away from flames | Strippers can be flammable |
Scraping And Sanding Techniques
After the finish softens, scrape it off gently with a plastic or metal scraper. Avoid gouging the wood. Sand the surface smooth using fine-grit sandpaper.
- Work in the direction of the wood grain.
- Use medium-grit sandpaper first, then fine-grit for smoothness.
- Clean dust with a tack cloth before refinishing.
- Test a small area before full sanding to avoid damage.

Repairing And Sanding The Surface
Refinishing a bedroom dresser starts with fixing its surface. Repairing scratches and dents helps the finish look smooth and new.
Sanding prepares the wood for a fresh coat of paint or stain. It makes the surface even and ready to absorb the finish well.
Filling Scratches And Dents
Use wood filler to fill scratches and dents on the dresser. Apply it with a putty knife and press firmly into the damaged spots.
Let the filler dry completely before sanding it smooth. This step stops scratches from showing through the new finish.
Sanding For Smoothness
Sand the entire dresser to remove old finish and rough spots. Use even strokes and sand in the direction of the wood grain.
- Start with medium grit sandpaper to take off old layers
- Use fine grit to smooth the surface after repairs
- Wipe off dust with a dry cloth before finishing
Choosing The Right Grit
| Grit Number | Use |
| 80-100 | Remove old paint or finish |
| 120-150 | Smooth wood after filler dries |
| 180-220 | Final sanding before applying finish |
Applying New Finish
Refinishing your bedroom dresser can give it a fresh, updated look. Applying a new finish protects the wood and improves its appearance.
This step involves choosing the right finish and applying it carefully for the best results.
Picking Paint Or Stain
Paint and stain offer different looks for your dresser. Paint covers the wood completely, while stain enhances the wood grain.
Choose paint for bright, solid colors. Pick stain for a natural wood appearance.
- Use latex paint for easy cleanup and durability
- Oil-based paint offers a smooth, hard finish
- Stains come in light, medium, and dark shades
- Gel stains work well for vertical surfaces
Using Primer When Needed
Primer helps paint stick better and last longer. It also hides old colors and stains on wood.
Use primer if your dresser has a dark color, rough surface, or if you use light paint.
- Choose a primer made for wood furniture
- Apply one or two thin coats
- Let primer dry fully before painting
- Sand lightly after primer dries for smoothness
Techniques For Even Application
Apply paint or stain evenly to avoid drips and streaks. Use the right tools for the finish you choose.
Work in thin layers and let each coat dry before adding another.
- Use a brush for detailed areas and edges
- Apply stain with a cloth or foam brush
- Use a roller for large, flat surfaces with paint
- Sand lightly between coats for smooth finish
- Follow wood grain direction when applying
Sealing And Protecting
After refinishing a bedroom dresser, sealing is important. It protects the wood and keeps it looking new.
Choosing the right sealant and applying it correctly ensures durability. Follow these steps to seal your dresser properly.
Selecting A Durable Topcoat
A durable topcoat protects the dresser's surface. It adds a layer against scratches and spills.
Look for water-based polyurethane or oil-based finishes. These provide strong protection and enhance the wood's natural beauty.
- Water-based polyurethane dries faster
- Oil-based finishes give a richer color
- Both options are long-lasting
Applying Sealant Properly
Before applying sealant, ensure the dresser is clean. Dust and dirt can affect the finish.
Use a brush or foam applicator for even coverage. Apply thin coats to avoid drips and bubbles.
- Start from the center and move outwards
- Follow the grain of the wood
- Allow each coat to dry fully
Drying And Curing Times
Drying times vary based on the sealant type. Water-based sealants dry faster than oil-based ones.
After drying, allow the dresser to cure. Curing ensures the sealant hardens and provides full protection.
- Water-based: 2-4 hours to dry
- Oil-based: 6-8 hours to dry
- Full cure: 7 days for maximum durability
Reattaching Hardware
Refinishing your bedroom dresser can give it a fresh look. Reattaching hardware is a key step in this process.
Properly securing hardware ensures that your dresser remains functional and stylish.
Cleaning Or Replacing Handles
Handles can be cleaned or replaced to enhance the dresser's appearance. Choose what suits your style.
- Use a mild soap and water for cleaning handles.
- Consider replacing old handles with new ones.
- Ensure new handles match the dresser's holes.
Installing Hardware Securely
Secure installation prevents handles from loosening over time. Follow these steps for a firm attachment.
| Tool | Purpose |
| Screwdriver | Tighten screws |
| Drill | Create new holes |
| Level | Ensure alignment |
Final Touches
Final touches add the perfect finish to your dresser. They ensure everything looks polished and complete.

Maintenance Tips
Keeping your bedroom dresser looking good takes some care. Simple maintenance helps the finish last longer.
Follow these tips to protect your dresser and keep it fresh over time.
Cleaning Without Damage
Use soft cloths to clean your dresser. Avoid harsh chemicals that can harm the finish.
Light dusting is better than wet cleaning. If needed, use a damp cloth and dry it right away.
- Use microfiber or soft cotton cloths
- Choose mild soap mixed with water
- Wipe gently to avoid scratches
- Dry surfaces immediately to prevent water marks
Avoiding Wear And Tear
Prevent damage by keeping sharp or heavy objects off the dresser. Use coasters or mats under items.
Open and close drawers gently. Avoid overloading drawers to stop stress on joints and slides.
- Place soft pads under decorations
- Handle drawers with care
- Keep dresser out of direct sunlight
- Avoid placing very hot or wet items directly on wood
Periodic Touch-up Ideas
Small scratches and dull spots can be fixed with touch-ups. Use wood markers or matching paint.
Apply a fresh coat of wax or polish every few months. This keeps the surface smooth and shiny.
- Use colored wood markers for minor scratches
- Lightly sand rough spots before refinishing
- Apply paste wax to protect the finish
- Polish with soft cloth for added shine
Frequently Asked Questions
How Do You Prepare A Dresser For Refinishing?
Start by removing all hardware and drawers. Clean the surface thoroughly. Sand the dresser to remove old finish and smooth imperfections. This creates an ideal base for new paint or stain.
What Materials Are Needed To Refinish A Bedroom Dresser?
You will need sandpaper, wood filler, primer, paint or stain, brushes or rollers, and protective finish. Also, gather cleaning supplies and new hardware if desired.
How Long Does It Take To Refinish A Bedroom Dresser?
Refinishing typically takes 1 to 3 days. Drying times between coats affect the schedule. Proper preparation and finishing ensure a durable result.
Can I Refinish A Dresser Without Sanding?
Sanding is recommended for best adhesion and smooth finish. However, using a deglosser can work for lightly worn surfaces. Sanding is still preferred for thorough refinishing.
Conclusion
Refinishing your bedroom dresser brings new life to old furniture. You can save money and enjoy a fresh look. The process is simple with the right tools and steps. Take your time and follow each step carefully. Soon, your dresser will look clean and stylish again.
A little effort makes a big difference. Try this project to refresh your room easily. Enjoy the satisfaction of a job well done.




