Have you ever wanted to work with clay but didn’t want to buy it from the store? What if you could dig it up from your own backyard and turn it into something amazing?
Processing clay from the ground at home is easier than you think. With a few simple steps, you can transform raw earth into smooth, workable clay ready for your next project. Keep reading, and you’ll discover how to unlock the natural clay right beneath your feet and bring your creative ideas to life.

Credit: www.leelachakravarti.com
Finding Natural Clay
Clay is a natural material found in soil. It can be used for pottery, sculpture, and crafts.
Finding clay near your home helps you start projects without buying supplies.
Identifying Clay-rich Soil
Clay soil feels smooth and sticky when wet. It holds its shape well.
- Look for soil that is dense and heavy.
- Wet a small amount and try to roll it into a thin coil.
- Check if the soil cracks as it dries.
- Clay soil often has a shiny or greasy feel.
- It may appear in colors like red, brown, or gray.
Tools For Collecting Clay
Use simple tools to dig and gather clay from the ground safely and easily.
| Tool | Purpose |
| Shovel or Spade | Dig clay from the soil |
| Bucket or Container | Carry collected clay |
| Sieve or Screen | Remove stones and debris |
| Gloves | Protect hands while digging |
| Water Spray Bottle | Keep clay moist for easier handling |

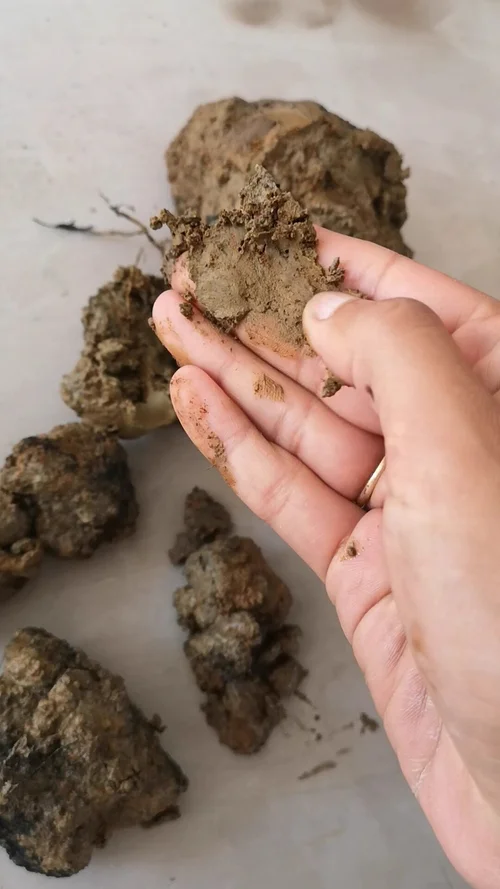
Credit: ancientpottery.how
Preparing The Clay
Processing clay from the ground at home is simple and rewarding. Proper preparation makes the clay easier to shape and work with.
Start by cleaning the clay and then soften it. These steps help remove impurities and improve texture.
Removing Debris And Rocks
Clay dug from the ground often contains small rocks, roots, and other debris. Removing these is important before use.
- Break the clay into smaller chunks.
- Pick out any visible stones, sticks, or leaves.
- Sift the clay through a mesh screen to catch fine debris.
- Repeat sifting until the clay feels smooth.
Soaking And Softening Clay
Dry clay is hard and difficult to shape. Soaking it softens the particles and makes it workable.
| Soaking Time | Purpose |
| 1 to 2 hours | Initial softening |
| Overnight (8-12 hours) | Full hydration for best texture |
| After soaking | Knead to remove air pockets |
After soaking, knead the clay on a clean surface. This step removes air bubbles and mixes moisture evenly.
Refining Clay Texture
Clay dug from the ground often contains lumps and unwanted particles. Refining its texture is key to making it smooth and workable.
This process removes impurities and improves the clay’s consistency for your projects.
Wedging Techniques
Wedging helps mix the clay evenly and removes air bubbles. It also improves clay’s texture and strength.
- Cut the clay into manageable chunks.
- Press and fold the clay repeatedly on a flat surface.
- Use a spiral motion to knead the clay thoroughly.
- Continue until the clay feels smooth and consistent.
Sifting And Filtering Impurities
Sifting removes stones, roots, and other debris from raw clay. Filtering helps get rid of fine particles that cause rough texture.
| Material | Purpose | Method |
|---|---|---|
| Wire Mesh | Remove large stones | Push wet clay through the mesh |
| Fine Cloth | Filter small particles | Pour clay slurry through cloth |
| Water | Separate clay and impurities | Mix clay with water and settle |
Drying And Storing Clay
Processing clay from the ground requires careful drying and storing. Proper handling keeps the clay ready for use and prevents damage.
Drying clay slowly and storing it in the right way helps maintain its quality. This guide explains simple methods for air drying and storing clay at home.
Air Drying Methods
Air drying clay removes moisture gently without cracking. It is important to dry clay evenly and avoid direct sunlight.
- Spread clay in a thin layer on a clean board or cloth.
- Turn the clay pieces regularly to dry both sides.
- Keep clay in a shaded, well-ventilated area.
- Avoid drying clay near heaters or in direct sun.
- Dry small portions to prevent uneven drying.
Proper Storage Tips
Storing clay properly preserves its moisture and texture. Clay that is too dry or too wet can become hard to work with.
| Storage Method | Purpose | Key Tips |
|---|---|---|
| Plastic Wrap | Keep clay moist | Wrap tightly; remove air bubbles |
| Sealed Containers | Prevent drying out | Use airtight boxes; check moisture often |
| Clay Bags | Store clay safely | Use damp cloth inside; store in cool place |
| Rehydration | Restore dry clay | Add small water amounts; knead thoroughly |
Testing Clay Quality
Testing clay from the ground helps you know if it is good for pottery. Clay quality affects how easy it is to shape and fire.
You can do simple tests at home to check clay plasticity and firing results. This saves time and effort before making large pieces.
Basic Plasticity Tests
Plasticity means how well clay bends without cracking. Good plasticity lets you shape clay easily.
To test plasticity, take a small ball of clay and roll it into a thin coil. Try bending the coil into a ring without breaking.
- If the coil cracks, the clay is not very plastic.
- If the coil bends smoothly, the clay has good plasticity.
- Try squeezing clay in your hand to see if it holds shape.
- Check if clay feels sticky or crumbly; sticky usually means better plasticity.
Firing Small Samples
Firing tests show how clay behaves under heat. It helps find the right temperature for firing.
Make small clay pieces and dry them fully. Then fire them in a kiln or oven at low heat first.
- Look for cracks or warping after firing.
- Check if the clay becomes hard and strong.
- Note the color change to understand firing temperature.
- Repeat with higher heat in steps to find the best firing point.
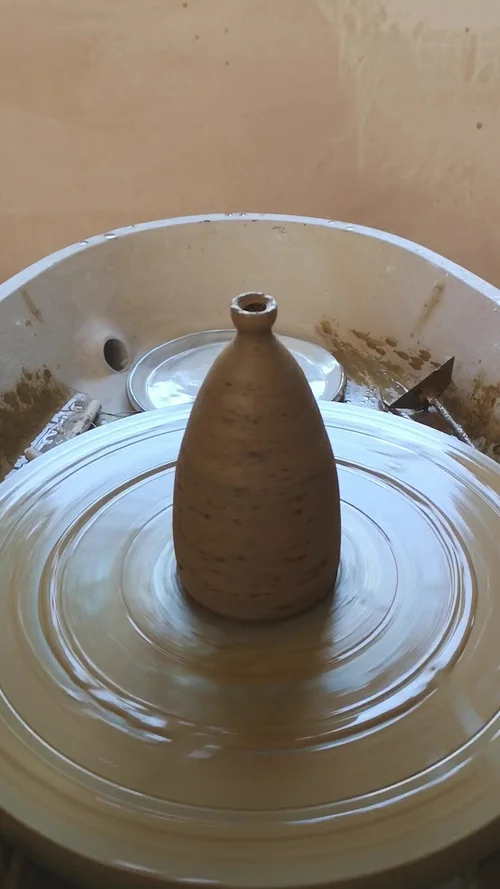
Credit: www.leelachakravarti.com
Common Issues And Fixes
Working with clay from the ground can be challenging. You may face issues that affect the quality of your clay creations.
This guide helps you identify common problems and provides solutions for better results.
Handling Cracks And Drying Problems
Cracks often appear when clay dries too fast or unevenly. Proper handling can reduce these issues.
- Dry clay pieces slowly by covering them with plastic.
- Use a damp cloth to maintain moisture levels evenly.
- Check for air bubbles and knead clay thoroughly to remove them.
Adjusting Clay Consistency
Clay consistency affects its workability. You need to adjust it to match your project needs.
| Problem | Solution |
| Too Hard | Add water gradually and knead well. |
| Too Soft | Mix with dry clay powder to firm it up. |
| Too Sticky | Dust with a little sand or grog. |
Frequently Asked Questions
What Tools Are Needed To Process Clay At Home?
Basic tools include a shovel, bucket, sieve, and water container. These help dig, clean, and prepare the clay effectively.
How Do You Remove Impurities From Raw Clay?
Soak the clay in water, stir well, then strain through a fine sieve. This removes stones and debris for smooth clay.
How Long Does It Take To Process Clay From Soil?
Processing clay usually takes 1 to 2 days. This includes soaking, settling, draining, and drying for usable clay.
Can I Use Any Soil To Make Clay?
No, clay soil must be rich in fine particles and sticky when wet. Avoid sandy or rocky soils for best results.
Conclusion
Processing clay from the ground at home is simple and rewarding. You only need basic tools and patience. Clean the clay well to remove dirt and stones. Mix it with water until smooth and easy to work. Dry it properly before shaping or baking.
This process saves money and lets you create your own projects. Try it step by step, and you will enjoy working with natural clay. Practice will make your clay better each time. Give it a try, and see what you can make!