Have you ever wanted to create something unique with your own hands but didn’t know where to start? Making clay at home is easier than you think, and it opens up a world of creativity right in your kitchen.
Imagine crafting personalized pots, decorations, or even gifts without spending a fortune on store-bought materials. In this guide, you’ll discover simple steps to prepare your own clay using everyday ingredients. By the end, you’ll feel confident to bring your ideas to life and enjoy the satisfaction of handmade creations.
Ready to get your hands a little messy and your creativity flowing? Let’s dive in!

Credit: www.youtube.com
Choosing The Right Ingredients
Making clay at home is fun and easy. Picking the right ingredients helps you get good results.
Different clays need different supplies. Knowing which ingredients to use saves time and effort.
Types Of Clay For Diy Projects
You can make many types of clay at home. Each type works best for certain projects.
- Salt Clay:Made from flour, salt, and water. It hardens when baked.
- Air-Dry Clay:Easy to use. Dries without baking in the air.
- Paper Clay:Made by mixing paper pulp with glue and clay.
- Oil-Based Clay:Soft and stays flexible. Good for models.
- Polymer Clay:Plastic-based and cures in an oven.
Choose clay based on your project needs and the tools you have.
Essential Supplies You Need
Gathering the right supplies makes your clay work easier. These tools help shape and store your clay.
- Mixing bowls to combine ingredients
- Measuring cups and spoons for accuracy
- Rolling pin to flatten the clay
- Clay tools like cutters and shaping sticks
- Plastic wrap or airtight containers to keep clay fresh
- Oven or drying space depending on clay type
Having these supplies ready helps you start your project quickly and cleanly.

Credit: www.youtube.com
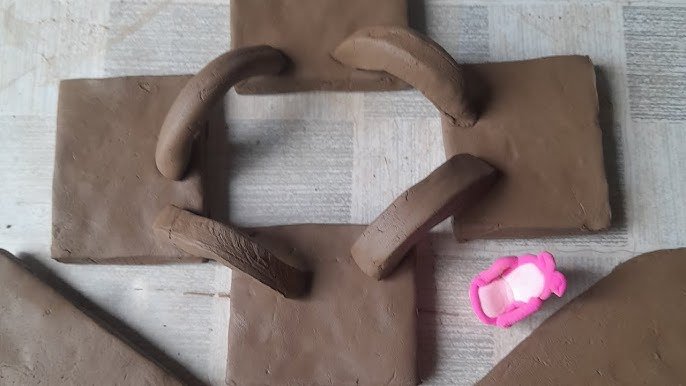
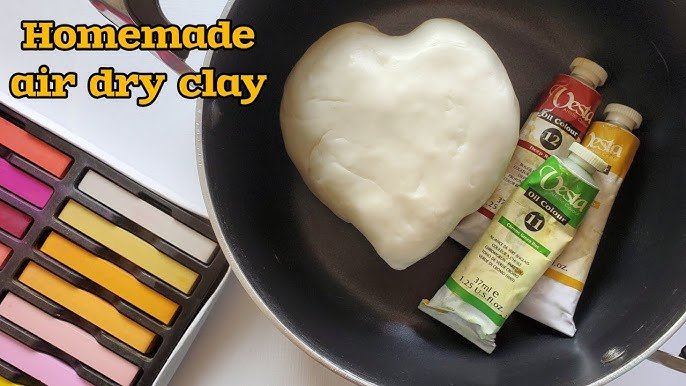
Basic Clay Recipe
Making clay at home is easy and fun. You can create your own clay with simple ingredients.
This basic clay recipe uses common items you may already have in your kitchen.
Mixing Ingredients Correctly
Start by measuring your ingredients carefully. Use the right amounts for the best clay.
Mix dry ingredients first, then add water slowly. Stir well to avoid lumps.
- 1 cup of flour
- 1/2 cup of salt
- 1/2 cup of water (add more if needed)
- 1 tablespoon of oil
Adjusting Texture And Consistency
If the clay feels too sticky, add a little more flour. Knead the clay to mix it well.
If the clay is too dry or crumbly, add small amounts of water. Keep adjusting until smooth.
- Sticky clay needs more flour
- Dry clay needs more water
- Soft clay is easier to shape
- Store clay in an airtight container to keep it fresh
Adding Color And Texture
Adding color and texture to clay can make your projects more interesting. You can use different materials to change how the clay looks and feels.
Choosing the right colorants and textures helps you create unique designs. Let’s explore the options for coloring and texturing clay at home.
Natural Vs Synthetic Colorants
You can use natural or synthetic colorants to tint your clay. Natural colorants come from plants, spices, and minerals. Synthetic colorants are man-made and come in powders or liquids.
- Natural colorants:turmeric, beetroot powder, cocoa powder, charcoal
- Synthetic colorants:acrylic paint, food coloring, mica powders
- Natural colorants give soft, earthy tones
- Synthetic colorants offer bright and vibrant colors
- Test colorants on small clay pieces before mixing
Incorporating Textures And Patterns
Textures add depth and interest to your clay work. You can press objects into the clay or add materials to change its surface feel.
| Texture Method | Description |
| Pressing Tools | Use stamps, leaves, or fabric to press patterns |
| Adding Materials | Mix sand, small beads, or fibers into the clay |
| Carving | Use tools to carve lines and shapes on clay surface |
| Rolling | Roll textured mats or rollers over clay |
Kneading And Conditioning Clay
Kneading and conditioning clay is key to making it soft and easy to work with. Proper preparation helps avoid cracks and uneven surfaces.
This process mixes moisture evenly and removes air bubbles. It also improves the clay's texture for better shaping and sculpting.
Techniques For Softening Clay
Start by pressing the clay with your palms to warm it up. This makes it more flexible and easier to knead.
- Use a clean surface to work on.
- Cut the clay into smaller pieces for easier handling.
- Press and fold the clay repeatedly to spread moisture.
- Add a few drops of water if the clay feels dry.
- Work the clay until it feels smooth and pliable.
Avoiding Common Mistakes
| Mistake | Problem | Solution |
| Not kneading enough | Clay remains hard and cracks easily | Knead until the texture is uniform and soft |
| Adding too much water | Clay becomes sticky and hard to shape | Add water slowly and in small amounts |
| Ignoring air bubbles | Clay cracks or explodes when fired | Press out bubbles while kneading |
| Using dirty tools or surface | Clay picks up debris that weakens it | Work on a clean surface and use clean hands |
Storing Homemade Clay
Storing homemade clay properly keeps it soft and easy to use. Good storage stops the clay from drying out.
Learn simple ways to keep your clay fresh longer. This helps you use it again without problems.
Preventing Drying And Cracking
Clay dries and cracks when it loses moisture. Keep the clay moist by sealing it tightly.
Wrap the clay in plastic wrap or place it in a sealed plastic bag. Check it often for dryness.
- Use damp cloths to keep clay moist
- Store clay away from heat and sunlight
- Do not leave clay exposed to air
Best Containers For Storage
Choose containers that block air and keep moisture inside. Airtight containers work best.
Plastic containers with tight lids or glass jars are good choices. Label containers to know the clay type inside.
- Plastic containers with snap-on lids
- Glass jars with rubber seals
- Resealable plastic bags
- Keep containers clean and dry before use

Credit: www.youtube.com
Tips For Successful Clay Projects
Creating clay projects at home is fun and rewarding. With a few tips, you can craft beautiful items.
Understanding clay stages helps in crafting perfect projects. Let’s explore some tips and ideas.
Working With Clay At Different Stages
Clay changes as it dries, affecting how you work with it. Knowing the stages helps in handling it well.
- Wet Stage:Best for shaping and molding. Keep it moist with a damp cloth.
- Leather Hard:Ideal for carving and joining pieces. It holds its shape.
- Bone Dry:Ready for firing. Handle with care to avoid breaking.
Simple Diy Project Ideas
Simple projects are great for beginners. They allow you to practice skills and create useful items.
| Project | Materials Needed |
| Candle Holder | Clay, knife, paint |
| Coasters | Clay, rolling pin, stamps |
| Planter | Clay, bowl, paint |
Try these projects to start your clay crafting journey. Each one teaches different skills.
Frequently Asked Questions
What Ingredients Are Needed To Prepare Clay At Home?
To prepare clay at home, you need flour, salt, water, and oil. These ingredients mix to create a smooth, pliable dough suitable for crafting.
How Long Does Homemade Clay Last?
Homemade clay lasts up to two weeks if stored properly. Keep it in an airtight container to maintain moisture and prevent drying out.
Can Homemade Clay Be Painted After Drying?
Yes, homemade clay can be painted once fully dry. Use acrylic or tempera paints for best results and seal with varnish for durability.
Is Homemade Clay Safe For Children?
Yes, homemade clay is safe for children as it uses non-toxic, edible ingredients. Always supervise young kids during crafting to avoid ingestion.
Conclusion
Preparing clay at home is simple and fun. You only need a few common ingredients. Mixing them carefully gives you soft, moldable clay. This clay works well for many art projects. You can shape, paint, and dry it easily. Making your own clay saves money and time.
It also lets you create unique pieces. Try it today and enjoy the creative process. Keep practicing to improve your skills. Homemade clay opens doors to endless creativity.