Are you ready to transform your room with a simple yet striking design? Painting vertical stripes on your wall is one of the easiest ways to add height, style, and personality to any space.
But if you’ve never done it before, the idea might seem tricky or overwhelming. Don’t worry—this guide will walk you through every step, making sure you get perfect, clean lines that impress everyone who walks in. Keep reading, and you’ll learn how to turn your plain wall into a stunning feature that feels fresh and modern.

Credit: crystelmontenegrohome.com
Tools And Materials Needed
Painting vertical stripes on a wall needs the right tools. Preparing properly helps you get clean, straight lines.
Below are the key materials and tools you will need to start your project.
Choosing The Right Paint
Select paint that suits the room and wall surface. Use a high-quality interior paint for smooth coverage.
- Choose semi-gloss or satin finish for easy cleaning.
- Pick colors that contrast well for clear stripes.
- Buy enough paint to cover all stripes and touch-ups.
Selecting Brushes And Rollers
Use the right brushes and rollers to apply paint evenly on the wall. Different tools serve different purposes.
| Tool | Use | Recommended Size |
| Angled Brush | Cutting edges and corners | 2 to 2.5 inches |
| Small Roller | Painting stripes on flat surfaces | 4 inches |
| Foam Brush | Touch-ups and smooth finish | 1 to 2 inches |
Tapes And Measuring Tools
Accurate measuring and taping help keep stripes straight and even. Use quality tape and measuring tools.
- Painter’s tape: Use a low-tack tape to avoid peeling paint.
- Measuring tape: Measure wall height and stripe width carefully.
- Level or laser level: Check that tape lines are perfectly vertical.
- Pencil: Lightly mark where stripes will go before taping.
Preparing The Wall
Painting vertical stripes looks best on a smooth, clean surface. Preparing the wall well helps paint stick and last long.
Take time to clean and fix the wall before you start painting. This makes the final result neat and even.
Cleaning And Repairing Surface
Start by removing dust, dirt, and grease from the wall. Use soap and water or a mild cleaner.
- Wipe the wall with a damp cloth or sponge
- Scrape off any peeling paint
- Fill holes or cracks with spackle
- Sand the patched areas smooth
- Let everything dry completely
Priming The Wall
Priming seals the wall and helps paint colors look even. Use a primer made for your wall type.
| Wall Type | Recommended Primer |
| Drywall | Latex-based primer |
| Plaster | Oil-based primer |
| Previously Painted | Stain-blocking primer |
| New Wood | Acrylic primer |
Measuring And Marking Stripes
Painting vertical stripes needs careful measuring and marking. This makes sure the stripes look straight and even on the wall.
Use simple tools like a pencil, level, and painter’s tape. These help you mark the stripes before painting.
Determining Stripe Width
Decide how wide each stripe should be. The width depends on your wall size and design style. Wider stripes suit big walls. Narrow stripes fit smaller walls.
- Measure the total width of the wall.
- Choose the number of stripes you want.
- Divide the wall width by the number of stripes.
- Adjust stripe width if needed for even spacing.
Using A Level And Pencil
Mark vertical lines with a pencil and level. The level keeps your lines straight up and down. This prevents crooked stripes.
- Place the level against the wall vertically.
- Draw a light pencil line along the edge of the level.
- Repeat for each stripe line, spacing them evenly.
- Check the lines with the level to ensure straightness.
Applying Painter’s Tape
Use painter’s tape to mark the edges of each stripe. The tape stops paint from bleeding outside the lines. Press the tape edges firmly for sharp lines.
| Painter’s Tape Tip | Purpose | How to Apply |
| Use good quality tape | Prevents paint bleeding | Stick tape on clean, dry wall |
| Press tape edges firmly | Create sharp lines | Run a fingernail along tape edges |
| Remove tape while paint is wet | Avoids peeling paint | Peel tape slowly and carefully |
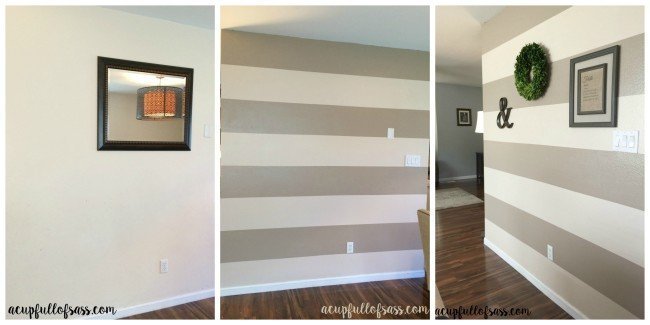
Painting The Stripes
Painting vertical stripes on a wall can add style and height to any room. The key is to paint carefully and use the right tools.
This guide will focus on painting the stripes smoothly and neatly for a professional look.
Applying The Base Color
Start by painting the entire wall with your base color. This color will show between the stripes. Use a roller for even coverage.
Let the base color dry completely. This usually takes a few hours, but check the paint can for exact drying times.
Use painter’s tape to mark the edges of each stripe. Measure carefully to keep stripes the same width. Press the tape firmly on the wall.
Paint the stripe color inside the taped areas with a small roller or brush. Apply two thin coats for better results. Wait for the paint to dry between coats.
Tips For Clean Edges
- Press tape edges firmly to stop paint from bleeding.
- Remove the tape while paint is still slightly wet.
- Use a small brush to fix any mistakes after tape removal.
- Do not overload the brush or roller with paint.
- Work slowly and carefully for the best lines.
Finishing Touches
After painting vertical stripes on your wall, the finishing touches matter. They ensure a clean, sharp look that lasts.
Take your time with final steps like removing tape, fixing errors, and sealing paint. These details make your stripes look professional.
Removing Tape Properly
Wait for the paint to dry but not fully cure before removing the tape. This helps avoid peeling paint off with the tape.
- Remove tape slowly and at a 45-degree angle.
- Peel the tape back on itself instead of pulling straight up.
- Use a sharp blade to score edges if paint cracks.
- Remove tape while paint is still slightly tacky for best results.
Touching Up Mistakes
Small mistakes can happen. Fix them carefully to keep stripes crisp and clean.
| Type of Mistake | Fix Method |
| Paint bleed under tape | Use a fine brush to carefully paint over the bleed with base wall color. |
| Uneven stripe edge | Touch edges with a small artist brush and matching stripe color. |
| Small paint chips | Fill chip with paint and blend with a sponge or brush. |
Sealing The Paint
Sealing your painted stripes protects them from damage and dirt. Choose the right finish for your wall type.
Here are common sealant options:
- Matte or satin polyurethane:Adds durability without shine.
- Clear acrylic spray:Easy to apply and dries quickly.
- Wax finish:Gives a soft sheen but may need reapplying.
Always test sealant on a small area first to check for color changes.

Credit: crystelmontenegrohome.com
Creative Variations
Painting vertical stripes on a wall can add depth and style to any room. Explore creative variations to make your walls stand out.
Using different techniques, you can create unique designs that reflect your personality. Let's dive into some ideas.
Using Multiple Colors
Multiple colors bring vibrancy and energy to your space. Choose shades that complement each other for a harmonious look.
- Decide on a color palette that matches your decor.
- Use painter's tape to mark the stripes on your wall.
- Alternate colors for each stripe for a dynamic effect.
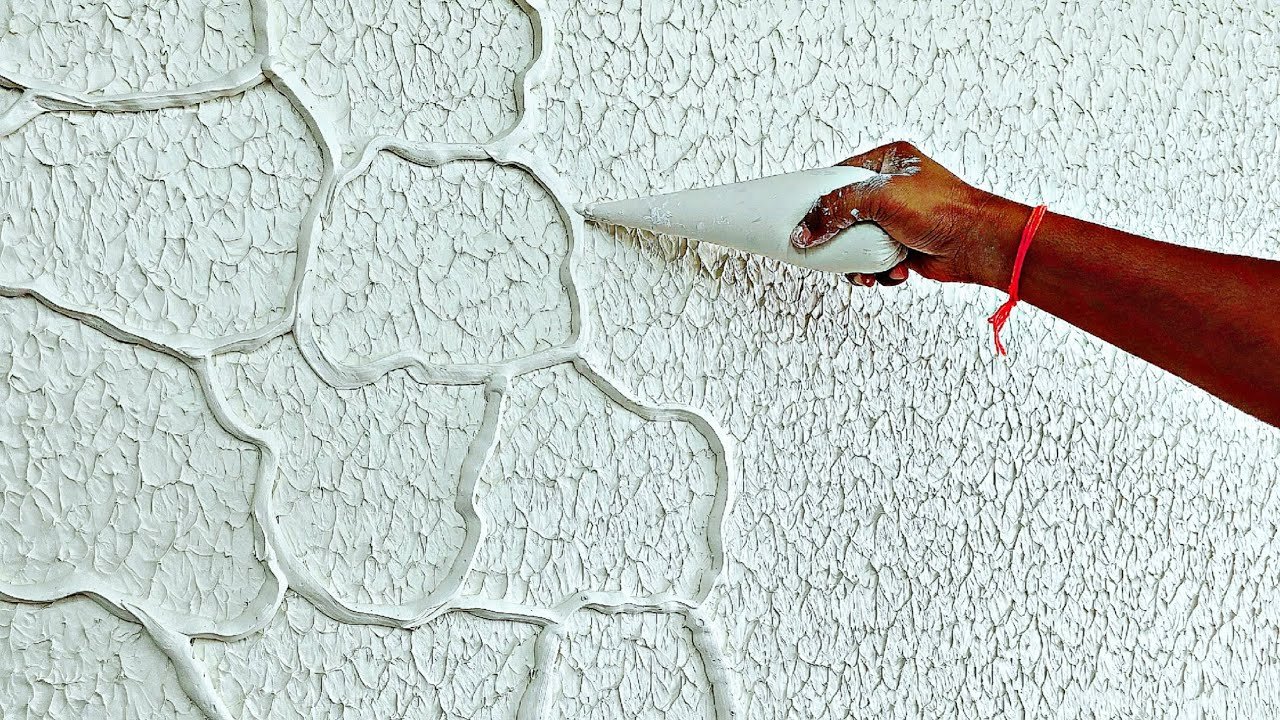
Adding Texture Or Patterns
Textures and patterns can add depth and interest. Consider using materials or techniques that create a tactile surface.
One way to add texture is by using a stencil or sponge. You can also apply texture paste before painting.
| Technique | Effect |
| Stenciling | Geometric patterns |
| Sponging | Soft, cloud-like texture |
| Texture paste | Raised, 3D effect |
Common Mistakes To Avoid
Painting vertical stripes can give a room a new look. But mistakes can spoil the effect.
Learn how to avoid these common errors for a smooth finish.
Uneven Stripes
Stripes that are not even can ruin the look of a wall. Measure carefully before starting.
- Use a level to ensure straight lines
- Measure and mark with a pencil
- Double-check measurements before painting
Tape Bleeding
Tape bleeding happens when paint seeps under the tape. This can blur your stripes.
| Solution | Description |
| Press tape firmly | Ensure the tape sticks well to the wall |
| Use quality tape | Choose tape designed for painting |
| Seal the edges | Run a dry brush along the tape edge |
Rushing The Process
Rushing can lead to mistakes like smudges and uneven drying. Take your time for a perfect finish.
Remember to allow paint to dry fully before removing tape.

Credit: crystelmontenegrohome.com
Frequently Asked Questions
How Do I Prepare A Wall For Vertical Stripes?
Clean the wall surface and remove any dust or grease. Fill holes and sand rough spots for a smooth finish. Apply a primer to ensure paint adhesion and even color.
What Tools Are Needed To Paint Vertical Stripes?
You need painter’s tape, a level or laser level, a pencil, paint rollers or brushes, and drop cloths. These tools help create straight, clean stripes and protect surrounding areas.
How Do I Measure And Mark Stripes Accurately?
Use a tape measure and level to mark equal intervals. Draw light pencil lines vertically where each stripe will go. This ensures symmetry and clean edges.
Can I Use Different Colors For Vertical Stripes?
Yes, you can use multiple colors for a bold look. Ensure each color dries completely before applying the next stripe to avoid smudging.
Conclusion
Painting vertical stripes on a wall adds style and height to any room. Careful measuring and taping make the process easier and neat. Choose colors that match your space and mood. Take your time applying paint for clean edges. A little patience brings big rewards.
Now, your room looks fresh and unique. Try this simple project to brighten your home today.