Are you looking to give your living room table a fresh, new look without spending a fortune? Painting your table is a simple and fun way to transform your space instantly.
Whether your table is old, scratched, or just a bit dull, the right paint can bring it back to life and match your personal style perfectly. In this guide, you’ll discover easy steps and expert tips that make painting your living room table a breeze.
Ready to turn your table into the centerpiece it deserves to be? Let’s get started!
Choosing The Right Paint
Painting a living room table can refresh your space. Picking the right paint is important for a lasting finish.
Different paints work better on furniture. You also need to think about color to match your room style.
Types Of Paint For Furniture
There are several paint types for furniture. Each has its own look and durability.
- Latex Paint:Water-based and easy to clean. Dries fast and has low odor.
- Chalk Paint:Gives a matte, vintage look. Requires sealing with wax or varnish.
- Oil-Based Paint:Durable and smooth finish. Takes longer to dry and has stronger smell.
- Acrylic Paint:Water-based with bright colors. Good for detailed work and quick drying.
Selecting The Perfect Color
Color affects the mood and style of your living room. Choose shades that fit your existing decor.
| Color | Effect | Best For |
| White | Brightens and creates a clean look | Small rooms or modern styles |
| Gray | Neutral and calming | Contemporary or minimalist rooms |
| Blue | Cool and relaxing | Coastal or casual spaces |
| Bold Colors | Add energy and focus | Accent tables or eclectic styles |
Gathering Supplies
Painting a living room table can change its look and feel. Before you start, you need to gather all supplies.
Having the right tools and a clean workspace helps you finish the job well and easily.
Essential Tools And Materials
Pick tools and materials that fit your table type and painting style. Quality items make your work easier and better.
- Sandpaper or sanding block to smooth the surface
- Primer to help paint stick and last longer
- Paint suitable for wood or the table’s material
- Paintbrushes or foam rollers for even application
- Painter’s tape to protect areas you don't want painted
- Drop cloth or old newspaper to cover the floor
- Cleaning cloths to wipe dust and spills
- Wood filler to fix dents or cracks
Preparing Your Workspace
Set up a clean, well-lit area to paint your table. A good workspace keeps your project safe and neat.
Cover floors and nearby items to avoid paint stains. Open windows or use a fan for fresh air.
- Choose a flat, stable surface for painting
- Lay down a drop cloth or newspapers
- Move furniture and objects away from the area
- Keep all tools and materials within reach
- Ensure good lighting to see details clearly
- Wear old clothes or a paint apron to stay clean
Preparing The Table
Before you paint a living room table, you must prepare it well. Preparing helps the paint stick better and last longer.
Start by cleaning, sanding, and fixing any damage on the table. These steps make the surface smooth and ready for paint.
Cleaning And Sanding
Clean the table to remove dust, dirt, and grease. Use a mild soap and water or a wood cleaner. Dry the table fully before sanding.
Sanding smooths the surface and removes old finish. Use medium-grit sandpaper first, then fine-grit for a smooth feel. Sand along the wood grain.
- Wipe off dust with a damp cloth after sanding
- Wear a mask to avoid breathing dust
- Sand edges and corners carefully
Fixing Imperfections
Check the table for cracks, holes, or dents. Use wood filler to fix these imperfections. Apply it with a putty knife and let it dry.
After the filler dries, sand the area smooth. This step makes the surface even and ready for a clean paint finish.

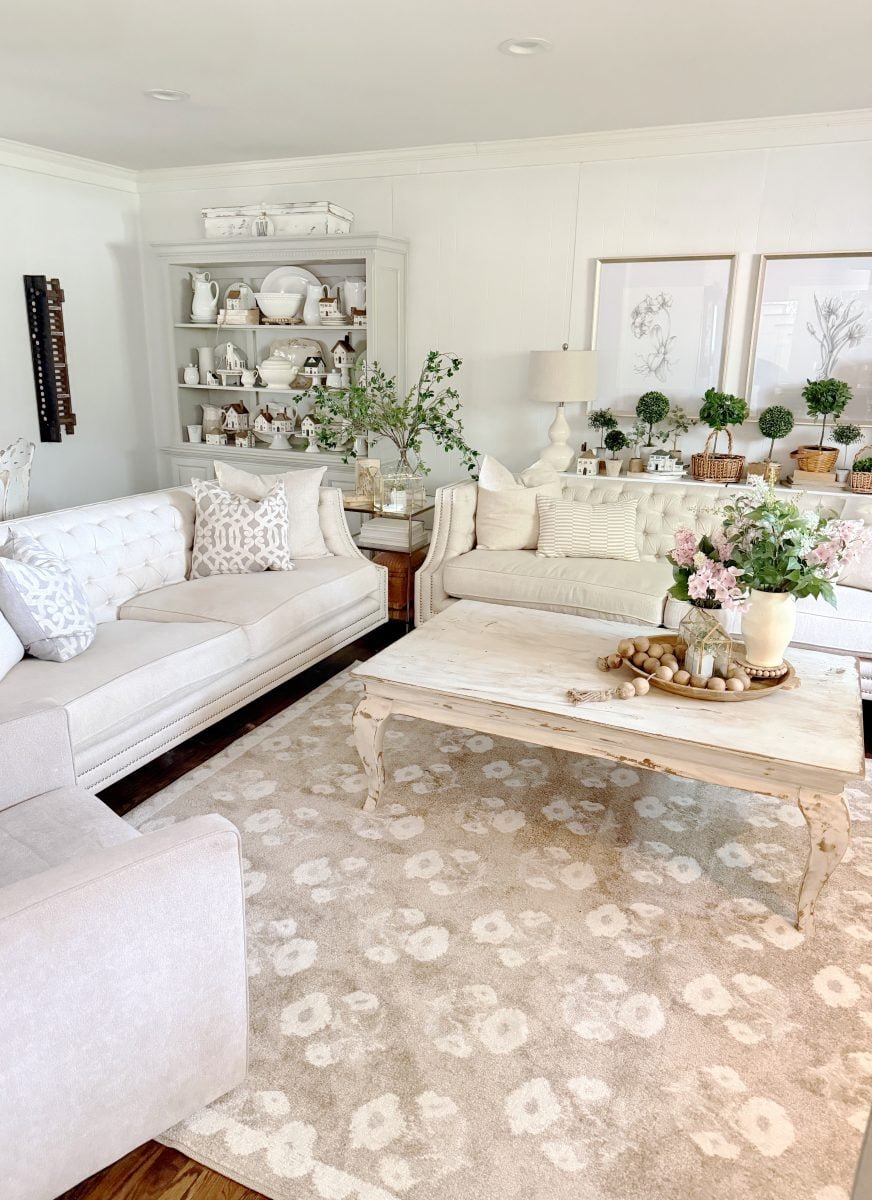
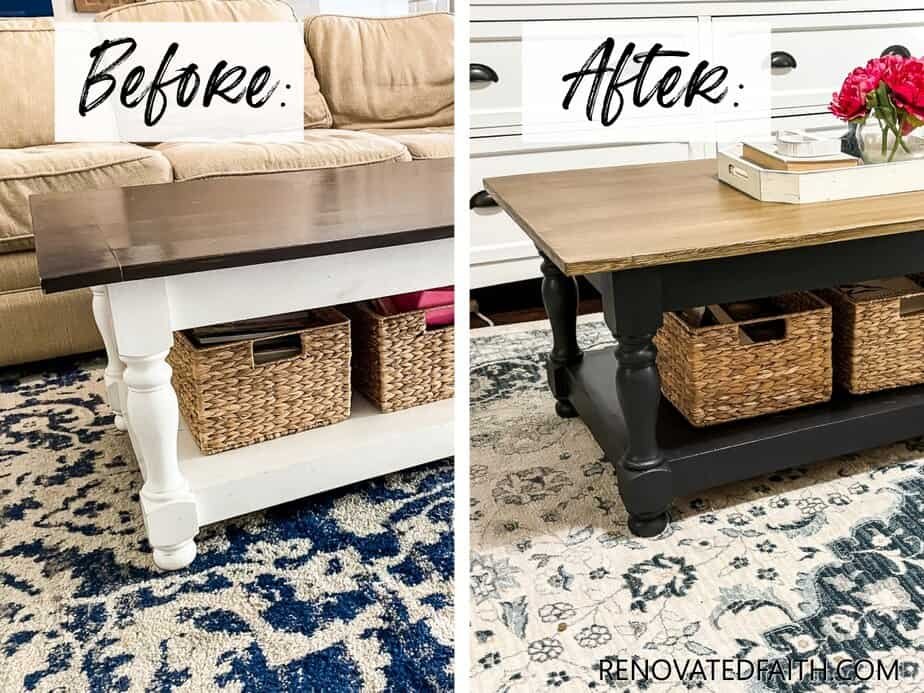
Credit: renovatedfaith.com
Priming The Surface
Priming a living room table is a key step before painting. It helps paint stick better and lasts longer.
Skipping primer can cause paint to peel or look uneven. Let’s see why primer matters and how to apply it properly.
Why Primer Matters
Primer creates a smooth base and seals the surface. This stops stains and wood tannins from showing through paint.
- Improves paint adhesion for a lasting finish
- Blocks knots and stains in wood
- Prevents peeling and cracking
- Creates an even color base for paint
- Reduces the number of paint coats needed
Applying Primer Properly
Follow these steps to apply primer correctly on your table’s surface. Good prep gives the best results.
- Clean the table well to remove dust and grease.
- Sand the surface lightly to help primer stick.
- Use a brush or roller to apply a thin, even coat of primer.
- Allow the primer to dry fully, usually 1–2 hours.
- Sand the primed surface lightly before painting.
| Tip | Reason |
|---|---|
| Use a high-quality primer | Ensures better adhesion and coverage |
| Apply primer in thin layers | Prevents drips and uneven surfaces |
| Work in a dust-free area | Keeps the surface clean and smooth |
| Let primer dry completely | Helps paint stick and cure properly |
Painting Techniques
Painting a living room table changes its look and feel. Good techniques make the job easier and the finish smoother.
Choosing the right method and applying paint evenly helps the table look its best. Let’s explore two key techniques.
Brush Vs. Spray Painting
Brush painting is traditional and gives control over small areas. It works well for detailed edges and touch-ups.
Spray painting covers large areas quickly. It creates a smooth, even coat but needs careful setup to avoid drips.
- Brush Painting:Easy to start, good for small jobs.
- Spray Painting:Fast coverage, best for smooth finishes.
- Clean Up:Brushes need washing, spray guns require careful cleaning.
- Control:Brushes offer precision; spray needs practice.
Applying Even Coats
Even coats prevent streaks and lumps. Use light, thin layers and wait for each to dry before adding the next.
| Tip | Why It Helps |
| Sand lightly between coats | Smooths surface for the next layer |
| Keep brush or spray moving | Stops paint from pooling |
| Apply thin coats | Prevents drips and uneven texture |
| Use quality paint | Ensures better coverage and durability |
Adding Finishing Touches
Painting a living room table can transform your space. After painting, adding the right finishing touches is essential.
These final steps will ensure your table looks great and stays protected for years.
Sealing And Protecting
Sealing your table helps prevent scratches and stains. It also adds a nice sheen to the surface.
- Choose a suitable sealant for your paint type.
- Apply a thin, even coat using a clean brush.
- Allow the sealant to dry completely before using the table.
Decorative Details
Adding decorative details enhances the table's appearance. Consider using stencils or decals for a personal touch.
Custom HTML Example: Use decals to add personality.
| Detail Type | Effect |
| Stencils | Creates patterns |
| Decals | Adds designs |
| Trims | Enhances edges |
Drying And Curing
Painting a living room table requires proper drying and curing for a smooth finish. This step ensures durability and a polished look.
Understanding the right drying times and avoiding mistakes can make the process easier. Let's explore the best practices.
Optimal Drying Times
Drying times can vary based on the type of paint you use. It's important to follow recommended times for a flawless finish.
| Paint Type | Drying Time |
| Latex | 1-2 hours |
| Oil-based | 6-8 hours |
| Chalk Paint | 30 minutes to 1 hour |
Avoiding Common Mistakes
Some mistakes can delay drying or affect the finish. Knowing what to avoid helps in achieving the best results.
- Do not apply thick layers of paint. It increases drying time.
- Avoid painting in humid conditions. It slows down the drying process.
- Ensure adequate ventilation in the room to speed up drying.

Credit: renovatedfaith.com
Maintaining Your Painted Table
Keeping your painted living room table in good shape helps it look nice longer. Regular care stops damage and wear.
Simple habits protect the paint and keep the table fresh. Follow easy steps to maintain your table well.
Cleaning Tips
Use a soft cloth to clean your painted table. Avoid harsh chemicals that can ruin the paint.
Wipe spills quickly to prevent stains. Use mild soap and water for regular cleaning.
- Dust weekly with a dry microfiber cloth
- Clean spills immediately with a damp cloth
- Use mild soap mixed with water for dirt
- Never use abrasive scrubbers or strong cleaners
- Dry the table fully after cleaning
Touch-up Advice
Small scratches or chips can be fixed easily. Keep some paint from the original job for touch-ups.
Lightly sand the damaged area before painting. Apply paint carefully and let it dry fully.
- Sand small rough spots gently with fine sandpaper
- Use a small brush for precise touch-ups
- Apply thin layers of paint, let each dry
- Finish with a clear coat if needed for protection
- Test touch-up paint color on a hidden spot first

Credit: shelbeeontheedge.com
Frequently Asked Questions
What Materials Do I Need To Paint A Living Room Table?
You need sandpaper, primer, paint, brushes, and a clear sealant. Choose high-quality supplies for a smooth finish. Prepare your workspace with drop cloths and ventilation to ensure safety and cleanliness during painting.
How Do I Prepare A Living Room Table For Painting?
Clean the table thoroughly to remove dirt and grease. Sand the surface to smooth imperfections and help paint adhere. Wipe off dust before applying a primer to create a durable base coat.
Which Type Of Paint Is Best For Living Room Tables?
Use acrylic or latex paint for durability and easy cleanup. These paints resist scratches and stains well. Choose a finish like satin or semi-gloss for a stylish, long-lasting surface.
How Many Coats Of Paint Should I Apply?
Apply two to three thin coats for even coverage and durability. Allow each coat to dry fully before applying the next. Thin layers prevent drips and create a professional look.
Conclusion
Painting a living room table can change its whole look. It adds color and style without much cost. Follow the steps carefully for a smooth finish. Choose the right paint and tools for best results. Take your time and enjoy the process.
A fresh coat of paint makes old furniture feel new again. Now, your table can match your room’s design perfectly. Try it out and see the difference yourself!