Have you ever wondered how to melt steel right at home? It might sound like a task only experts can handle, but with the right tools and simple steps, you can do it too.
Imagine turning solid steel into molten metal and shaping it yourself—that’s a powerful skill that puts creativity and control in your hands. In this guide, you’ll discover exactly what you need and how to safely melt steel without expensive equipment.
Ready to unlock this fascinating process? Keep reading, and you’ll be amazed at how achievable it really is.

Credit: www.reliance-foundry.com
Safety Precautions
Melting steel at home can be dangerous without the right safety measures. Protecting yourself and your workspace lowers the risk of accidents.
Follow safety rules carefully to handle hot materials and tools safely.
Protective Gear Essentials
Wear the correct gear to protect your body from heat and sparks. This gear keeps burns and injuries away.
- Heat-resistant gloves to protect your hands
- Safety goggles to shield your eyes from sparks
- A heavy-duty apron to guard your body
- Closed-toe boots to protect your feet
- A respirator mask to avoid inhaling fumes
Safe Workspace Setup
Set up your workspace to reduce hazards. Keep it clean and organized to work safely and efficiently.
| Safety Element | Details |
| Ventilation | Use fans or open windows to remove harmful fumes |
| Fire Extinguisher | Keep a class D extinguisher nearby for metal fires |
| Clear Area | Remove flammable materials and clutter |
| Stable Surface | Work on a heat-resistant and sturdy table |
Handling Hot Materials
Handle molten steel and hot tools with care. Use tools designed for high temperatures to avoid burns.
- Use tongs or clamps to hold hot steel
- Never touch molten metal with bare hands
- Keep a bucket of water or sand nearby for emergencies
- Work slowly and avoid rushing to prevent accidents
Materials And Tools Needed
Melt steel at home needs special materials and tools. Safety is very important.
You must know the right steel types, furnace options, and crucibles to use.
Types Of Steel For Melting
Choose steel that melts easily and suits your project. Carbon steel and stainless steel are common.
- Carbon steel: melts at about 1425°C (2597°F)
- Stainless steel: melts at about 1375°C to 1530°C (2500°F to 2786°F)
- Tool steel: used for hard tools, melts higher
- Alloy steel: contains other metals, check melting points
Furnace Options
Select a furnace that reaches high temperatures safely. Electric and propane furnaces work well.
| Furnace Type | Fuel | Max Temperature |
| Electric Furnace | Electricity | 1600°C (2912°F) |
| Propane Furnace | Propane Gas | 1700°C (3092°F) |
| Coal Furnace | Coal | 1400°C (2552°F) |
Crucibles And Molds
Use strong crucibles to hold molten steel. Choose molds to shape the metal after melting.
- Graphite crucibles resist high heat well
- Ceramic crucibles are cheaper but fragile
- Steel molds shape molten metal into tools or parts
- Sand molds are easy to make and good for simple shapes
Setting Up Your Furnace
Melting steel at home requires a furnace that can reach very high temperatures. Setting up your furnace safely and correctly is the first step.
This guide covers building a furnace, choosing fuel, and controlling temperature for melting steel.
Building A Simple Furnace
You can build a furnace using firebricks or a metal container lined with insulating material. The furnace must hold heat well to melt steel.
- Use firebricks or a steel drum for the furnace body
- Line the inside with ceramic wool or fireclay for insulation
- Include a hole for air flow and fuel addition
- Make sure the furnace is stable and heat-resistant
Fuel Choices
Choose fuel that burns hot enough to melt steel, which requires around 1370°C (2500°F). Common fuels include charcoal, propane, and coal.
| Fuel Type | Max Temperature | Availability | Cost |
| Charcoal | 1100°C (2012°F) | Easy | Low |
| Propane | 1995°C (3623°F) | Easy | Moderate |
| Coal | 1300°C (2372°F) | Moderate | Low |
Temperature Control Tips
Maintaining the right temperature is important to melt steel without wasting fuel or damaging your furnace.
- Use a thermometer or pyrometer to monitor heat
- Adjust airflow with a fan or blower for higher heat
- Add fuel gradually to keep temperature steady
- Wear safety gear to protect from heat and sparks
Melting Process Step-by-step
Melting steel at home needs care and the right tools. You must follow each step to do it safely.
This guide explains how to prepare steel, heat it, and pour the molten metal.
Preparing Steel Pieces
Start with clean steel pieces. Remove dirt, rust, and paint from the metal.
Cut steel into small pieces. Small parts melt faster and more evenly.
- Use gloves and eye protection.
- Clean steel with a wire brush or sandpaper.
- Cut steel into pieces about 1 to 2 inches wide.
- Keep steel dry before melting.
Heating And Monitoring
Use a propane or charcoal furnace to heat steel. The temperature must reach about 2,500°F (1,370°C).
Place steel pieces in a crucible. The crucible holds the steel as it melts.
- Light the furnace and wait for a strong flame.
- Put the crucible inside the furnace carefully.
- Wear heat-resistant gloves and face shield.
- Watch the steel until it turns bright orange or yellow.
- Use a metal rod to stir the molten steel gently.
Pouring Molten Steel
When steel melts fully, remove the crucible with tongs. Pour molten steel slowly and carefully.
Use a mold or safe container to shape the steel. Let it cool completely before handling.
- Keep a safe distance while pouring.
- Wear protective clothing and eye protection.
- Pour steel in a smooth, steady motion.
- Do not touch molten steel or mold until cooled.
- Allow steel to cool for several hours.
Cooling And Solidifying
After melting steel at home, cooling and solidifying are key steps. Proper methods ensure the metal forms correctly. Cooling too fast or slow can cause problems.
This section explains safe cooling methods, how to remove casts from molds, and post-melting cleanup tips.
Safe Cooling Methods
Cooling steel safely prevents cracks and weak spots. Use controlled methods to avoid sudden temperature changes. Let the steel cool in a stable environment.
- Cool the mold on a fireproof surface
- Keep the cooling area free of drafts
- Avoid adding water or moisture during cooling
- Let the steel cool naturally at room temperature
- Use insulating materials to slow cooling if needed
Removing Casts From Molds
Once the steel has solidified and cooled enough, remove the cast carefully. Removing too early can deform the metal.
Follow these steps to remove casts safely:
- Check if the metal is cool to touch but still warm inside
- Gently tap the mold edges to loosen the cast
- Wear gloves and use tools to lift the cast from the mold
- Place the cast on a heat-resistant surface for final cooling
- Inspect the cast for cracks or defects
Post-melting Cleanup
Cleaning up after melting steel keeps your workspace safe and ready for next use. Remove slag and clean tools properly.
| Cleanup Task | Recommended Method |
| Remove slag from the mold | Use a wire brush or scraper |
| Clean crucible | Let it cool, then brush off residue |
| Store tools | Keep dry and away from moisture |
| Dispose of waste safely | Follow local regulations for metal waste |

Credit: www.youtube.com
Common Challenges And Solutions
Melting steel at home can be tough. There are common challenges that you may face. Knowing solutions can help you achieve better results.
Let's explore key challenges like dealing with impurities, preventing furnace damage, and troubleshooting uneven melts. Each challenge requires specific solutions.
Dealing With Impurities
Impurities in steel can weaken the final product. Removing them is crucial for quality results. Here's how you can manage impurities effectively:
- Use flux to bind with impurities and remove them.
- Ensure the steel is clean before melting.
- Regularly skim off slag during the melting process.
Preventing Furnace Damage
Your furnace is vital for melting steel. Preventing damage ensures long-term use. Follow these tips to protect your furnace:
- Do not exceed the furnace’s temperature limit.
- Regularly inspect for cracks and wear.
- Use a proper cooling method after each use.
Troubleshooting Uneven Melts
Uneven melts can cause defects in your steel. It is important to address this issue promptly. Consider these solutions:
| Problem | Solution |
| Uneven heat distribution | Rotate the steel during melting. |
| Inconsistent temperature | Use a thermometer to check regularly. |
| Impurities causing uneven melts | Remove slag often and use flux. |
Advanced Tips For Better Results
Melting steel at home can be complex. With the right tips, you can achieve better results. Focus on furnace efficiency, steel alloy adjustments, and mold quality.
Improving Furnace Efficiency
A well-maintained furnace can melt steel more efficiently. Regular checks and adjustments are necessary.
- Clean the furnace regularly to remove debris.
- Check for leaks to prevent heat loss.
- Ensure proper airflow to maintain temperature.
Steel Alloy Adjustments
Choosing the right steel alloy is crucial. Different alloys have different melting points. Adjust based on your needs.
| Alloy Type | Melting Point (°C) |
| Carbon Steel | 1425-1540 |
| Stainless Steel | 1400-1450 |
| Tool Steel | 1425-1540 |
Enhancing Mold Quality
The quality of your mold affects the final product. Use durable materials and precise designs.
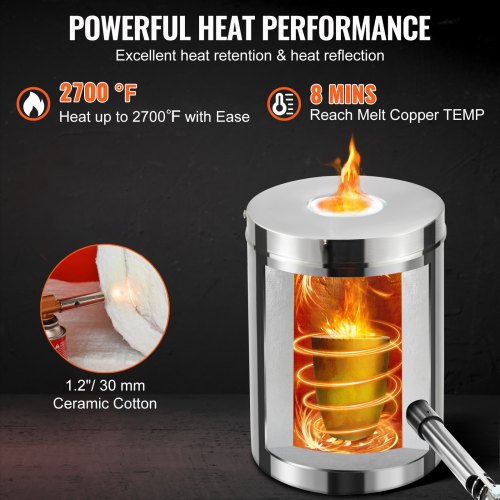
Credit: www.vevor.ca
Frequently Asked Questions
What Equipment Is Needed To Melt Steel At Home?
You need a high-temperature furnace, crucible, tongs, and safety gear. A propane or electric furnace can reach steel’s melting point. Proper ventilation and fireproof gloves ensure safety during the melting process.
What Is The Melting Point Of Steel?
Steel melts at approximately 1370°C to 1510°C (2500°F to 2750°F). The exact temperature varies by alloy composition. Reaching this heat requires specialized equipment like a forge or electric arc furnace.
Is It Safe To Melt Steel At Home?
Melting steel at home involves extreme heat and molten metal risks. Proper safety gear and ventilation are essential. Only experienced individuals should attempt this to avoid burns, fire hazards, and toxic fumes.
How Long Does It Take To Melt Steel At Home?
Melting steel typically takes 20 to 60 minutes depending on furnace power. Smaller batches melt faster, while larger amounts need more time. Maintaining consistent high heat speeds the melting process.
Conclusion
Melting steel at home takes care, safety, and the right tools. You need strong heat and proper protection. Small projects become possible with patience and practice. Always follow safety steps to avoid accidents. Keep learning and improving your skills. This process can be rewarding and useful.
Try simple melts before moving to harder tasks. Enjoy the challenge and stay safe while working.