

Have you ever wanted to create your own terracotta clay right at home? Imagine the satisfaction of shaping beautiful pots, sculptures, or decorations made with your very own natural clay.
Making terracotta clay yourself is easier than you think, and it gives you full control over the materials and texture. In this guide, you’ll discover simple steps and insider tips that will help you craft perfect terracotta clay every time.
Ready to bring your creative ideas to life? Keep reading to unlock the secrets of homemade terracotta clay!
Credit: www.gatheringbeauty.com
Materials Needed
Making terracotta clay at home is a simple process. You need some basic materials to get started.
Gathering the right ingredients and tools helps you create good quality clay for pottery or crafts.
Basic Ingredients
Terracotta clay mainly consists of natural clay and a few other ingredients. These help the clay to dry and harden well.
- Natural clay powder or soil with high clay content
- Water to mix and form the clay
- Sand to add texture and prevent cracking
- Fine powdered grog (optional) to improve strength
Use clean materials to avoid impurities that can weaken the clay.
Tools And Equipment
You need some simple tools to prepare and shape your terracotta clay. These make the process easier and neater.
- Large mixing container or bucket
- Wooden paddle or stick for mixing
- Fine sieve to remove lumps from the clay
- Plastic sheet or bag to cover the clay
- Work surface like a table or board
- Clay shaping tools (optional) for molding
Make sure tools are clean and dry before use to keep the clay fresh.

Credit: www.kenarry.com
Preparing The Clay Mixture
Making terracotta clay at home starts with preparing the right clay mixture. The quality of the clay affects the final product’s strength and texture.
This guide explains how to measure ingredients and mix them properly for the best results.
Measuring Ingredients
Use accurate measurements to get the right balance of clay, sand, and water. Too much water or sand can weaken the clay.
- Clay powder: 3 parts
- Fine sand: 1 part
- Water: 1 part (adjust as needed)
- Optional: small amount of natural fibers for strength
| Ingredient | Quantity |
|---|---|
| Clay powder | 3 parts |
| Fine sand | 1 part |
| Water | 1 part (adjust if too dry) |
| Natural fibers (optional) | Small pinch |
Mixing Process
Mix the dry ingredients first, then slowly add water. Stir well to form a smooth and workable clay.
- Combine clay powder and sand in a large bowl.
- Stir dry ingredients until evenly mixed.
- Add water in small amounts while stirring.
- Mix until the clay feels soft and pliable, not sticky.
- Add fibers if using, and knead them into the clay.
- Let the clay rest for 10 minutes before use.
Conditioning The Clay
Conditioning terracotta clay is an important step before use. Properly prepared clay is easier to work with and shapes better.
The process involves making the clay soft and pliable. This ensures your clay creations are strong and durable.
Kneading Techniques
Kneading clay is like kneading dough. It removes air bubbles and makes the clay smooth.
Roll the clay into a ball. Then, press it down and fold it in half. Repeat this several times.
- Roll into a ball
- Press and fold
- Repeat until smooth
Checking Consistency
After kneading, check the clay’s consistency. It should be soft but not sticky.
If the clay is too dry, add a little water. If too wet, let it air dry for a bit.
- Soft but not sticky
- Add water if dry
- Let dry if too wet
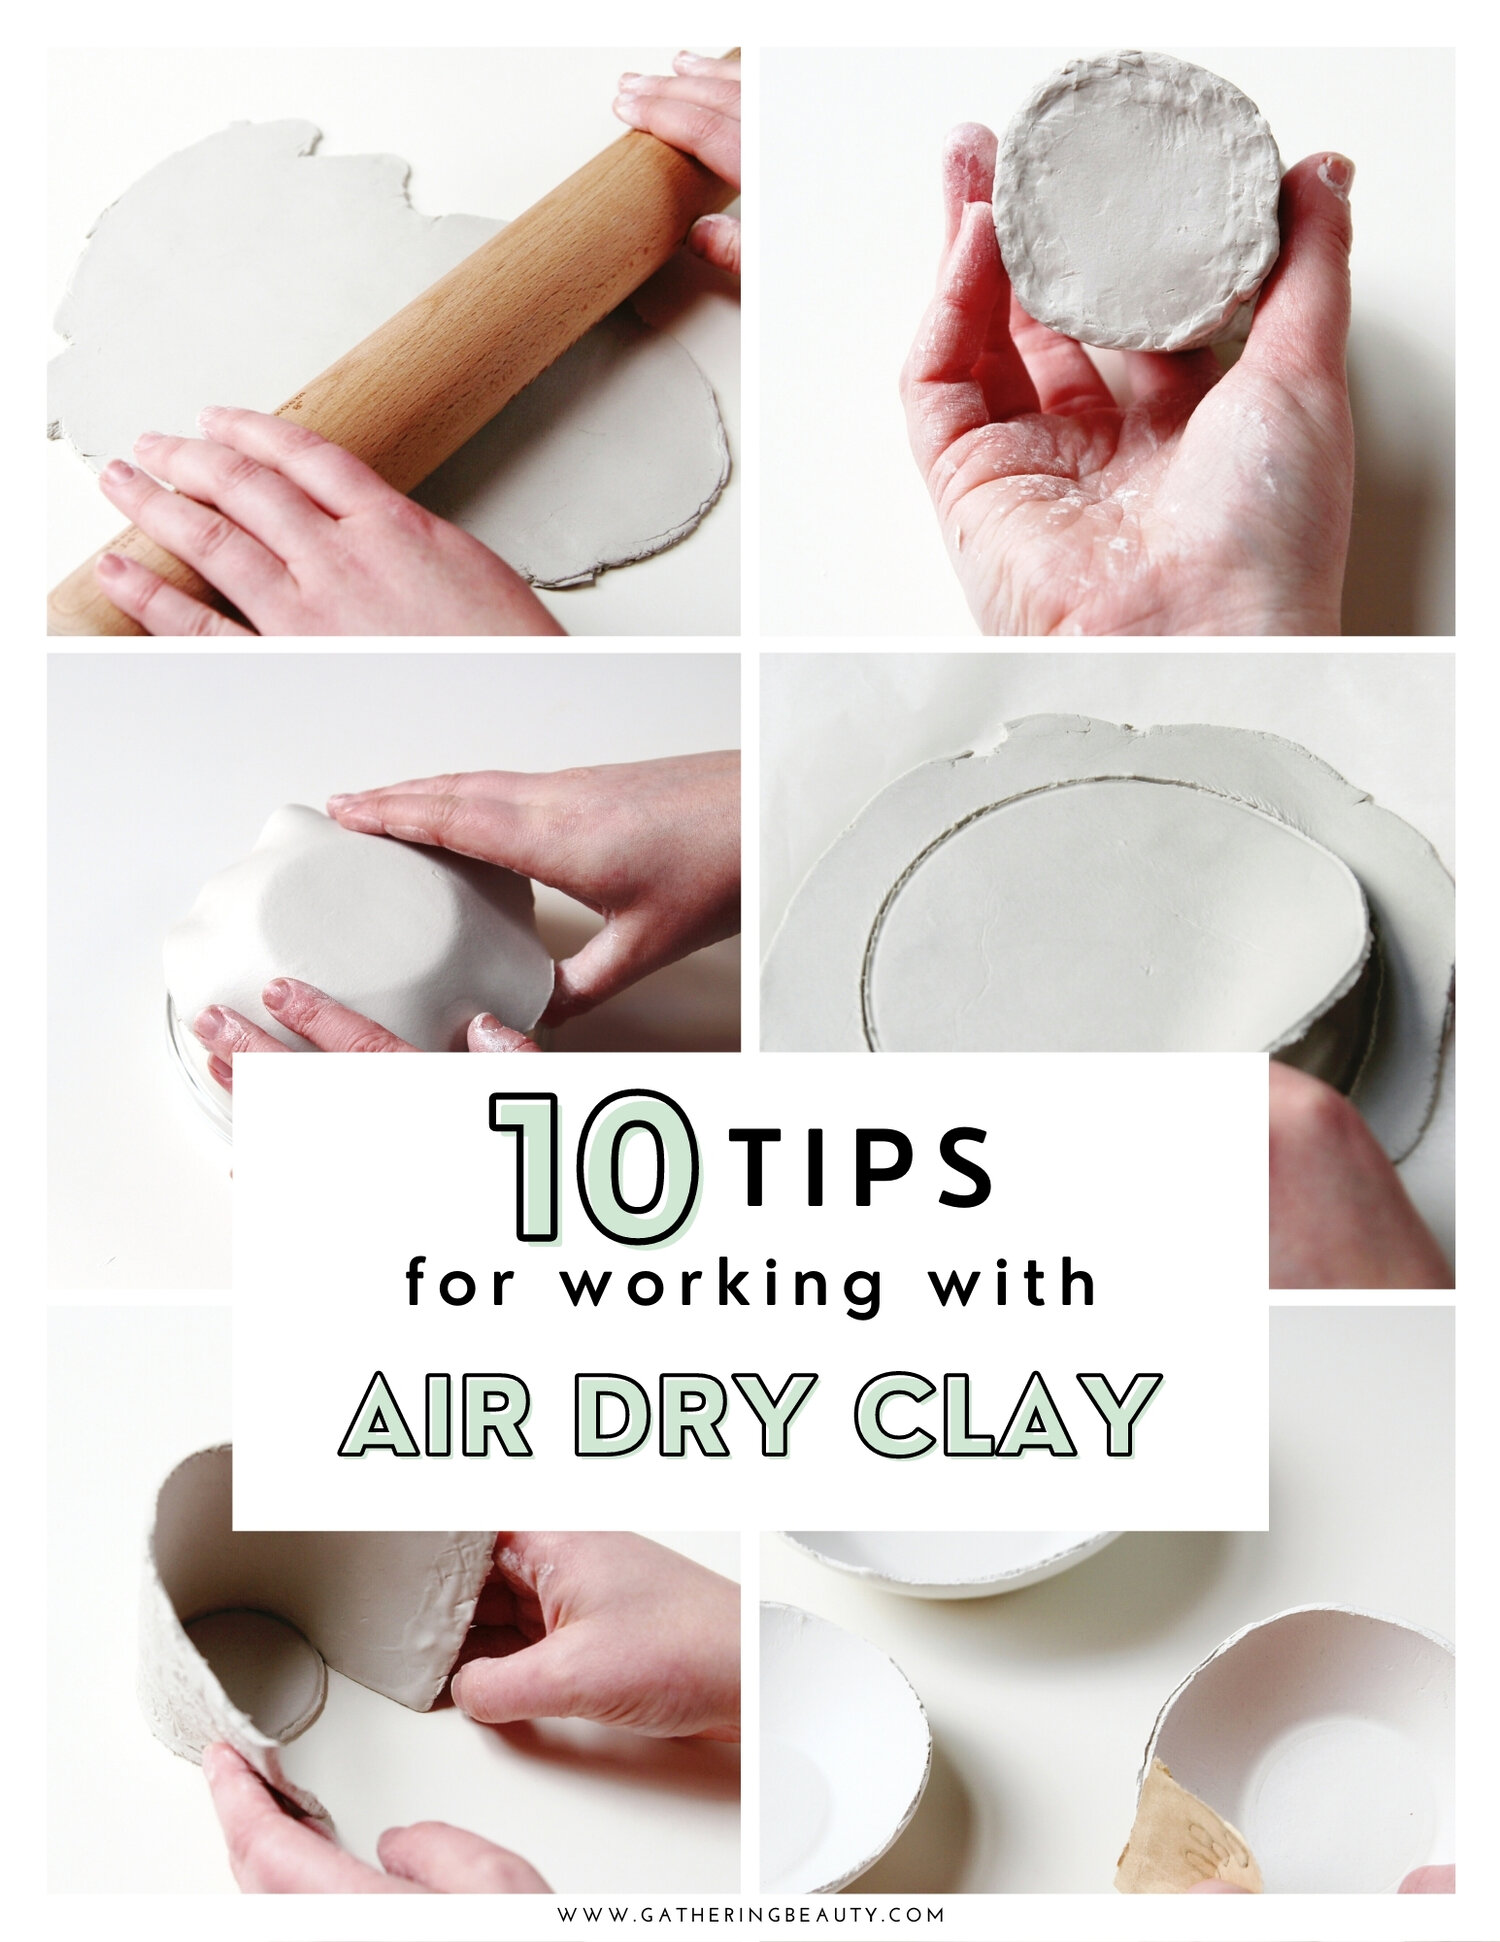
Shaping Your Clay
Shaping terracotta clay is a fun and creative part of making pottery. You can form your clay by hand or use molds for more detailed shapes.
Both methods help you create unique designs for your terracotta projects. Let’s explore two popular ways to shape your clay.
Hand Building Methods
Hand building lets you shape clay using simple tools and your hands. You can build items without a potter’s wheel.
- Pinching:Use your fingers to pinch clay into bowls or cups.
- Coiling:Roll clay into long ropes and stack them to form walls.
- Slabbing:Flatten clay into slabs and cut shapes to join together.
- Sculpting:Carve or model clay to add details and textures.
Using Molds
Molds help you shape clay into exact forms. You press the clay into or around the mold to get the shape.
| Type of Mold | How to Use | Best For |
| Plaster Mold | Press soft clay inside and let it dry a bit. | Bowls, plates, and cups |
| Rubber Mold | Push clay into flexible mold for detailed shapes. | Small figurines and decorations |
| Wooden Mold | Wrap clay around the mold and smooth the edges. | Boxes and curved forms |
Drying And Firing Tips
Making terracotta clay at home needs careful drying and firing. These steps help prevent cracks and make the clay strong.
Following proper drying and firing tips will give your terracotta a smooth finish and long-lasting durability.
Air Drying Steps
Air drying is the first and most important step before firing terracotta clay. Dry your clay slowly to avoid cracks.
Keep the clay in a cool, dry place with good airflow but no direct sunlight. Turn the pieces often for even drying.
- Place clay on a flat, absorbent surface like plaster or wood
- Turn the pieces gently every day
- Keep away from strong sun and wind
- Let clay dry for several days, depending on thickness
- Check for cracks and smooth any rough spots
Firing Options At Home
You can fire terracotta clay using a home oven or a small kiln. Each option has different temperatures and times.
Firing hardens the clay and gives it the classic terracotta look. Follow safety rules during firing.
- Home Oven:Use a baking temperature around 200-250°C (392-482°F). Fire for 2-3 hours.
- Small Kiln:Heat slowly up to 900°C (1652°F). Hold temperature for 1-2 hours.
- Let clay cool down inside the oven or kiln before removing
- Wear gloves and keep area well-ventilated
Painting And Sealing
Learning to paint and seal terracotta clay enhances its beauty. This guide helps you choose paints and apply sealants effectively.
With the right materials and techniques, your terracotta projects will look vibrant and last longer.
Choosing Paints
Picking the right paint is crucial for a smooth finish. Consider the color, texture, and durability of the paint.
- Acrylic paints work well for terracotta.
- Choose non-toxic options for safety.
- Opt for weather-resistant paints for outdoor items.
Applying Sealants
Sealants protect your terracotta creations from moisture and wear. Applying them correctly ensures lasting results.
To apply a sealant, follow these steps:
- Clean the surface thoroughly.
- Allow the clay to dry completely.
- Apply an even coat of sealant using a brush.
- Let it dry as per the instructions on the product.
Troubleshooting Common Issues
Making terracotta clay at home can be simple, but some problems may appear. Cracking and uneven drying are common issues. Fixing these helps your clay last longer and stay strong.
Learn how to spot these problems and the best ways to avoid them. This guide covers cracking, breakage, and uneven drying.
Cracking And Breakage
Cracks often happen because the clay dries too fast or is too thick. Breakage can occur if the clay is weak or handled roughly. Fix these by following good drying and handling steps.
- Keep clay pieces thin and even in thickness.
- Dry slowly in a shaded, cool place.
- Use a spray bottle to keep clay moist if it dries too fast.
- Handle clay gently to avoid stress points.
- Mix clay well for even texture and strength.
Uneven Drying
Uneven drying causes warping and cracks. Parts of the clay dry faster than others. Controlling the environment helps keep drying even and smooth.
| Cause | Effect | How to Fix |
| Sunlight on one side | Warping and surface cracks | Dry in shaded, ventilated area |
| Thick and thin areas | Uneven shrinkage | Keep thickness uniform |
| Dry air or wind | Fast drying spots | Cover with damp cloth or plastic |
| Cold temperatures | Slow drying, cracking | Dry in warm, stable room |

Credit: www.youtube.com
Frequently Asked Questions
What Materials Do I Need To Make Terracotta Clay At Home?
To make terracotta clay, you need natural clay, water, and sand. Optional tools include a mixing bowl and a sieve. Using clean, fine clay ensures smooth texture and better results. These materials are easy to find and cost-effective for homemade terracotta clay.
How Long Does It Take To Prepare Terracotta Clay?
Preparing terracotta clay takes about 30 to 60 minutes. Mixing and kneading the clay thoroughly is essential. Drying time depends on thickness and environment but typically takes 24 to 48 hours. Proper preparation ensures the clay is workable and durable for crafting.
Can I Use Regular Soil To Make Terracotta Clay?
Regular soil is not ideal due to impurities and inconsistent texture. Pure, fine clay is necessary for strong terracotta. You can sift soil to remove debris but it may still lack quality. Using natural clay results in better strength and finish.
How To Store Homemade Terracotta Clay Properly?
Store terracotta clay in an airtight container or plastic bag. Keep it moist by wrapping in a damp cloth. Store in a cool, dry place to prevent drying out. Proper storage maintains clay’s workability for future use.
Conclusion
Making terracotta clay at home is simple and fun. You need just a few basic materials. Mixing and kneading helps create the right texture. Drying the clay properly ensures strong results. This process lets you craft pots, decorations, or art pieces.
Try different shapes and designs as you practice. Enjoy the hands-on experience and the natural feel. Keep experimenting to improve your skills. Making your own terracotta clay saves money and adds a personal touch. Start today and see what you can create!