Have you ever wondered if you could make stainless steel at home? Imagine creating a strong, shiny metal right in your own space.
It might sound complicated, but with the right steps, you can understand the process and even try it yourself. This guide will walk you through how to make stainless steel, breaking down the science into simple, clear instructions. Keep reading, and you’ll discover how to turn everyday materials into something durable and useful.
Your curiosity is about to pay off!
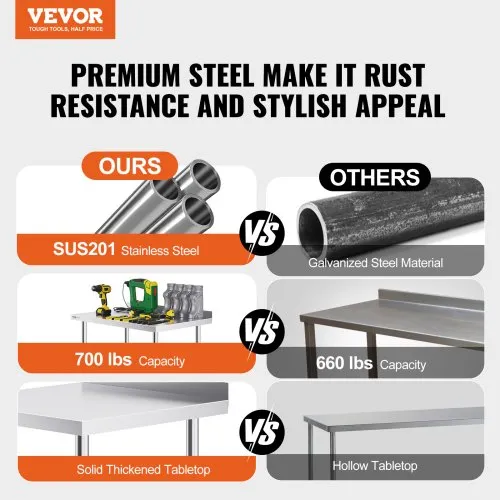
Credit: www.vevor.com
Materials Needed
Making stainless steel at home requires specific materials. You need to gather raw metals and safety equipment first.
This guide covers the types of steel, alloying elements, and safety gear needed for the process.
Types Of Steel
Stainless steel comes in many types. The most common types for home projects are 304 and 316 stainless steel.
- Type 304: Good corrosion resistance and easy to work with.
- Type 316: Better corrosion resistance, used for harsh environments.
- Type 430: Magnetic and less resistant to corrosion.
Alloying Elements
Alloying elements give stainless steel its special properties. Here is a simple table showing common elements and their effects.
| Element | Purpose |
|---|---|
| Chromium | Prevents rust and adds hardness |
| Nickel | Improves corrosion resistance and toughness |
| Manganese | Increases strength and hardness |
| Carbon | Adds hardness but too much can cause brittleness |
Safety Gear
Working with metals requires proper safety gear. Protect yourself to avoid injuries.
- Heat-resistant gloves to handle hot materials
- Safety goggles to protect your eyes
- Respirator mask to avoid inhaling fumes
- Long-sleeved clothing to protect your skin
- Closed-toe shoes for foot safety
Preparing The Workspace
Making stainless steel at home needs a clean and safe workspace. You must prepare your area before starting the process.
Good preparation helps you work faster and avoid accidents. It also keeps your tools and materials organized.
Setting Up Tools
Gather all the tools you need before you begin. Make sure they are clean and in good condition.
Arrange tools within easy reach. This saves time and keeps your workspace tidy.
- Wear safety gloves and goggles
- Use a sturdy workbench or table
- Have a hammer, tongs, and crucible ready
- Keep a fire extinguisher nearby
Ensuring Proper Ventilation
Stainless steel making produces fumes that can be harmful. Good airflow keeps the air safe to breathe.
Work near open windows or outside if possible. Use fans to push fresh air into the workspace.
- Open doors and windows
- Use an exhaust fan or ventilation hood
- Avoid working in small, closed rooms
- Take breaks outside for fresh air
Organizing Materials
Keep all your raw materials in one place. Label each container clearly to avoid confusion.
Organized materials help you work quickly and prevent mix-ups during the process.
- Store iron, chromium, and nickel separately
- Keep small parts in labeled jars or boxes
- Place materials near your workbench
- Dispose of waste materials safely
Melting The Steel
Melting stainless steel at home needs careful planning and safety. You must use the right tools and control the heat well. This guide explains key steps for melting steel safely and effectively.
The melting process changes solid steel into liquid form. This lets you shape or mix it with other metals. Follow these sections to learn about the furnace, temperature, and handling molten metal.
Choosing The Right Furnace
Select a furnace that can reach high temperatures needed for melting steel. Electric arc and induction furnaces are common for home use. Your furnace must hold steel safely and heat evenly.
- Electric arc furnaces use electrical current to melt steel.
- Induction furnaces heat steel with magnetic fields.
- Ensure the furnace lining resists high heat and chemical wear.
- Check that the furnace size fits your steel amount.
Melting Temperature
Steel melts at about 1370 to 1510 degrees Celsius (2500 to 2750 degrees Fahrenheit). Keeping the right temperature is crucial to get pure molten steel. Too low heat will not melt steel fully. Too high heat can cause damage or burn the metal.
| Steel Type | Melting Point (°C) | Melting Point (°F) |
|---|---|---|
| 304 Stainless Steel | 1400 | 2552 |
| 316 Stainless Steel | 1375 | 2507 |
| 410 Stainless Steel | 1450 | 2642 |
Handling Molten Metal
Molten steel is dangerous. Use strong gloves, face shields, and heat-resistant clothes. Pour the molten metal slowly to avoid splashing. Work in a safe area free from flammable materials.
- Wear protective gear at all times.
- Use proper tools like tongs and crucibles.
- Keep a fire extinguisher nearby.
- Work with a partner if possible.
- Cool down equipment safely after use.
Adding Alloying Elements
To make stainless steel at home, you need to add alloying elements. These elements give stainless steel its unique properties.
The key alloying elements are chromium and nickel. Adding them properly is crucial for the desired result.
Incorporating Chromium
Chromium is essential for stainless steel's corrosion resistance. It forms a thin layer on the surface, protecting it.
Here's a simple HTML snippet to help you visualize the chromium layer:
Adding Nickel
Nickel adds strength and flexibility to stainless steel. It helps in achieving a shiny and polished finish.
- Measure the right amount of nickel to add.
- Mix it with the base metal thoroughly.
- Ensure even distribution for a consistent finish.
Mixing Techniques
Proper mixing is vital for alloying elements to integrate well. This ensures the steel's properties are consistent.
| Technique | Description |
| Mechanical Stirring | Use a tool to mix elements physically. |
| Electromagnetic Stirring | Uses magnetic fields to mix evenly. |
| Gas Injection | Injects inert gas to aid mixing. |
Cooling And Solidifying
Making stainless steel at home involves several steps. Cooling and solidifying is crucial for quality.
Proper cooling methods ensure the stainless steel maintains its integrity. This guide will help you understand these methods.
Cooling Methods
Cooling stainless steel can be done in various ways. The cooling method affects the final product's quality.
- Air cooling: Allows the steel to cool naturally in air.
- Water quenching: Involves submerging the steel in water.
- Oil quenching: Uses oil for a slower cooling rate.
Preventing Cracks
Cracks can form if cooling is too fast or uneven. Preventing cracks is key for strong stainless steel.
Timing Considerations
Timing is important in the cooling process. The right timing affects the steel's properties.
| Cooling Method | Average Time |
| Air Cooling | 2-4 hours |
| Water Quenching | 30 minutes |
| Oil Quenching | 1-2 hours |
Choose the best timing based on your method to ensure quality stainless steel.
Credit: www.lifenreflection.com
Shaping And Finishing
Making stainless steel at home requires careful shaping and finishing. These steps ensure the metal holds its form and looks smooth.
Good techniques help improve the strength and appearance of your stainless steel items.
Forging Techniques
Forging shapes stainless steel by heating and hammering it. Heat the metal until it glows red, then hammer it on an anvil. This makes the steel strong and shapes it as needed.
- Heat the steel evenly to avoid weak spots.
- Use a heavy hammer for better shaping.
- Hammer in smooth, even strokes.
- Cool the steel slowly to reduce cracks.
Grinding And Polishing
Grinding removes rough edges and shapes the surface. Use a grinding wheel or file to smooth out the steel. After grinding, polishing makes the surface shiny and smooth.
| Tool | Purpose | Tip |
| Grinding Wheel | Remove rough edges | Use steady pressure |
| Sandpaper | Smooth surface | Start with coarse grit |
| Polishing Cloth | Make surface shiny | Use polishing compound |
Corrosion Resistance Tips
Stainless steel resists rust but needs care. Clean it often and avoid scratches. Use oil or wax to protect the surface from moisture.
- Clean with mild soap and water
- Dry the steel fully after cleaning
- Apply thin layer of oil or wax
- Avoid harsh chemicals and salt
- Store in a dry place
Common Challenges
Making stainless steel at home is a complex task. Many challenges can affect the quality of the final product.
Understanding these challenges helps you prepare and avoid common mistakes during the process.
Avoiding Contamination
Contamination can weaken stainless steel or change its properties. It happens when unwanted materials mix with the steel.
- Use clean tools and containers only for stainless steel.
- Keep your workspace free from dust and dirt.
- Store raw materials in dry, sealed containers.
- Avoid mixing stainless steel with other metals during melting.
Managing Temperature
Temperature control is critical when making stainless steel. Too hot or too cold can ruin the metal.
| Temperature Range | Effect |
| Below 1400°C (2552°F) | Incomplete melting, weak steel |
| 1400°C to 1600°C (2552°F to 2912°F) | Optimal melting and mixing |
| Above 1600°C (2912°F) | Burning or unwanted reactions |
Handling Safety Risks
Working with high heat and metals brings safety risks. Protect yourself to avoid accidents.
- Wear heat-resistant gloves and clothing.
- Use safety goggles to protect your eyes.
- Work in a well-ventilated area.
- Keep a fire extinguisher nearby.
- Never work alone when melting metals.

Credit: www.amazon.com
Maintenance And Care
Stainless steel needs regular care to stay shiny and strong. Proper maintenance helps it last longer.
Clean and store stainless steel correctly to avoid damage and rust.
Cleaning Stainless Steel
Use warm water and mild soap to clean stainless steel surfaces. Avoid harsh chemicals that can harm the finish.
Dry with a soft cloth to prevent water spots and streaks. Clean regularly to remove dirt and fingerprints.
- Use a microfiber cloth for wiping
- Apply gentle circular motions when cleaning
- Rinse well with clean water after washing
- Never use steel wool or abrasive pads
Preventing Rust
Keep stainless steel dry to stop rust from forming. Wipe away any moisture after use.
Avoid leaving salty or acidic foods on the surface for long. These can cause corrosion over time.
- Dry stainless steel after washing
- Use a protective oil or polish occasionally
- Fix scratches quickly to prevent rust spots
- Keep away from chlorine and bleach
Storage Tips
Store stainless steel items in a dry, cool place. Avoid stacking heavy items on top to prevent dents.
Use soft cloth or padding between pieces to avoid scratches. Keep away from humid areas to reduce rust risk.
- Store in a well-ventilated area
- Keep pieces separated with cloth or foam
- Avoid damp or humid storage spots
- Inspect stored items regularly for damage
Frequently Asked Questions
What Materials Are Needed To Make Stainless Steel At Home?
You need iron, chromium, nickel, and carbon in precise ratios. Proper tools for melting and mixing metals are essential. Safety equipment is also necessary to handle high temperatures and molten metals effectively.
How Do You Melt Metals To Create Stainless Steel?
Use a high-temperature furnace or a strong torch capable of reaching 1400°C. Metals must be melted evenly and mixed thoroughly for uniform composition. Controlled cooling helps achieve desired stainless steel properties.
Can Stainless Steel Be Safely Made In A Home Workshop?
Making stainless steel at home is risky due to extreme heat and toxic fumes. Proper ventilation, protective gear, and knowledge are critical. It’s generally recommended to leave stainless steel production to professionals.
What Are The Key Steps To Alloy Stainless Steel Correctly?
First, melt iron and add chromium and nickel carefully. Stir the molten mixture to blend metals uniformly. Then, control cooling to form the stainless steel’s desired microstructure and corrosion resistance.
Conclusion
Making stainless steel at home takes patience and care. Follow each step with attention. Use the right tools and materials for safety. Practice helps improve your results over time. Enjoy the process and learn from mistakes. Soon, you will create strong, shiny stainless steel.
Keep experimenting and exploring new methods. Making metal can be fun and rewarding. Try small projects before bigger ones. Stay safe and work in a well-ventilated area. You can bring simple steel ideas to life.