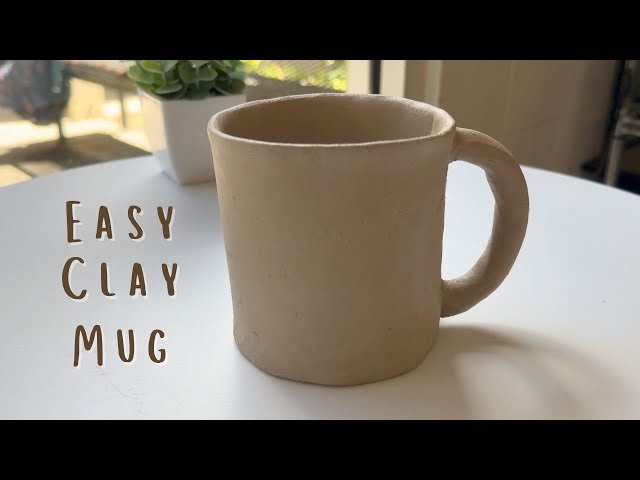
Have you ever wanted to create your own clay for crafting but didn’t want to spend money on expensive materials? Making oven clay at home is easier than you think, and it gives you the freedom to shape, paint, and bake your creations right in your own kitchen.
Imagine turning simple ingredients into beautiful, lasting art pieces—all with just a few steps. If you’re ready to unlock your creativity and make something truly unique, keep reading. This guide will show you exactly how to make oven clay at home, step by step.
Your next masterpiece is waiting!
Materials Needed
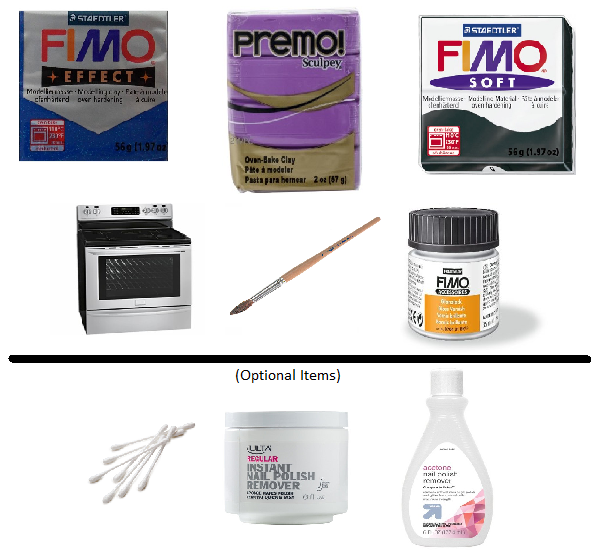
Making oven clay at home requires a few simple materials. These materials help create a smooth and durable clay for crafting.
Gathering the right items ensures your clay will bake well and harden properly in the oven.
Common Ingredients
The basic ingredients form the main body of the oven clay. Each part plays a role in texture and strength.
- 1 cup baking soda
- 1/2 cup cornstarch
- 3/4 cup water
- 1 tablespoon vegetable oil
Optional Additives
Optional additives can improve the clay’s feel and finish. Use them to customize your clay for different projects.
| Additive | Purpose | Amount |
| White glue | Increases strength | 1-2 tablespoons |
| Acrylic paint | Adds color | As desired |
| Lemon juice | Prevents cracking | 1 teaspoon |
| Baby oil | Enhances smoothness | 1 teaspoon |
Preparing The Clay Dough
Making oven clay at home is fun and easy. You need to prepare the clay dough carefully to get good results.
This guide helps you mix ingredients and get the right texture for your clay.
Mixing Ingredients
Start by gathering all ingredients before mixing. The main parts are flour, salt, and water.
Mix dry ingredients first. Then slowly add water to make a dough.
- 1 cup all-purpose flour
- 1/2 cup salt
- 1/2 cup water (add more if needed)
- 1 tablespoon vegetable oil (optional)
Achieving The Right Texture
The dough should be soft but not sticky. If it is too dry, add a little water.
Knead the dough for about 5 minutes. This makes it smooth and easier to shape.
- If sticky, add small amounts of flour
- If crumbly, add a few drops of water
- Soft dough is easier to mold and bake
Shaping And Sculpting Tips
Oven clay is easy to shape and sculpt once you know some simple tips. You can make many designs by learning basic techniques and using the right tools.
Working with oven clay allows you to create both smooth and detailed pieces. This guide will help you get better at shaping and sculpting your clay projects.
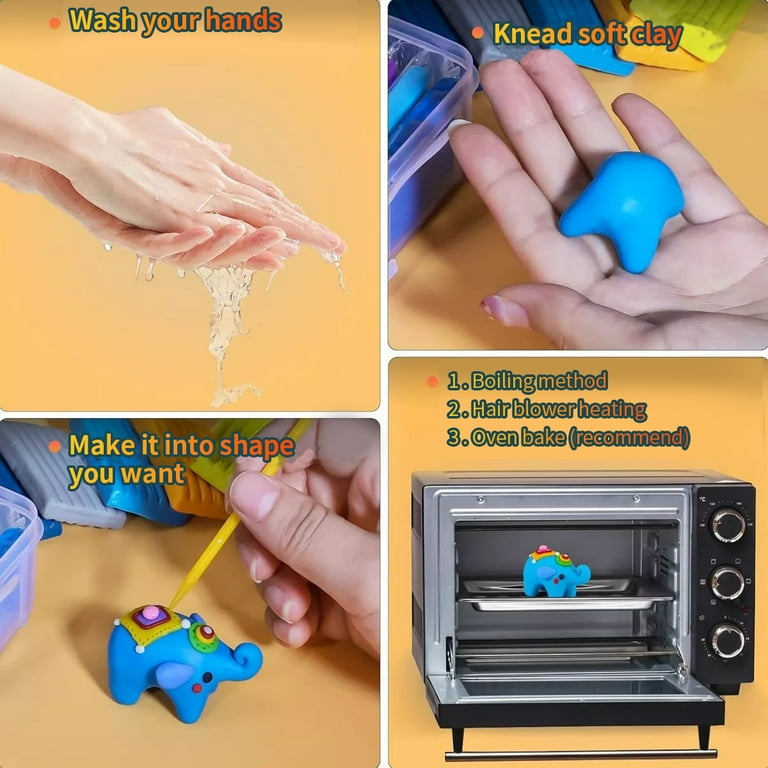
Basic Techniques
Start by softening the clay with your hands to make it easier to shape. Roll it gently to form smooth surfaces or flatten it to create thin layers. Pinching and pulling the clay helps form curves and edges.
- Roll clay evenly for smooth shapes
- Pinch edges to create sharp details
- Use gentle pressure to avoid cracks
- Join pieces by slightly wetting the surfaces
- Smooth rough areas with a damp sponge
Tools To Use
Using the right tools makes sculpting easier and more precise. Some tools help you cut, shape, and add textures to your clay work. You can use household items or buy special clay tools.
| Tool | Purpose | Example |
| Rolling Pin | Flatten clay evenly | Small wooden pin |
| Clay Knife | Cut and trim shapes | Plastic or metal blade |
| Needle Tool | Make fine details | Pin or toothpick |
| Sponge | Smooth surfaces | Damp kitchen sponge |
| Modeling Tools | Shape and texture | Wooden or plastic sticks |
Credit: medium.com
Baking The Clay
Baking oven clay is a key step to make it hard and strong. You need the right heat and time.
This guide will help you bake clay safely using your home oven. Follow the tips below.
Setting Oven Temperature
Set your oven to the correct temperature. Too hot can burn the clay. Too low will not harden it.
Most oven clays bake well at a low temperature around 230°F to 275°F (110°C to 135°C).
- Use an oven thermometer to check the exact temperature.
- Avoid using a microwave or toaster oven.
- Preheat the oven before placing the clay inside.
Recommended Baking Times
Baking time depends on the thickness of your clay piece. Thicker pieces take longer.
Follow these general baking times to avoid over or under baking your clay.
| Clay Thickness | Baking Time |
|---|---|
| 1/4 inch (6 mm) | 15-20 minutes |
| 1/2 inch (12 mm) | 25-30 minutes |
| 3/4 inch (18 mm) | 35-40 minutes |
After baking, let the clay cool in the oven to avoid cracking. Handle with care.
Finishing Touches
After baking your oven clay, finishing touches make your creation look neat and polished. These steps help improve texture and color.
Careful sanding and painting protect your piece and give it a nice finish.
Sanding And Smoothing
Use fine-grit sandpaper to gently smooth rough areas. Sand in small, circular motions to avoid scratches.
- Wait for the clay to cool completely before sanding.
- Start with medium grit sandpaper and finish with fine grit.
- Wipe off dust with a damp cloth after sanding.
- Repeat sanding if needed for a smoother surface.
Painting And Sealing
Painting adds color and character to your clay piece. Use acrylic paints for best results.
| Paint Type | Drying Time | Finish |
| Acrylic | 30 minutes | Matte or glossy |
| Watercolor | 15 minutes | Matte |
| Oil-based | 1 hour | Glossy |
Seal your painted clay with a clear varnish to protect colors and add shine. Let the sealant dry fully before handling.

Credit: www.hgtv.com
Troubleshooting Common Issues
Making oven clay at home can be fun. Sometimes, problems can happen. Here are some common issues and how to fix them.
Knowing these tips can help your clay projects turn out better. Let's look at some problems and their solutions.
Cracking And Breaking
Cracks in clay can happen when it dries too fast. It can also break if the clay is too thin.
To avoid cracking, keep clay pieces even. Wrap clay in a damp cloth if it dries too quickly.
- Use thicker pieces for stronger clay.
- Cover thin areas with extra clay.
- Let clay dry slowly at room temperature.
Uneven Baking
Uneven baking can make clay hard in some parts and soft in others. This happens if the oven heat is not even.
Check your oven’s temperature with a thermometer. Rotate the baking tray halfway through baking.
- Preheat the oven for even heat.
- Place items in the center of the oven.
- Use an oven thermometer for accurate temperature.
Creative Project Ideas
Making oven clay at home can be a fun and rewarding activity. You can create unique items that are both decorative and functional. Here are some ideas to get you started.
Explore the possibilities of oven clay to make jewelry, accessories, and home decor items. Let your creativity guide you through this enjoyable crafting journey.
Jewelry And Accessories
Oven clay is perfect for making custom jewelry pieces. You can create earrings, necklaces, and bracelets with ease. Use your favorite colors and shapes to express your style.
Experiment with different textures and patterns. Add beads or small stones for extra flair. Your handmade jewelry will be unique and special.
- Mix and match clay colors for a marbled effect
- Use cookie cutters for consistent shapes
- Add metallic powders for a shiny finish
Home Decor Items
Create beautiful home decor items with oven clay. You can craft items like vases, candle holders, and small sculptures. These items can add a personal touch to your home.
Try making decorative bowls or planters. They can be both functional and decorative. Use different techniques to make each piece unique.
| Item | Ideas |
| Vase | Add textured patterns for visual interest |
| Candle Holder | Use bright colors to match room decor |
| Planter | Shape into fun animal designs |
Credit: www.walmart.com
Frequently Asked Questions
What Ingredients Are Needed To Make Oven Clay At Home?
To make oven clay, you need baking soda, cornstarch, and water. These common kitchen ingredients mix well to create a pliable clay that hardens when baked.
How Long Should Oven Clay Be Baked?
Bake oven clay at 250°F (120°C) for 20-30 minutes. The time depends on the thickness of your project. Let it cool completely before handling.
Can Oven Clay Be Reused After Baking?
No, oven clay cannot be reused once baked. It hardens permanently, making it ideal for crafts and decorations that need durability.
Is Oven Clay Safe For Children To Use?
Yes, oven clay is non-toxic and safe for children. Always supervise young kids during baking to ensure safety and proper handling.
Conclusion
Making oven clay at home is simple and fun. You only need a few common ingredients. This clay lets you create many craft projects. It dries hard and lasts a long time. Try different shapes and colors to enjoy more.
Clean up is easy with just water. Experiment and have fun with your homemade clay. Crafting can bring joy to anyone’s day. Start your project today and see the results!