Have you ever wanted to create your own mud clay at home but didn’t know where to start? Making mud clay yourself is easier than you think, and it can be a fun, creative way to connect with nature.
Imagine shaping your own clay, perfect for crafts, pottery, or even kids’ projects—all made with simple ingredients you can find around your house. In this guide, you’ll discover step-by-step how to make mud clay that’s smooth, moldable, and ready for your next masterpiece.
Keep reading, and you’ll soon have everything you need to bring your ideas to life.

Credit: www.youtube.com
Materials Needed
Making mud clay at home is simple and fun. You need just a few materials to start. These materials come from natural sources and common household tools.
Below are the main types of clay, natural ingredients, and tools you will need. Each section explains what works best for making mud clay.
Types Of Clay
Clay is the base for mud clay. You can use different types depending on what you want to create. Each type has unique features.
- Natural clay: Found in soil and easy to collect.
- Ball clay: Fine texture, good for shaping.
- Bentonite clay: Sticky and holds water well.
- Kaolin clay: Soft and smooth, perfect for detail work.
Natural Ingredients
Besides clay, natural ingredients help improve the texture and strength of mud clay. These make your clay easier to use and last longer.
| Ingredient | Purpose |
| Water | Mixes ingredients and forms the clay |
| Sand | Adds firmness and reduces cracking |
| Straw or dry grass | Reinforces clay and prevents shrinkage |
| Salt (optional) | Improves clay durability |
Tools And Containers
You need some simple tools and containers to mix and store your mud clay. These make the process cleaner and easier.
- Large mixing bowl or bucket
- Measuring cups or spoons
- Spoon or stick for stirring
- Plastic wrap or airtight container for storage
- Gloves to protect your hands (optional)

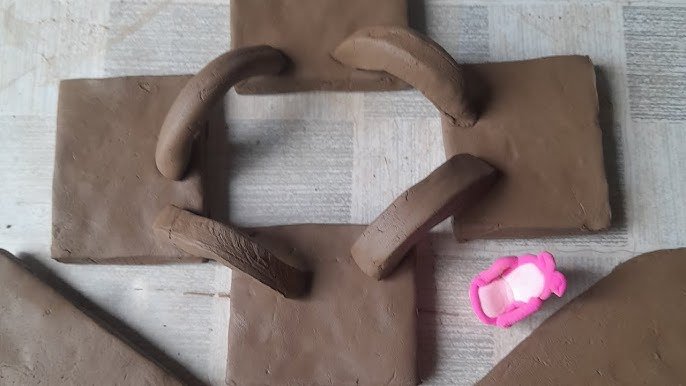
Credit: www.youtube.com
Preparing Your Workspace
Making mud clay at home can be a fun and creative project. Setting up your workspace correctly helps keep the process smooth and clean.
Organizing your area before starting saves time and prevents messes. It also keeps you safe while working with natural materials.
Choosing The Right Area
Pick a place that is easy to clean and well-ventilated. Outdoor spaces or garages work well for making mud clay.
Make sure the area has enough light and space to move around. Avoid places with carpets or delicate furniture.
- Use a table or flat surface that is sturdy
- Choose a spot near a water source for easy cleanup
- Keep children and pets away from the workspace
Protecting Surfaces
Cover your work surface with plastic or old newspapers. This protects tables and floors from stains and dirt.
Use a large tray or shallow box to hold the clay while you work. It helps contain the mess and keeps your area tidy.
- Lay down plastic sheets or tarps under your workspace
- Use washable mats or old towels to catch spills
- Keep cleaning supplies nearby for quick wipe-downs
Safety Tips
Wear gloves to protect your skin from rough materials. Mud clay can irritate sensitive skin if handled too long.
Keep your workspace ventilated to avoid breathing in dust or particles. Clean up spills quickly to prevent slips.
- Wear old clothes or an apron to avoid stains
- Wash your hands thoroughly after working
- Keep sharp tools out of reach of children
- Store materials safely to avoid accidents
Basic Mud Clay Recipe
Making mud clay at home is easy and fun. You only need a few simple ingredients. This clay is great for crafts and play.
Follow these steps to mix your own mud clay. You will learn how to get the right texture and store it properly.
Mixing Clay And Water
Start by placing dry clay powder in a large bowl. Slowly add clean water to the clay. Stir the mix as you add water.
Keep mixing until the clay becomes thick and smooth. Avoid adding too much water at once. It should not be runny.
- Use about 2 parts clay to 1 part water
- Add water in small amounts
- Mix well with your hands or a spoon
- Stop when the clay feels like soft dough
Adjusting Texture
If the clay is too dry, add a little water. Add water slowly and mix well each time. If it is too wet, add more dry clay.
Test the clay by pressing it between your fingers. It should hold together but not stick too much. Adjust until it feels right.
- Add water to soften stiff clay
- Add dry clay to firm soft clay
- Mix thoroughly after each addition
- Keep testing the texture by hand
Storing The Clay
Store your mud clay in an airtight container. This keeps the clay moist and ready to use. Do not leave it open or it will dry out.
If the clay dries out, add a little water and knead it again. Keep the container in a cool place for best results.
- Use airtight plastic containers or bags
- Keep clay in a cool, dry place
- Add water if clay feels dry before use
- Seal container tightly after each use
Adding Natural Enhancements
Making mud clay at home is simple and fun. You can improve its texture and look by adding natural ingredients.
These natural enhancements help your clay dry better and look more attractive.
Using Sand And Organic Matter
Sand helps make the clay stronger and less sticky. It stops the clay from cracking too much when it dries.
Organic matter like leaves or straw adds small fibers. These fibers hold the clay together and add texture.
- Use fine sand for smooth texture
- Add dry leaves or straw in small pieces
- Mix well with clay and water
- Test small batches before making large amounts
Incorporating Natural Pigments
You can add color to your mud clay with natural pigments. These come from plants, minerals, or earth.
Mix pigments into the clay to get beautiful, natural colors without chemicals.
- Red clay or iron oxide for red or brown shades
- Charcoal powder for black or gray colors
- Turmeric powder for yellow tones
- Spinach powder for green shades
Benefits Of Additives
Adding natural materials improves clay's quality and appearance. It makes your projects last longer.
These additives help clay dry evenly and reduce cracks. They also add color and texture without harm.
- Stronger and less brittle clay
- Smoother or textured surfaces
- Natural, safe colors
- Better drying and handling
Techniques For Shaping Clay
Shaping mud clay is fun and easy to do at home. You can create many forms with simple tools and your hands.
Different techniques help you shape clay into useful or decorative items. Try these ways to work with mud clay.
Hand Molding
Hand molding is the most natural way to shape clay. Use your fingers and palms to form the clay into shapes.
Press, pinch, and smooth the clay to get the shape you want. Hands give you control and feel for the clay.
Using Simple Tools
Simple tools help you cut, carve, and shape clay more precisely. You can use items from around your home.
- Wooden sticks to draw lines or make holes
- Plastic knives to cut shapes
- Rolling pins to flatten clay evenly
- Sponges to smooth the surface
These tools make it easier to create clean edges and detailed shapes.
Creating Textures
Textures add interest and detail to your clay pieces. You can press different objects into the clay.
- Use leaves to make natural patterns
- Press fabric to create cloth-like texture
- Use combs or forks for lines and grooves
- Stamp with small items like bottle caps or buttons
Try mixing textures to make your clay art more unique and fun.
Drying And Curing Clay
Making mud clay at home can be a fun activity. Once shaped, clay needs to dry and cure properly.
This ensures your creations become solid and durable. Let's explore how to dry and cure clay.
Air Drying Methods
Air drying is a simple way to harden clay. Place your clay in a cool, dry area.
Ensure air circulates around it. This helps moisture escape, drying the clay evenly.
- Keep clay away from direct sunlight
- Use a fan to improve air circulation
- Turn the clay occasionally for even drying
Avoiding Cracks
Cracks can spoil your clay projects. Avoid them by drying clay slowly and evenly.
Keep clay pieces thin and consistent in thickness. This reduces stress on the clay.
- Moisten cracks with a little water
- Smooth cracks with your fingers
- Cover clay with a damp cloth to slow drying
Long-term Storage Tips
Store unused clay properly to keep it fresh. Wrap it tightly in plastic to prevent drying out.
Keep stored clay in a cool, dark place. This keeps it moist and ready to use later.
- Check clay for dryness every few months
- Add a few drops of water if needed
- Seal plastic wrap tightly to block air
Troubleshooting Common Issues
Making mud clay at home can be fun and rewarding. Sometimes problems arise. Here are solutions to common clay issues.
Follow these tips to fix crumbly clay, prevent mold, and revive dry clay. This will ensure your clay projects are successful.
Fixing Crumbly Clay
Crumbly clay can ruin your project. It happens when clay is too dry. Add water slowly to fix it.
Knead the clay well after adding water. This helps the water mix evenly. If needed, add more water in small amounts.
- Add water a few drops at a time
- Knead the clay thoroughly
- Repeat until the clay is smooth
Preventing Mold
Mold can form on clay if it stays wet too long. Store clay properly to avoid mold. Use airtight containers.
Keep the clay in a cool, dry place. This helps stop mold growth. Check your clay regularly for signs of mold.
- Store clay in airtight containers
- Keep in a cool, dry location
- Inspect clay for mold often
Reviving Dry Clay
Dry clay can be brought back to life. Wrap it in a damp cloth. Let it sit for several hours.
After it absorbs moisture, knead the clay. This helps it become flexible again. Repeat if the clay is still hard.
- Wrap clay in a damp cloth
- Allow it to rest for hours
- Knead until flexible
Creative Project Ideas
Making mud clay at home is fun and easy. You can use it for many creative projects.
This natural material helps you create pots, decorations, and outdoor art. Let's explore some ideas.
Simple Pots And Bowls
Use mud clay to shape small pots and bowls. These are great for holding plants or small items.
Make the clay soft and smooth. Shape it by hand or use simple molds to form your pots.
- Roll mud clay into a ball
- Press your thumb in the center to make a bowl shape
- Smooth the edges with wet fingers
- Let dry in the sun for a day or two
Decorative Items
Create small sculptures and decorations with mud clay. You can make animals, flowers, or abstract shapes.
Paint your decorations with natural colors after they dry. This adds beauty and personal touch.
- Shape mud into your favorite designs
- Use tools like sticks to add details
- Let dry fully before painting
- Use watercolors or natural dyes to color
Outdoor Mud Art
Make art outside using mud clay on walls or stones. You can create patterns or pictures in the mud.
This is a fun way to decorate your garden or yard naturally. Mud art blends well with nature.
- Mix mud clay to a thick paste
- Use your hands or tools to spread it on surfaces
- Create shapes or patterns before it dries
- Let it dry naturally under the sun

Credit: www.news18.com
Frequently Asked Questions
What Ingredients Are Needed To Make Mud Clay At Home?
To make mud clay, you need natural soil, water, and optional organic materials like straw or sand. These ingredients mix to create a pliable, moldable clay perfect for crafts or gardening projects.
How Long Does Homemade Mud Clay Take To Dry?
Homemade mud clay typically takes 24 to 48 hours to dry, depending on thickness and humidity. Thinner pieces dry faster, while thicker ones require more time for complete hardening.
Can Mud Clay Be Reused After Drying?
No, dried mud clay becomes hard and brittle, making it unsuitable for reuse. To reuse, keep the clay moist before shaping and drying again.
Is Homemade Mud Clay Safe For Children?
Yes, homemade mud clay is non-toxic and safe for children when made with clean soil and natural ingredients. Supervise kids during use to avoid ingestion or inhalation.
Conclusion
Making mud clay at home is simple and fun. You only need a few natural ingredients. Mix them well to get the right texture. This clay is perfect for art and craft projects. It also helps children learn and play creatively.
Try different amounts to find what works best. Store your clay in a cool, dry place. This keeps it fresh for longer use. Enjoy creating with your homemade mud clay anytime you want. It’s a great way to be creative and save money.
Give it a try and see the results yourself!