Have you ever wanted to create your own liquid clay at home but didn’t know where to start? Making liquid clay yourself is easier than you think—and it can save you money while giving you full control over the consistency and quality.
Whether you’re a hobbyist, an artist, or just curious, this guide will walk you through simple steps to make your own liquid clay quickly. By the end, you’ll have a smooth, ready-to-use clay that’s perfect for your next creative project.
Keep reading to discover the secrets to crafting liquid clay with ingredients you already have!

Credit: www.youtube.com
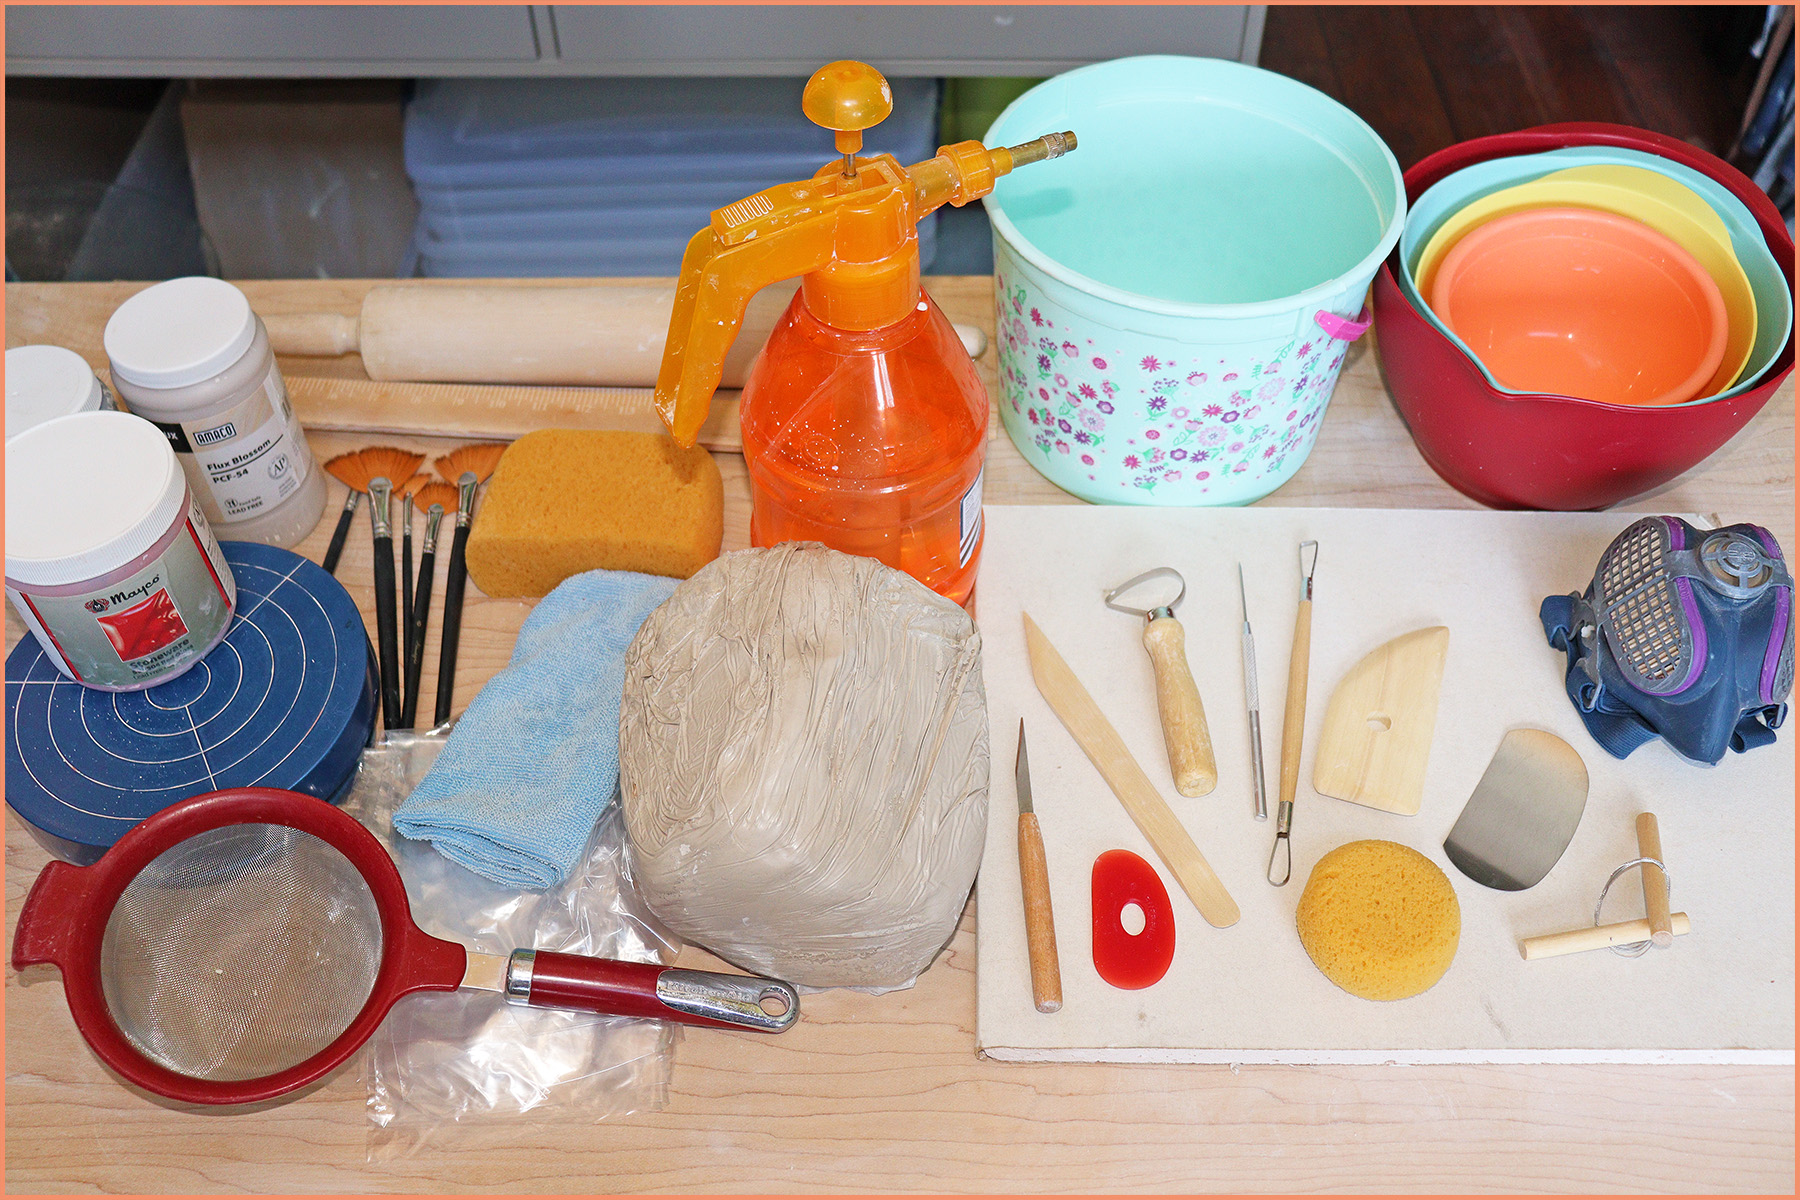
Materials Needed
Making liquid clay at home is easy and fun. You only need a few simple materials.
These materials are common and safe to use. Let’s look at what you will need.
Air-dry Clay
Air-dry clay is the base for liquid clay. It is soft and easy to work with.
Choose white or colored clay depending on your project.
Water
Water helps to thin the clay and make it liquid. Use clean water for best results.
Start with small amounts and add more as needed.
Mixing Bowl
A small bowl or container helps mix the clay and water. Use a clean and dry bowl.
Mixing Tool
Use a spoon, stick, or spatula to stir the clay and water together. This helps get a smooth texture.
Plastic Wrap Or Airtight Container
Cover the liquid clay with plastic wrap or store it in an airtight container. This keeps it from drying out.
Choosing The Right Clay
Making liquid clay at home starts with picking the right clay. The type of clay affects the final liquid texture.
Some clays work better for liquid clay than others. Knowing the differences helps you choose the best one.
Polymer Clay
Polymer clay is a popular choice for liquid clay. It is soft and easy to blend with liquid mediums.
You can find polymer clay in many colors. It cures hard after baking, which is good for crafts.
Air-dry Clay
Air-dry clay dries naturally without baking. It is softer and can mix well with water to make liquid clay.
This clay is good for quick projects but may not be as strong after drying.
Natural Clay
Natural clay comes from the earth and needs water to become soft. It can be used to make liquid clay.
It may crack when dry, so use it for projects that do not need a smooth finish.
Consider Clay Texture
Clay texture affects how easy it is to turn into liquid. Softer clays blend better with liquid.
- Soft clay mixes easily
- Hard clay may need more liquid
- Grainy clay can cause lumps
Check Clay Ingredients
Look at the ingredients to avoid clays with harmful chemicals. Safe clays work best for home projects.
Natural or non-toxic clays are better for children and beginners.
Step-by-step Mixing Process
Making liquid clay at home is easy with the right steps. You only need clay and water to start.
This guide will show you how to mix clay and water to get the perfect liquid clay.
Preparing The Clay
Begin by choosing soft clay for easy mixing. Break the clay into small pieces to help it dissolve faster.
Remove any hard parts or debris from the clay. This will give you a smoother liquid clay.
Adding Water Gradually
Pour a small amount of water into a bowl. Add the clay pieces slowly and mix well.
- Start with one part clay to two parts water.
- Stir the mixture until the clay softens.
- Add more water if the clay is too thick.
- Keep stirring to avoid lumps.
- Pause and check the texture after each addition.
Achieving The Right Consistency
The perfect liquid clay flows like thick paint. It should not be too runny or too stiff.
| Consistency | Description | Fix |
|---|---|---|
| Too Thick | Hard to stir and spread | Add small amounts of water and mix |
| Too Thin | Runs off surfaces quickly | Add small pieces of clay and mix |
| Just Right | Flows smoothly, easy to work with | Ready to use for your projects |
Credit: potterycrafters.com
Tips For Smooth Liquid Clay
Making liquid clay at home can be a fun activity. You need to ensure it is smooth for the best results.
Follow these tips to create a silky texture that enhances your clay projects.
Use The Right Tools
Having the right tools is essential for achieving smooth liquid clay. They help mix and blend the ingredients evenly.
- Mixing bowls for combining ingredients
- A whisk or hand mixer for smooth blending
- Measuring cups for accurate quantities
Choose Quality Ingredients
Quality ingredients make a big difference in the texture of liquid clay. They ensure consistency and durability.
| Ingredient | Quality Tip |
| Clay powder | Opt for fine, sifted powder |
| Water | Use distilled or filtered water |
| Binder | Choose a high-quality polymer |
Maintain Proper Consistency
Consistency plays a crucial role in the smoothness of liquid clay. It affects how the clay flows and sets.
Storage And Shelf Life
Liquid clay is easy to make at home. Proper storage keeps it fresh longer. Knowing how long it lasts helps you avoid waste.
Storing liquid clay the right way protects its texture and usability. Let’s look at the best methods and how long it stays good.
Best Storage Containers
Use airtight containers to keep liquid clay from drying out. Plastic or glass jars with tight lids work well. Avoid containers that let air in.
- Choose small containers to limit air exposure
- Label containers with the date made
- Keep containers clean and dry before use
Ideal Storage Conditions
Store liquid clay in a cool, dark place. Avoid heat and sunlight that can dry the clay quickly. A drawer or cupboard is a good spot.
Refrigeration can help slow drying. Make sure the container is sealed tightly to prevent moisture loss and contamination.
Shelf Life Of Liquid Clay
| Storage Method | Approximate Shelf Life |
| Room Temperature, Airtight | 1 to 2 weeks |
| Refrigerated, Airtight | 3 to 4 weeks |
| Left Open or Poor Seal | 2 to 3 days |
Signs Liquid Clay Has Gone Bad
Check your liquid clay before use. Changes in color, smell, or texture mean it is no longer good. It might become lumpy or dry.
- Strong or sour odor
- Dark or uneven color
- Thick clumps or separation
- Sticky or overly dry texture

Credit: www.youtube.com
Creative Uses For Liquid Clay
Liquid clay is a versatile craft material you can make at home. It works well for many creative projects. Its smooth texture lets you shape and decorate with ease.
Using liquid clay expands your crafting options. You can add details, create jewelry, or even fix broken pieces. Let’s explore some popular uses for liquid clay.
Adding Texture To Clay Crafts
Liquid clay helps add interesting textures to your projects. You can spread it thin or build up layers. It works great for creating raised designs or patterns.
Making Small Decorative Items
Use liquid clay to make small charms, beads, or pendants. Its fluid nature lets you pour it into molds or shape it by hand. After baking, these pieces become hard and durable.
Repairing Broken Clay Pieces
Liquid clay is useful for fixing cracks or broken parts. Apply a thin layer along the break, press pieces together, and bake. This seals the repair and strengthens the item.
Painting And Coating Effects
You can mix liquid clay with color pigments or glitter. It works as a paint or clear coating over your creations. This adds shine or color while keeping the surface smooth.
- Create shiny surfaces on jewelry
- Add colorful details to sculptures
- Seal painted areas for protection
- Mix glitter for sparkle effects
Combining Liquid Clay With Other Materials
Liquid clay can bond with materials like fabric, paper, or metal. Use it to decorate mixed media art or add clay accents. It sticks well and holds after baking.
| Material | Use with Liquid Clay |
| Fabric | Add clay shapes to clothing or accessories |
| Paper | Make clay embellishments for cards or scrapbooks |
| Metal | Attach clay charms to jewelry bases |
Common Mistakes To Avoid
Making liquid clay at home can be fun. Yet, there are common mistakes that many make. Being aware of these can improve your results.
Learn about the pitfalls to have a smooth crafting experience. This will help you create better liquid clay.
Using Incorrect Ratios
Using the wrong ratio of ingredients can ruin the texture. It may become too runny or too thick.
| Ingredient | Common Ratio |
| Clay Powder | 1 cup |
| Water | 2 cups |
Skipping The Mixing Process
Mixing the ingredients well is key to smooth clay. If you skip this, lumps may form.
- Use a whisk or mixer for even blending
- Stir until the mixture is uniform
- Check for any remaining lumps
Not Testing Consistency
Testing the clay's consistency before use is important. This ensures it will work for your project.
Storing Improperly
Improper storage can dry out the clay. Always store it in a sealed container.
Frequently Asked Questions
What Ingredients Are Needed To Make Liquid Clay At Home?
To make liquid clay, you need white glue, liquid starch, and water. Mixing these creates a smooth, moldable liquid clay perfect for crafts and repairs.
How Long Does Homemade Liquid Clay Last?
Homemade liquid clay typically lasts 1 to 2 weeks when stored in an airtight container. Keep it cool to maintain its consistency and prevent drying out.
Can Liquid Clay Be Used For Jewelry Making?
Yes, liquid clay is ideal for jewelry making. It allows you to create detailed designs and smooth finishes on beads, pendants, and other accessories.
Is Liquid Clay Safe For Kids To Use?
Liquid clay is generally safe for kids when used under adult supervision. Ensure non-toxic glue and starch are used to avoid any health risks.
Conclusion
Making liquid clay at home is simple and fun. You only need a few basic ingredients. This craft helps you create smooth, flexible clay for your projects. It saves money and lets you customize the texture. Try different recipes to find what works best.
Enjoy crafting with your homemade liquid clay anytime. Keep practicing, and your skills will improve quickly. Have fun exploring new ideas and designs!