Have you ever wanted to create your own sculptures, decorations, or crafts but didn’t have the right materials? Making hardening clay at home is easier than you think, and it can save you money while giving you full control over your projects.
Imagine turning simple ingredients from your kitchen into a strong, moldable clay that dries hard and lasts long. In this guide, you’ll discover step-by-step how to make your own hardening clay, perfect for all your creative ideas. Ready to unlock your creativity and start crafting with your own homemade clay?
Keep reading to find out how!

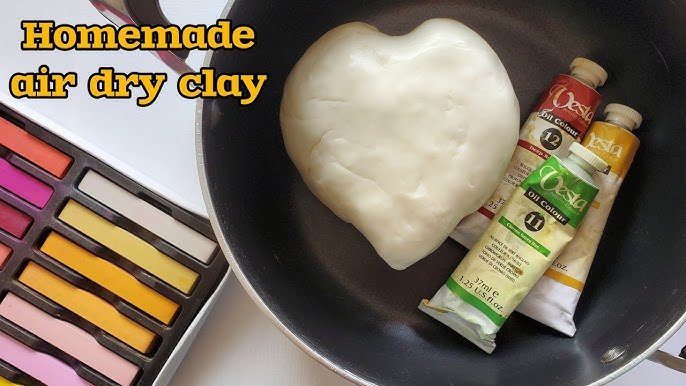
Credit: www.youtube.com
Materials Needed
Making hardening clay at home is simple and fun. You only need a few basic materials that are easy to find.
This guide will list the materials needed to create your own hardening clay. Gather them before you start your project.
Flour
Flour acts as the main base for the clay. All-purpose flour works best for a smooth texture.
Salt
Salt helps harden the clay and preserve it. Use fine salt for even mixing and better results.
Water
Water binds the flour and salt together. Warm water speeds up the mixing process and makes the clay soft.
Oil
Adding a small amount of oil keeps the clay smooth and prevents cracking. Vegetable oil is a good choice.
Optional Materials
- Food coloring for adding color
- Lemon juice to increase durability
- Varnish to seal finished projects
| Material | Purpose | Notes |
| Flour | Main base | Use all-purpose flour |
| Salt | Hardening agent | Fine salt mixes better |
| Water | Binder | Warm water helps mixing |
| Oil | Softener | Vegetable oil works well |
Basic Clay Recipe
Making hardening clay at home is easy and fun. You need simple ingredients and a little time.
This recipe creates clay that dries hard without baking. It is perfect for crafting small items.
Ingredients Needed
Gather these common items from your kitchen and craft supplies. They form the base of your clay.
- 1 cup baking soda
- 1/2 cup cornstarch
- 3/4 cup water
- Food coloring (optional)
Mixing The Clay
Combine baking soda and cornstarch in a saucepan. Stir the dry ingredients well.
Add water slowly while stirring. Keep mixing to avoid lumps.
- Use medium heat on the stove
- Stir continuously to prevent sticking
- Stop when the mixture thickens like mashed potatoes
Cooling And Using The Clay
Remove the thickened mixture from heat. Let it cool enough to handle safely.
Knead the clay on a clean surface until smooth. Add food coloring if you want color.
- Wrap unused clay in plastic wrap
- Store in an airtight container
- Use within a week for best results
Step-by-step Mixing Process
Making hardening clay at home is simple and fun. This guide shows you how to mix the ingredients correctly.
Follow each step carefully to get clay that dries strong and smooth. You only need a few basic materials.
Gather Ingredients And Tools
Start by collecting everything you need. You will mix the clay in a clean bowl with a spoon or your hands.
- 1 cup of baking soda
- 1/2 cup of cornstarch
- 3/4 cup of water
- Mixing bowl
- Spoon or spatula
- Measuring cups
Combine Dry Ingredients
Put the baking soda and cornstarch into the mixing bowl. Stir them together well to blend evenly.
Add Water Slowly
Pour the water into the dry mix little by little. Stir the mixture as you add water to avoid lumps.
- Start stirring with a spoon until the mixture gets thick.
- If too sticky, add a small amount of cornstarch.
- If too dry, add a few drops of water.
- Knead the mixture with your hands for better texture.
- Continue until it feels smooth and firm.
Cook The Mixture
Place the mixture in a saucepan on low heat. Stir constantly to prevent burning.
After a few minutes, the clay will thicken and pull away from the pan sides. Remove it from heat.
Cool And Store The Clay
Let the clay cool down for a few minutes. Wrap it in plastic wrap to keep it soft.
| Storage Tip | Why It Helps |
| Wrap in plastic wrap | Prevents drying out |
| Keep in airtight container | Keeps clay fresh longer |
| Store in cool place | Stops clay from becoming sticky |

Credit: www.youtube.com
Shaping And Molding Tips
Shaping and molding hardening clay is fun and easy. Using the right techniques helps your clay hold its form well.
These tips will guide you to create smooth and strong shapes from your homemade hardening clay.
Keep Your Clay Soft And Moist
Soft clay is easier to shape and less likely to crack. If your clay feels dry, add a few drops of water and knead it well.
Cover unused clay with plastic wrap to keep it moist while you work on other parts.
Use Simple Tools For Shaping
Basic tools like toothpicks, plastic knives, or rolling pins help you shape details. You can also use household items like forks or straws.
- Toothpicks make small holes and fine lines
- Plastic knives cut clean edges
- Rolling pins flatten clay evenly
- Forks create texture patterns
Work In Small Sections
Shape your clay in small parts instead of one big piece. This makes it easier to fix mistakes and add details.
After shaping each section, let it dry a little before joining it to other parts.
Smooth Surfaces With Water
Dip your finger in water and gently rub the clay surface. This smooths rough spots and joins small cracks.
Use a soft brush dipped in water for hard-to-reach areas.
Support Your Shapes During Drying
Use small props like crumpled paper or foam to hold delicate parts in place. This stops them from bending or breaking as they dry.
Make sure props do not stick to the clay by covering them with plastic wrap.
Drying And Hardening Methods
Hardening clay at home makes your crafts last longer. You can dry and harden clay using simple methods. Two popular ways are air drying and oven baking. Each method has its own steps and benefits.
Choosing the right method depends on your clay type and project size. Here is a guide to help you dry and harden clay safely and effectively.
Air Drying
Air drying is the easiest way to harden clay. It needs no special tools or heat. Just leave your clay piece in a dry, well-ventilated place. The drying time depends on the clay thickness and room conditions.
- Place clay on a flat surface lined with wax paper or foil
- Keep it away from direct sunlight to prevent cracking
- Turn the clay piece occasionally for even drying
- Wait 24 to 72 hours until the clay feels hard
- Thin pieces dry faster than thick ones
After air drying, you can sand or paint the clay. This method is gentle and good for delicate shapes.
Oven Baking
Oven baking is faster and gives a stronger finish. Use it only for clay types that allow heat hardening, like polymer clay. Follow the clay package instructions for temperature and time.
| Temperature | Time |
| 265°F (130°C) | 15 to 30 minutes |
| 275°F (135°C) | 15 to 45 minutes |
| 300°F (150°C) | 10 to 30 minutes |
Do not bake clay at too high heat. This can cause burning or bubbles. Use an oven thermometer for accuracy. Let the clay cool inside the oven before removing it.
Troubleshooting Common Issues
Making hardening clay at home can be simple, but some problems may appear. Knowing how to fix these issues helps you get better results.
This guide shows common problems and how to solve them. Follow these tips to improve your clay projects.
Clay Cracks After Drying
Cracks happen when the clay dries too fast or is too thick. To prevent cracks, keep your clay pieces thin and dry them slowly.
Clay Remains Soft Or Crumbles
If your clay stays soft or breaks easily, it might have too much water or not enough binder. Add a bit more glue or flour and knead well.
Clay Sticks To Surfaces
Clay can stick to tools or work surfaces if they are not prepared. Dust your work area with cornstarch or flour to stop sticking.
- Lightly sprinkle cornstarch on the table
- Use a silicone mat for easier removal
- Keep tools clean and dry
Clay Does Not Harden Properly
Hardening clay needs the right baking time and temperature. Below is a baking guide to help you get it right.
| Clay Thickness | Baking Temperature | Baking Time |
| Up to 1/4 inch (0.6 cm) | 275°F (135°C) | 15-20 minutes |
| 1/4 to 1/2 inch (0.6 - 1.3 cm) | 275°F (135°C) | 25-30 minutes |
| Over 1/2 inch (1.3 cm) | 275°F (135°C) | 30-45 minutes |
Clay Color Fades Or Changes
Colors can change if the clay bakes too hot or too long. Use low heat and check your clay often while baking.
Tip:Place a piece of aluminum foil under your clay to protect colors during baking.
Creative Project Ideas
Making hardening clay at home is fun and easy. You can use simple ingredients from your kitchen.
This homemade clay is perfect for crafts and art projects. It can be shaped into anything you imagine.
Animal Figurines
Create small animal figurines with your homemade clay. These can be great gifts or decorations.
- Shape the clay into animals like cats or dogs.
- Use tools to add details like eyes and fur.
- Let them dry and harden completely.
Clay Beads For Jewelry
Clay beads are easy to make and customize. Use them to create unique jewelry pieces.
| Step | Description |
| 1 | Roll clay into small balls. |
| 2 | Poke a hole through each ball with a toothpick. |
| 3 | Let them dry before stringing onto a necklace. |
Decorative Clay Pots
Make small pots to hold plants or other items. These pots can add charm to any room.
Use your fingers to shape the clay into pots.
Design patterns on the surface for texture.
Allow them to dry before using.
Personalized Keychains
Create keychains with names or initials. These are great as personal gifts.
- Flatten the clay and cut into shapes.
- Use stamps or tools to imprint letters.
- Add a hole for the keyring.
- Let the keychains harden before attaching to keys.
Storage And Preservation
Hardening clay can last longer if stored correctly. Proper preservation methods are essential to maintain its quality.
Let's explore some effective ways to store and preserve your homemade hardening clay.
Use Airtight Containers
Airtight containers prevent clay from drying out. They keep moisture in and air out.
- Choose containers with a tight seal
- Label containers with the date
- Store containers in a cool, dry place
Refrigeration Tips
Refrigerating clay can extend its shelf life. Follow these guidelines for best results.
- Wrap clay in plastic wrap
- Place wrapped clay in a sealed bag
- Store in the refrigerator's coolest section
Check For Moisture Levels
Maintaining the right moisture level is crucial. Too much or too little moisture affects the clay's usability.
| Condition | Action |
| Too Dry | Add a damp cloth inside the container |
| Too Wet | Leave the container slightly open to air out |
Avoid Direct Sunlight
Direct sunlight can cause the clay to harden prematurely. Store it away from windows and heat sources.

Credit: www.youtube.com
Frequently Asked Questions
What Ingredients Do I Need To Make Hardening Clay?
You need flour, salt, water, and cream of tartar. These common kitchen items create a strong, durable clay for crafting.
How Long Does Homemade Hardening Clay Take To Dry?
It usually takes 24 to 48 hours to air dry completely. Drying time depends on clay thickness and room humidity.
Can I Paint The Hardening Clay After It Dries?
Yes, you can paint the clay with acrylic or tempera paints. Make sure it is fully dry before painting for best results.
Is Homemade Hardening Clay Safe For Children?
Yes, it is non-toxic and safe for children with supervision. Avoid ingestion and wash hands after use to keep safe.
Conclusion
Making hardening clay at home is simple and fun. You only need a few common ingredients. Mixing them carefully creates clay that dries strong and lasts long. This homemade clay saves money and lets you craft anytime. Try different shapes and designs as you go.
Your creativity can grow with every project you make. Keep your clay in a cool, dry place to use again. Enjoy crafting with your homemade hardening clay and share your art with friends. Easy, affordable, and satisfying.