Have you ever wanted to create something soft, squishy, and fun right at home? Making foam clay yourself is easier than you think, and it opens up endless possibilities for crafts and creativity.
Imagine having a colorful, lightweight material that you can shape, mold, and let dry into amazing designs—all without spending a lot of money. You’ll discover simple steps to make foam clay using ingredients you probably already have. Get ready to unlock your creative side and surprise yourself with how easy and enjoyable this project can be!

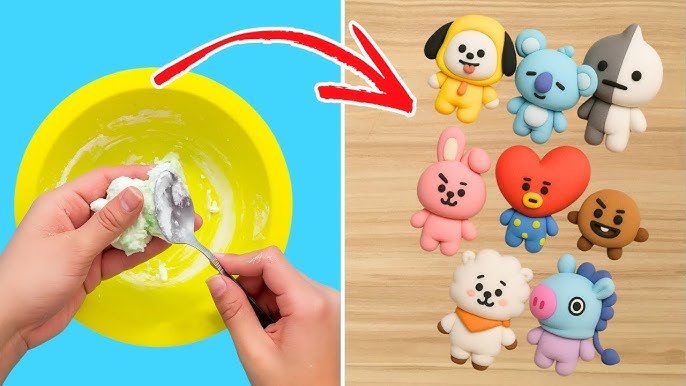
Credit: www.youtube.com
Materials Needed
Making foam clay at home is easy and fun. You only need a few simple materials.
This guide will help you gather all the items before starting your project.
Basic Ingredients
These ingredients form the base of your foam clay. Each one is easy to find at home or in stores.
- White glue (PVA glue works well)
- Shaving foam (not gel)
- Baking soda
- Contact lens solution (must contain boric acid)
- Food coloring or paint (optional for color)
Optional Add-ons
You can add extra materials to change the texture or look of the foam clay. These are not required but can make your clay unique.
- Glitter for sparkle
- Essential oils for scent
- Small beads for texture
- Foam beads for more fluffiness
Step-by-step Preparation
Making foam clay at home is easy and fun. You only need a few simple materials. This guide will help you prepare it step by step.
Follow each section carefully to get the best texture and consistency for your foam clay. Let’s start with mixing the base.
Mixing The Base
First, gather the base ingredients for your foam clay. You will need white glue, shaving foam, and some cornstarch. Mixing these creates a soft and fluffy base.
- Pour 1 cup of white glue into a mixing bowl.
- Add 1 cup of shaving foam to the glue.
- Mix gently until combined.
- Slowly add 1/2 cup of cornstarch.
- Stir until the dough starts to form.
Adding Texture
Texture makes foam clay smooth and fun to shape. You can add baking soda or lotion to improve its feel. Try small amounts first.
| Ingredient | Effect on Texture | Amount to Add |
|---|---|---|
| Baking Soda | Makes clay firmer | 1 tablespoon |
| Hand Lotion | Makes clay softer | 1 teaspoon |
| Food Coloring | Adds color | Few drops |
Achieving The Right Consistency
The right consistency means the clay is not sticky or dry. Knead the clay by hand for a few minutes. Add cornstarch or lotion as needed.
Try this if your clay is too sticky:
- Sprinkle a small amount of cornstarch.
- Knead the clay until it feels smooth.
- Repeat if needed but do not add too much.
If the clay is too dry, add a little lotion and knead well.
Tips For Best Results
Making foam clay at home can be fun and easy. Using the right tips helps you get the best clay texture.
Good foam clay feels soft and sticks well. It also dries without cracking if you follow simple rules.
Avoiding Common Mistakes
Many beginners add too much glue or water. This makes the clay sticky or too runny.
Not mixing the ingredients well can cause lumps. Also, using cold water slows the process.
- Use the right amount of glue and water
- Mix ingredients slowly and evenly
- Use room temperature water for better results
- Do not add extra powders or liquids
- Work quickly to prevent drying during mixing
Storing Foam Clay
Foam clay dries out fast if left in open air. Store it in airtight containers to keep it soft.
Keep the clay in a cool, dry place. Avoid direct sunlight or heat, which can dry it quickly.
- Use sealed plastic bags or containers
- Label containers with the date made
- Check clay regularly for dryness
- Add a few drops of water if it starts to dry
- Do not freeze foam clay to store it
Enhancing Durability
Adding a small amount of white glue helps foam clay hold shape. This makes it stronger when dry.
Let the clay dry slowly. Fast drying causes cracks and weak spots in your creation.
- Add glue to improve strength
- Dry clay in a shaded, well-ventilated area
- Avoid bending clay too soon after drying
- Seal finished pieces with clear varnish for extra protection
- Use thin layers to avoid cracking
Creative Uses
Foam clay is soft, light, and easy to shape. You can make many creative items with it.
Making foam clay at home is fun and helps you craft unique projects. It works great for learning and decorating.
Craft Projects
Use foam clay to create small models and shapes. It is perfect for making animals, flowers, or fun characters.
The clay stays soft longer, so you can change your design anytime. It also sticks well on paper and cardboard.
- Make colorful beads and jewelry
- Create custom keychains and charms
- Build miniature food items for dollhouses
- Shape holiday-themed decorations
Educational Activities
Foam clay helps children learn about shapes and colors. They develop fine motor skills by molding and shaping the clay.
Teachers can use foam clay for fun lessons in science and art. It makes learning more hands-on and exciting.
- Teach geometry with clay shapes
- Explore textures and patterns
- Practice counting by making small balls
- Use clay to explain simple science ideas
Decorations And Gifts
Create beautiful home decorations with foam clay. You can make flowers, wall art, and small sculptures that brighten any room.
Foam clay items also make thoughtful gifts. Personalize them with names or favorite colors for friends and family.
- Craft custom fridge magnets
- Make colorful photo frames
- Design unique gift toppers
- Create small, soft sculptures as keepsakes
Safety Precautions
Making foam clay at home can be fun and creative. It is important to follow safety rules to avoid accidents and health issues.
Using safe methods helps protect your skin, eyes, and lungs from harm. Keep your workspace clean and organized.
Handling Ingredients Safely
Use gloves when you touch powders or glue for foam clay. Avoid breathing in dust from dry ingredients.
Work in a well-ventilated area to keep fresh air flowing. Wash your hands well after handling any clay materials.
- Wear protective gloves and a mask if needed
- Keep ingredients away from eyes and mouth
- Mix ingredients slowly to reduce dust
- Clean spills immediately to avoid slips
Allergy Considerations
Some ingredients in foam clay may cause allergies. Check labels for common allergens like latex or certain chemicals.
If you have sensitive skin, test a small amount of clay on your arm first. Stop using it if you see redness or feel itching.
- Know your allergies before starting
- Use hypoallergenic or natural ingredients if possible
- Keep foam clay away from children with allergies
- Seek medical help if you have a bad reaction
Safe Storage Practices
Store foam clay in airtight containers to keep it fresh. Label containers with the date and ingredients used.
Keep containers out of reach of small children and pets. Store in a cool, dry place away from sunlight.
- Use sealed containers to prevent drying out
- Keep foam clay in a place with stable temperature
- Do not store near food or drinks
- Clean storage area regularly to avoid dust and pests

Credit: www.youtube.com
Troubleshooting Guide
Foam clay is fun to make at home. Sometimes, things don't go as planned. Here are some tips to fix common issues.
This guide will help you fix texture problems, adjust drying times, and revive dried clay.
Fixing Texture Issues
Foam clay should be smooth and stretchy. If it's too sticky, add a little corn starch. Knead it well to mix.
If the clay is too dry, add a few drops of water. Knead it until the texture improves.
- Sticky clay: add corn starch
- Dry clay: add water
- Knead until smooth
Adjusting Drying Time
Foam clay needs time to dry. If it's drying too fast, cover it with plastic wrap. This slows the drying process.
For slower drying, keep the clay in a cool place. Avoid direct sunlight and heat.
- Cover with plastic wrap
- Store in a cool place
- Avoid sunlight
Reviving Dried Clay
If your foam clay has dried out, don't worry. Wrap it in a damp cloth and let it sit for a few hours.
Check the clay after a few hours. If it's still dry, add a bit more water and knead it again.
- Wrap in a damp cloth
- Let sit for a few hours
- Add water if needed

Credit: claymoo.com
Frequently Asked Questions
What Ingredients Are Needed To Make Foam Clay At Home?
You need white glue, shaving foam, cornstarch, and food coloring. Mix glue and shaving foam first. Then add cornstarch gradually. Stir until soft, pliable foam clay forms.
How Long Does Homemade Foam Clay Last?
Homemade foam clay lasts about 1 to 2 weeks. Keep it airtight and store in a cool place. Avoid moisture exposure to prevent drying or spoilage.
Can Foam Clay Be Reused After Drying?
No, foam clay hardens permanently once dried. It cannot be reshaped or reused like traditional clay. Use it fresh for best results.
Is Homemade Foam Clay Safe For Kids?
Yes, homemade foam clay is generally safe. Use non-toxic glue and avoid harsh chemicals. Always supervise children during crafting to ensure safety.
Conclusion
Making foam clay at home is simple and fun. You only need a few common ingredients. This craft lets you create soft, colorful shapes easily. Kids and adults enjoy the process together. It’s a great way to spend free time creatively.
Try different colors and textures to make unique designs. Keep your clay in a sealed bag to stay soft longer. Enjoy crafting with your homemade foam clay today!