

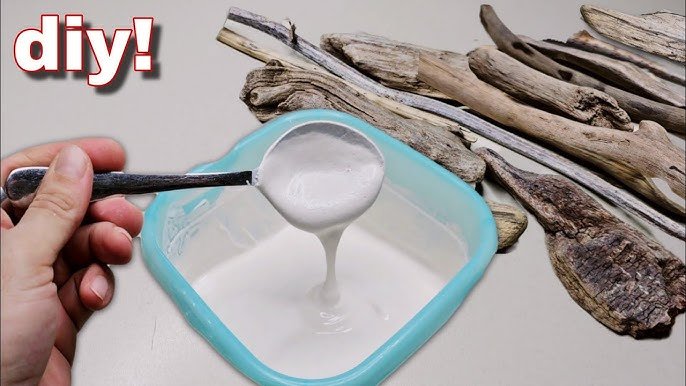
Are you ready to create your own fire clay right at home? Whether you’re a DIY enthusiast or simply curious about crafting materials, making fire clay yourself is easier than you might think.
Imagine having a special clay that can withstand high heat, perfect for fireplaces, kilns, or even pottery projects. In this guide, you’ll discover simple steps to mix and prepare fire clay using ingredients you can find around you. Keep reading, and by the end, you’ll have the know-how to make your very own fire-resistant clay that works just like the pros’.
Your next creative project is about to get a powerful upgrade!

Materials Needed
Making fire clay at home requires a few simple materials. These ingredients help create a strong and heat-resistant clay.
Some materials are basic and always needed, while others are optional. Optional items can improve the clay's properties.
Basic Ingredients
Basic ingredients form the main body of fire clay. They are easy to find and affordable.
- Kaolin clay – the main clay that resists high heat
- Fire clay – adds heat resistance and strength
- Silica sand – improves texture and durability
- Water – to mix and bind the ingredients
Optional Additives
Optional additives can enhance fire clay's performance. Use them based on your project needs.
| Additive | Purpose |
| Grog (crushed fired clay) | Reduces shrinkage and cracking |
| Ball clay | Improves plasticity and workability |
| Alumina powder | Increases heat resistance |
| Organic binder (like paper pulp) | Helps hold the clay together |
Preparing The Workspace
Making fire clay at home requires a clean and organized workspace. This helps you work safely and efficiently.
Before starting, prepare your area to avoid accidents and keep tools handy.
Safety Precautions
Safety is very important when working with fire clay. Take steps to protect yourself and others.
- Wear gloves to protect your hands from rough materials.
- Use a dust mask to avoid breathing in fine clay particles.
- Keep a fire extinguisher nearby in case of emergencies.
- Work in a well-ventilated space to reduce dust and fumes.
- Wear old clothes or an apron to protect your skin and clothing.
Setting Up Tools
Gather all necessary tools before you start making fire clay. Organize them for easy use.
| Tool | Purpose |
| Mixing bucket | To mix clay and water |
| Measuring cup | To measure water and ingredients |
| Protective gloves | To protect hands |
| Dust mask | To avoid inhaling particles |
| Stirring stick | To mix ingredients thoroughly |
| Clean cloth | To wipe spills and keep area tidy |
Mixing The Ingredients
Making fire clay at home requires careful mixing of materials. This process helps the clay become strong and heat-resistant.
Follow simple steps to measure and combine the ingredients correctly for the best results.
Measuring Proportions
Accurate measurement of each ingredient is important. It keeps the clay balanced and workable.
- Use a kitchen scale for precise weight measurements.
- Measure fire clay, ball clay, and sand in dry form.
- Keep water measurements separate until mixing.
- Write down the amounts to avoid mistakes.
Combining Components
Mix the dry ingredients first to get an even blend. Then add water slowly to reach the right texture.
| Ingredient | Action | Tip |
|---|---|---|
| Fire Clay | Measure and sift | Remove lumps for smooth mix |
| Ball Clay | Add to fire clay | Mix evenly with a spoon |
| Sand | Stir in after clays | Use fine sand for better texture |
| Water | Add slowly while mixing | Stop when clay feels soft but firm |
Kneading And Shaping
Kneading and shaping fire clay is an important part of making it at home. This process helps the clay become smooth and ready for use.
Good kneading and shaping improve the clay’s strength and make it easier to work with for your projects.
Achieving The Right Consistency
Start kneading by pressing and folding the clay with your hands. This mixes the ingredients well and removes air pockets.
The clay should feel soft but firm. If it is too dry, add a little water. If it is sticky, add a small amount of dry clay.
- Knead for at least 10 minutes
- Add water slowly to avoid making it too wet
- Stop when the clay feels smooth and elastic
Forming Clay Blocks
After kneading, shape the clay into blocks or slabs. This makes it easier to store and use later.
Use your hands or a flat surface to press the clay into the shape you want. Keep the edges smooth to prevent cracking.
- Divide clay into equal parts for uniform blocks
- Press firmly to remove air pockets
- Wrap blocks in plastic to keep moisture
Drying And Curing
Drying and curing fire clay properly is key to its strength. This process helps remove moisture and prepare the clay for firing.
Careful handling during drying and firing prevents cracks and damage. Use the right methods for best results.
Air Drying Tips
Air drying is the first step after shaping your fire clay. It must dry slowly to avoid cracks and warping.
- Keep the clay in a shaded, well-ventilated area
- Avoid direct sunlight to prevent fast drying
- Turn the clay pieces regularly for even drying
- Use a plastic cover to slow drying if cracks appear
- Ensure the clay is fully dry before firing
Kiln Firing Basics
Firing the clay in a kiln hardens it and makes it fireproof. Follow a controlled temperature schedule.
| Temperature Stage | Description | Approximate Time |
| Low Heat | Slowly remove moisture | 2-3 hours |
| Mid Heat | Clay becomes stronger | 4-6 hours |
| High Heat | Final firing to harden | 1-2 hours |
| Cooling | Slowly cool down to avoid cracks | 4-8 hours |
Common Mistakes To Avoid
Making fire clay at home is fun and creative. But, some mistakes can ruin your project.
Learn about common errors to save time and materials.
Incorrect Ingredient Ratios
Using the wrong amounts of sand, clay, and water can ruin your fire clay. Measure each ingredient carefully.
- Too much water makes the clay too soft
- Too much sand makes it crumbly
- Not enough clay causes weak structure
Inadequate Mixing
Poor mixing leads to uneven texture. Mix until all ingredients are blended well.
Check for lumps and dry spots. Smooth consistency is key.
Not Testing The Clay
Skipping the test phase can cause surprises. Test a small batch first.
Check its drying and firing qualities before making a big batch.
Incorrect Drying Process
Drying too fast or unevenly can crack the clay. Let it dry slowly in a shaded area.
- Avoid direct sunlight
- Turn the clay often
- Check for even drying
Improper Storage
Storing fire clay incorrectly can spoil it. Keep it in an airtight container.
Store in a cool, dry place to prevent moisture from affecting the clay.
Tips For Successful Fire Clay
Creating fire clay at home can be a rewarding activity. It requires simple steps and patience for best results.
Following these tips ensures your clay is durable and easy to use in projects. Below are suggestions for storage and enhancing durability.
Storage Suggestions
Proper storage of your fire clay keeps it usable for longer periods. This prevents it from drying out or getting contaminated.
- Store clay in an airtight container.
- Keep it in a cool, dry place.
- Label containers with the date of creation.
Enhancing Durability
To make your fire clay more durable, consider using certain techniques during the preparation process.
| Method | Benefit |
| Mix with sand | Increases strength |
| Add grog | Reduces shrinkage |
| Use fine mesh sieve | Improves texture |

Frequently Asked Questions
What Materials Are Needed To Make Fire Clay At Home?
You need common clay, sand, and grog or crushed firebrick. Mix these in specific ratios to create fire clay. This blend improves heat resistance and durability for high-temperature projects.
How To Mix Ingredients For Homemade Fire Clay?
Combine 2 parts clay, 1 part sand, and 1 part grog. Mix thoroughly until the texture is smooth and consistent. Adjust proportions slightly for desired heat resistance and workability.
Can Fire Clay Withstand High Temperatures?
Yes, fire clay can resist temperatures above 1500°F (815°C). It is ideal for making kiln shelves, fire pits, and fireplaces due to its heat durability.
How Long Does Homemade Fire Clay Last?
With proper drying and firing, fire clay can last for years. Its durability depends on correct ingredient mixing and firing temperature.
Conclusion
Making fire clay at home is simple and rewarding. You only need a few basic ingredients and tools. Follow the steps carefully to get the right texture. This clay works well for pottery and heat-resistant projects. Practicing a few times will improve your results.
Save money by creating your own fire clay. Enjoy crafting with a material you made yourself. Give it a try and see how it feels. Fire clay opens new possibilities for creative work. Keep experimenting and have fun with your projects.






