Have you ever wanted to create something beautiful and useful with your own hands? Making clay pots at home is easier than you think, and it gives you a chance to bring your creativity to life.
Imagine holding a pot you crafted yourself, perfect for your plants or as a unique decoration. In this guide, you’ll discover simple steps to shape, mold, and bake clay right in your own space. By the end, you’ll not only have a new skill but also a handmade pot that tells your story.
Ready to get your hands dirty and create something special? Let’s dive in!

Credit: www.hobbycraft.co.uk
Materials Needed
Making clay pots at home is fun and creative. You need the right materials to start. This guide helps you gather what you need.
Below are three main groups of materials: types of clay, essential tools, and decorative supplies.
Types Of Clay
Choosing the right clay is important. Different clays work well for pot making at home.
- Earthenware Clay:Easy to shape and fires at low temperatures.
- Stoneware Clay:Strong and durable, good for daily use pots.
- Polymer Clay:Air-dry clay, no kiln needed, good for small pots.
Essential Tools
You need basic tools to shape and finish your clay pots. These tools help you work the clay smoothly.
| Tool | Use |
|---|---|
| Clay Cutter | Cut clay into pieces |
| Potter’s Needle | Trim and detail edges |
| Rolling Pin | Flatten clay evenly |
| Wire Clay Cutter | Slice large blocks of clay |
| Sponge | Smooth surfaces and clean |
| Loop Tools | Carve and shape clay |
Optional Decorative Supplies
Decorate your pots with colors and textures. These supplies add style to your work.
- Glazes for shiny or matte finishes
- Paintbrushes for applying colors
- Stamps or texture mats for patterns
- Colored slips to add designs before firing
- Sealants to protect finished pots
Preparing The Clay
Making clay pots starts with preparing the clay properly. Good preparation helps the clay shape well and stay strong when drying.
Clean, soft, and well-mixed clay is easier to work with and produces better pots.
Warming And Kneading
Warming the clay makes it soft and easy to mold. Kneading spreads the moisture evenly and makes the clay smooth.
Use your hands to press and fold the clay. Keep kneading until it feels soft and no cracks appear.
- Press clay with your palms.
- Fold it like dough.
- Repeat for 5 to 10 minutes.
- Stop when clay feels soft and smooth.
Removing Air Bubbles
Air bubbles can cause cracks or breaks in your pots. Removing them is important for strong pots.
Use a wire clay cutter to slice the clay and press it back together. This pushes out trapped air.
- Cut the clay into slices.
- Press slices firmly together.
- Repeat until no bubbles remain.
Basic Pot Shapes
Clay pots come in many shapes. Each shape has its own making method. Learning these shapes helps you create pots at home easily.
This guide explains three simple pot shapes: pinch pots, coil pots, and slab pots. Each uses basic clay techniques.
Pinch Pots
Pinch pots are the easiest type to make. You start with a ball of clay. Then, use your thumb to pinch the sides and open the pot. This makes a small bowl or cup shape.
Pinch pots are good for beginners. They need no special tools and dry quickly. You can decorate them by adding textures or painting once dry.
Coil Pots
Coil pots form by rolling clay into long ropes. These ropes are stacked in circles. Then, smooth the coils together to make walls.
- Roll clay into even coils
- Place coils in a circle for the base
- Stack coils to build height
- Smooth the inside and outside walls
Coil pots can be tall or wide. They offer more shape options than pinch pots. You can make vases, bowls, or planters.
Slab Pots
Slab pots use flat pieces of clay cut into shapes. These shapes join to form a pot. This method is good for square or angular pots.
| Step | Action |
|---|---|
| 1 | Roll clay into flat slabs |
| 2 | Cut slabs into shapes with a knife |
| 3 | Score and slip edges to join |
| 4 | Smooth joints and shape pot |
Slab pots let you create unique designs. You can add handles or decorations on flat surfaces. This style needs careful joining to avoid cracks.
Shaping Techniques
Making clay pots at home is a fun and creative activity. Shaping the clay is an important part of the process.
There are different ways to shape clay into pots. Each way gives a unique look and feel.
Hand Building
Hand building is the oldest way to shape clay. It uses only your hands and simple tools.
You can pinch, coil, or slab the clay to form pots. This method lets you make many shapes easily.
- Pinch: Press and squeeze clay with fingers to form a bowl shape.
- Coil: Roll clay into long ropes and stack them to build walls.
- Slab: Flatten clay into sheets and join pieces to create shapes.
Using Molds
Molds help you shape clay by pressing it into a form. This makes pots with smooth and even surfaces.
You can use ready-made molds or create your own from materials like plaster or plastic.
- Prepare the mold by cleaning and dusting with dry clay.
- Press soft clay firmly into the mold to fill all spaces.
- Let the clay dry slightly before removing the mold carefully.
- Trim and smooth edges after removing the mold.
Wheel Throwing Basics
Wheel throwing uses a spinning wheel to shape clay quickly. It needs some practice but makes round pots fast.
You center the clay on the wheel and use your hands to form the shape as it spins.
- Center the clay by pressing it down and inward on the wheel.
- Open the center gently to create space inside the pot.
- Pull the walls up slowly to make the pot taller and thinner.
- Smooth the surface with a wet sponge or rib tool.
Adding Texture And Design
Adding texture and design to clay pots makes them unique and interesting. You can use simple tools and techniques at home. These methods give your pots a personal touch.
Below are three popular ways to add texture and design: carving patterns, impressing objects, and applying slip and engobes. Each method creates different effects on your clay pots.
Carving Patterns
Carving patterns means cutting or scratching designs into the surface of the clay. Use tools like knives, needles, or wooden sticks. Carving can create lines, shapes, or detailed images.
- Wait until the clay is leather-hard before carving
- Draw your design lightly with a pencil or tool first
- Carve slowly to avoid breaking the clay
- Use different tools for varied line thickness
- Clean the carved area gently to remove clay dust
Impressing Objects
Impressing uses objects to press patterns into soft clay. This technique can add texture quickly and easily. Common objects include leaves, buttons, and lace.
| Object | Effect on Clay |
| Leaf | Veined, natural pattern |
| Button | Round shapes with holes |
| Lace | Delicate, repeating texture |
| Coin | Small circular patterns |
| Fork | Parallel lines or crosshatch |
Applying Slip And Engobes
Slip is liquid clay you apply to the pot surface. Engobes are colored slips used for decoration. Both add color and texture before firing.
Tips for using slip and engobes:
- Apply to leather-hard clay for best results
- Use brushes or sponges to create patterns
- Layer different colors for depth
- Carve or scratch the slip to reveal clay beneath
- Experiment with dripping or splattering slip
Drying And Firing
Creating clay pots at home is a fun and creative activity. Proper drying and firing techniques are essential for strong and lasting pots.
Learn how to air dry your pots and explore alternatives to kiln firing. These methods will ensure your clay creations are durable and beautiful.
Air Drying Tips
Air drying is a simple way to dry clay pots at home. It requires patience and proper conditions.
Ensure your pots dry evenly to prevent cracks. Follow these tips to achieve the best results.
- Place pots on a flat, dry surface.
- Turn pots regularly for even drying.
- Keep pots away from direct sunlight.
- Allow pots to dry for several days.
Kiln Firing Alternatives
If you don't have access to a kiln, there are other ways to fire clay pots. These alternatives can be done with common household items.
Explore different methods to harden your pots without a kiln. This ensures your clay creations are ready for use.
- Use a kitchen oven for low-temperature firing.
- Try pit firing using a backyard pit.
- Explore barrel firing with sawdust and wood.
- Consider using a campfire for rustic effects.
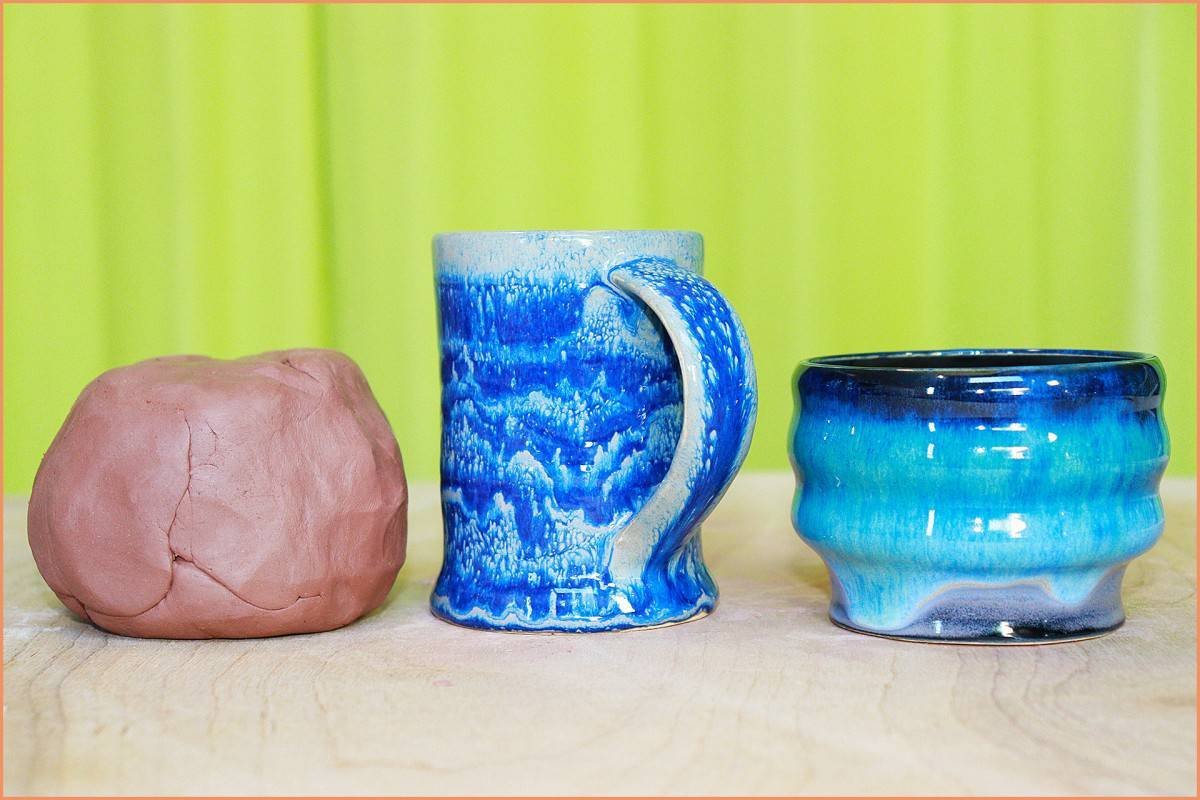
Glazing And Finishing
Glazing and finishing give clay pots their final look. They add beauty and protect the surface. This process can change a simple pot into a work of art.
Learn the steps to choose, apply, and finish glazes. These steps ensure your pots are both beautiful and durable.
Choosing Glazes
Glazes come in many colors and textures. It's important to select the right one for your pot.
- Glossy glazes add shine and brightness.
- Matte glazes offer a soft, smooth finish.
- Textured glazes create interesting surface effects.
Applying Glaze
Applying glaze is a careful process. It covers the clay evenly and enhances the pot's appearance.
Use a brush or dip the pot into the glaze. Ensure the entire surface is coated well.
Sealing And Polishing
Sealing protects the glaze and pot. It keeps the colors bright and prevents damage.
Polishing adds a final touch. It makes the pot smooth and ready for use.
- Apply a clear sealant after glazing.
- Use a soft cloth to polish the surface.
- Check for any missed spots and touch up if needed.

Credit: www.hobbycraft.co.uk
Troubleshooting Common Issues
Making clay pots at home can be fun but may come with challenges. Some problems happen often and can be fixed easily.
Knowing how to solve these issues helps you create better pots every time. Here are some common problems and how to fix them.
Cracking And Warping
Cracking happens when clay dries too fast or unevenly. Warping occurs if the pot is not shaped well or dries under stress.
- Keep pots in a cool, shaded place to dry slowly.
- Cover pots with plastic to control drying speed.
- Make sure the clay is moist and even before shaping.
- Avoid thin walls; keep pot walls uniform in thickness.
- Support pots properly during drying to keep shape.
Uneven Drying
Uneven drying causes weak spots and cracks. It happens when some parts dry faster than others.
| Cause | Effect | Solution |
| Direct sunlight | Fast drying on one side | Dry in shaded area |
| Thin edges | Dry faster than thick parts | Keep thickness even |
| Air drafts | Uneven moisture loss | Cover pots with cloth or plastic |
| Stacking pots | Traps moisture unevenly | Space pots apart |
Glaze Problems
Glaze may crack, peel, or look dull if not applied or fired correctly. It needs good surface and firing temperature.
To avoid glaze issues:
- Clean pots before glazing to remove dust.
- Apply glaze evenly and not too thick.
- Use the right firing temperature for your glaze type.
- Test glaze on small pieces first.
- Allow pots to cool slowly after firing.
Creative Ideas For Clay Pots
Making clay pots at home is a fun way to bring your creativity alive. You can create useful and beautiful items with simple materials. Clay pots are perfect for gifts, gardening, and decoration.
Try different shapes, colors, and designs to make each pot unique. Below are some ideas to inspire your next clay pot project.
Personalized Gifts
Clay pots make thoughtful and personal gifts. You can add names, dates, or special messages to make each pot one of a kind. Painting or carving your designs adds a personal touch.
- Write the recipient’s name using clay tools or paint
- Add meaningful symbols or patterns
- Use favorite colors or themes
- Include a short message or quote
- Wrap the pot with natural twine for a rustic look
Functional Planters
Clay pots are perfect for growing plants. You can make planters in various sizes and shapes to fit different plants. Adding drainage holes helps keep plants healthy.
| Plant Type | Pot Size | Special Features |
| Succulents | Small | Good drainage holes |
| Herbs | Medium | Wide opening for easy access |
| Small flowers | Medium | Decorative rim |
| Ferns | Large | Extra depth for roots |
Decorative Art Pieces
Clay pots can be art objects for your home or garden. Use bright colors and creative shapes to make eye-catching pieces. You can also add textures or small clay figures.
- Mix different paint colors for a bold look
- Carve patterns using simple tools
- Attach small clay animals or flowers
- Use glaze for a shiny finish
- Stack pots to create a sculpture

Credit: www.youtube.com
Frequently Asked Questions
What Materials Do I Need To Make Clay Pots At Home?
You need natural clay, water, a mixing bowl, and shaping tools. Optional items include a pottery wheel and paint for decoration. Ensure the clay is air-dry or oven-bake type for easy crafting and durability.
How Long Does It Take To Make A Clay Pot?
Making a clay pot typically takes 1-3 hours for shaping and initial drying. Additional drying and firing can take 1-3 days depending on the method used. Patience is key for a strong, crack-free pot.
Can Beginners Easily Make Clay Pots At Home?
Yes, beginners can make simple clay pots with basic tools and instructions. Start with small projects, practice shaping techniques, and experiment with air-dry clay for easy handling. Practice improves skill and results.
How Do I Prevent Cracks In Homemade Clay Pots?
Prevent cracks by kneading clay thoroughly to remove air bubbles. Dry pots slowly in a shaded area. Avoid rapid temperature changes. Adding water gradually keeps clay moist and flexible during shaping.
Conclusion
Making clay pots at home is simple and fun. You only need a few tools and some clay. Practice shapes and sizes to improve your skills. Each pot you create will be unique and useful. This craft brings joy and a sense of calm.
Try different designs to find what you like. Enjoy the process, not just the result. Your handmade pots will add charm to any space. Start today, and see how creative you can be.