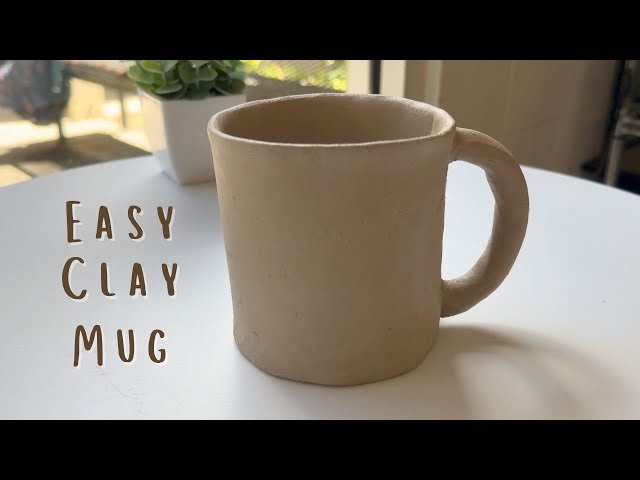
Have you ever wanted to create your own unique clay mug right at home? Imagine sipping your favorite drink from a mug you made with your own hands.
It’s easier than you think, and you don’t need fancy tools or experience. In this guide, you’ll discover simple steps to turn basic clay into a beautiful, personalized mug. By the end, you’ll feel proud of your creation and ready to impress friends with your new skill.
Let’s get started and unlock your creativity!

Credit: www.youtube.com
Materials Needed
Making clay mugs at home requires certain materials. These help shape and finish your mug properly.
Knowing what each material does will make your crafting easier and more fun.
Types Of Clay
Clay is the main material for your mugs. Different types have unique features.
- Earthenware: Soft and easy to shape, but less durable.
- Stoneware: Strong and waterproof after firing.
- Porcelain: Smooth and fine, needs careful handling.
Essential Tools
These tools help you shape, smooth, and finish your clay mug.
| Tool | Purpose |
| Potter’s wheel | Shapes the clay evenly |
| Clay cutter | Cuts clay into pieces |
| Rib tool | Smooths and shapes surfaces |
| Sponge | Cleans and moistens clay |
| Needle tool | Carves and trims details |
Optional Supplies
You can use these supplies to add style and durability to your mug.
- Glazes: Add color and make mugs waterproof.
- Underglazes: Used for painting designs before glazing.
- Brushes: For applying glazes and underglazes.
- Kiln: Needed to fire and harden the clay.
Preparing The Clay
Preparing clay correctly is important for making strong and smooth mugs. This process helps the clay become soft and easy to shape. It also removes problems that can cause cracks or air pockets.
Two key steps in preparing clay are conditioning and removing air bubbles. These steps make the clay ready for shaping and firing.
Conditioning Techniques
Conditioning clay means softening it to make it easier to work with. It also makes the texture even. Here are some common methods to condition clay:
- Kneading: Press and fold the clay repeatedly to soften it.
- Wedging: Roll and slam the clay on a hard surface to mix and remove lumps.
- Cutting and Stacking: Cut the clay into pieces, stack, and press to even out moisture.
- Using a Rolling Pin: Roll the clay flat and fold it to improve texture.
Conditioned clay feels smooth and flexible. It should not crack or crumble when you bend it.
Removing Air Bubbles
Air bubbles inside clay can cause problems during firing. They make the clay weak and can cause it to break. Removing air bubbles is very important before shaping the mug.
| Method | Description |
| Wedging | Press and fold clay on a surface to push out trapped air. |
| Slamming | Lift and slam clay against a table to release air pockets. |
| Rolling and Folding | Roll clay flat and fold to help air escape. |
Always check the clay for air bubbles before starting to shape your mug. This step helps create a strong and durable final product.
Shaping The Mug
Shaping a clay mug is an exciting part of pottery. It takes patience and care. This process forms the mug’s basic shape before drying and firing.
There are different ways to shape a mug. You can build it by hand, use a potter’s wheel, or add a handle for function and style.
Hand-building Methods
Hand-building is a simple way to shape a mug without special tools. You use basic clay pieces and join them carefully.
- Roll out a slab of clay to form the mug’s body.
- Cut a rectangle shape for the wall of the mug.
- Join the ends of the slab to make a cylinder.
- Pinch the base onto the cylinder to close it.
- Smooth out all the seams for a clean look.
Using A Potter’s Wheel
The potter’s wheel spins clay to form round shapes quickly. It needs some practice to control the shape and thickness.
| Action | Description |
| Centering | Place clay in the middle of the wheel and press down firmly. |
| Opening | Push your thumbs into the center to create the mug’s hollow. |
| Pulling | Draw the walls up slowly to shape the mug’s height. |
| Shaping | Use hands or tools to smooth and form the mug’s curves. |
| Trimming | Remove extra clay from the base after drying slightly. |
Creating The Handle
The handle adds comfort and style. Make sure it fits well and is strong enough to hold.
Follow these steps to create a handle:
- Roll a clay coil to the right length and thickness.
- Shape the coil into a curve that fits the mug’s body.
- Score the ends of the handle and the mug surface.
- Apply slip (liquid clay) to the scored areas.
- Attach the handle firmly and smooth the joints.
- Let the mug dry slowly to avoid cracks.
Drying And Finishing
After shaping your clay mug, drying and finishing are important. Proper drying stops cracks and breaks.
Finishing adds smoothness and style to your mug. This process makes your mug strong and nice.
Proper Drying Time
Dry your clay mug slowly to avoid cracks. Let air dry at room temperature for several days.
Turn the mug gently to dry all sides evenly. Avoid direct sunlight or heat to stop warping.
- Place mug in a dry, shaded area
- Dry for 3 to 7 days depending on thickness
- Check for soft spots before firing
Smoothing Surfaces
Use a damp sponge or soft brush to smooth the mug’s surface. This removes rough spots and fingerprints.
After drying, gently sand the mug with fine sandpaper. This makes the surface ready for glazing or painting.
- Wipe with a damp sponge before drying
- Sand lightly after the mug is dry
- Focus on edges and handles for comfort
Adding Decorative Elements
Add decorations while the clay is still soft. You can carve, add clay shapes, or press textures onto the mug.
Use small tools or household items to create patterns. Let decorations dry fully before finishing your mug.
- Carve designs with a needle tool or toothpick
- Attach small clay pieces with slip (wet clay)
- Press leaves or fabric for unique textures
Firing The Mug
Firing is the process that hardens your clay mug. It turns soft clay into solid ceramic.
There are different ways to fire your mug. Each method needs care and attention.
Kiln Firing Basics
A kiln is a special oven made for firing pottery. It uses very high heat to make the clay strong.
- Make sure the mug is completely dry before firing.
- Load the kiln carefully, leaving space between pieces.
- Set the kiln to the right temperature for your clay type.
- Let the kiln heat up slowly to avoid cracks.
- After firing, cool the kiln slowly before removing the mug.
Alternative Firing Methods
Some people use other ways to fire mugs without a kiln. These methods can be fun but need practice.
| Method | Description | Temperature Range |
|---|---|---|
| Pit Firing | Clay is placed in a pit with wood and sawdust, then set on fire. | Up to 1100°F (593°C) |
| Raku Firing | Pottery is heated quickly and cooled in water or air for unique effects. | 1700°F (927°C) |
| Electric Oven | Some use special electric ovens for low-fire clay projects. | Up to 2000°F (1093°C) |
Glazing Tips
Making clay mugs at home is a fun activity. Glazing gives your mugs a shiny finish. Learn some tips to make your mugs look great.
Glazing is the step where you apply a glassy coating to your mugs. This coating not only makes them pretty but also waterproofs them.
Choosing The Right Glaze
Picking the right glaze is important for your mugs. You need to think about color and finish.
Some glazes are shiny, others are matte. Check the label to know which is which.
- Glossy glazes make colors bright
- Matte glazes give a soft look
- Try samples to see results
Applying Glaze Evenly
Even application of glaze is key. Use a clean brush or sponge for this.
Dip your mug or apply with a brush. Make sure there are no drips or thick spots.
- Stir glaze well before use
- Apply thin, even coats
- Let each coat dry before the next
Safety Precautions
Safety is important when glazing mugs. Glazes can have chemicals that need careful handling.
Always work in a well-ventilated area. Wear gloves and a mask to protect yourself.
- Read labels for safety info
- Wash hands after glazing
- Keep glazes away from kids
Common Mistakes To Avoid
Making clay mugs at home can be fun and creative. Yet, there are common mistakes you should avoid. These errors can affect the quality of your mugs.
Learn about cracking, uneven thickness, and glaze problems. By understanding these, you can make better clay mugs.
Cracking And Warping
Cracking happens when clay dries unevenly. To prevent this, dry your mugs slowly. Warping can occur if the clay is too thin.
Make sure to keep the clay thickness consistent. This helps avoid both cracking and warping.
- Dry your mugs slowly in a cool, shaded area
- Keep clay thickness even to prevent warping
Uneven Thickness
Uneven thickness can cause weak spots. These spots may lead to cracks or breaks. Roll out your clay evenly for better results.
Use a rolling pin and guides to keep the thickness the same. This makes your mugs stronger and more durable.
- Use a rolling pin with equal pressure
- Place guides on each side to keep thickness consistent
Glaze Issues
Glaze problems occur if not applied evenly. Bubbles or drips can ruin the look of your mug. Stir the glaze well before use.
Apply glaze in thin layers for a smooth finish. Avoid thick layers to prevent drips and bubbles.
- Stir glaze before applying
- Apply in thin, even layers

Credit: www.youtube.com
Care And Maintenance
Clay mugs are beautiful and useful. Taking care of them helps them last longer.
Proper cleaning and storage keep your mugs safe from cracks and stains.
Cleaning Tips
Clean your clay mugs gently to avoid damage. Use mild soap and warm water.
Do not use harsh scrubbers or chemicals. They can scratch or weaken the clay.
- Wash by hand only, avoid dishwashers
- Use a soft sponge or cloth
- Rinse thoroughly to remove soap
- Let air dry completely before storing
Storage Advice
Store clay mugs in a dry place to prevent moisture damage. Avoid stacking them tightly.
Use shelf liners or cloth to protect the surface. Keep mugs away from extreme temperatures.
- Place mugs upright on shelves
- Use soft padding between stacked mugs
- Keep away from direct sunlight
- Store in a cool, dry area
Creative Ideas
Making clay mugs at home lets you explore your creativity. You can shape, decorate, and personalize each mug.
This guide offers ideas to add unique touches and gift your handmade mugs with pride.
Personalizing Your Mug
Add your own style to each mug with colors, patterns, and textures. Use tools like stamps or carving knives for designs.
- Paint simple shapes or patterns with ceramic paint.
- Carve initials or names into the clay before it dries.
- Attach clay decorations like flowers or leaves.
- Use different clay colors to create stripes or spots.
- Try glazing for a shiny or matte finish.
Gift Ideas
Handmade clay mugs make thoughtful gifts. Personalize them to suit the recipient’s taste and style.
| Gift Type | Design Idea | Occasion |
| Friend | Bright colors and fun shapes | Birthday |
| Family | Initials and floral patterns | Holiday |
| Colleague | Simple, elegant glaze | Work anniversary |
| Teacher | Inspirational quotes carved | Teacher’s Day |

Credit: www.youtube.com
Frequently Asked Questions
How Do I Start Making Clay Mugs At Home?
Begin by gathering clay, shaping tools, and a workspace. Learn basic hand-building techniques like pinching and coiling. Practice forming mug shapes and handles before firing or glazing.
What Type Of Clay Is Best For Homemade Mugs?
Use stoneware or earthenware clay for durability and food safety. These clays withstand heat and are ideal for functional mugs. Avoid air-dry clay for drinkware as it isn’t waterproof.
How Long Does It Take To Make A Clay Mug?
Making a mug takes a few hours including shaping and drying. Firing and glazing add extra days. Total time varies depending on technique and kiln availability.
Can I Use A Home Oven To Fire Clay Mugs?
No, home ovens can't reach the high temperatures needed. Use a kiln or community pottery studio for proper firing. Kiln firing ensures mugs are durable and safe.
Conclusion
Making clay mugs at home can be a fun and rewarding hobby. You need only a few tools and some patience. Each mug you create will be unique and special. Practice will help you improve your skills over time. Enjoy the process of shaping and decorating your mugs.
Creating your own mugs adds a personal touch to your kitchen. Try different designs and colors to find what you like best. Keep experimenting and have fun with this creative craft. Your handmade mugs will bring joy to you and others.