Have you ever wanted to create your own clay right at home? Making clay yourself is easier than you think, and it opens up a world of creativity without spending a lot of money.
Imagine molding your ideas into shapes and crafts using something you made with your own hands. In this guide, you’ll discover simple steps to make clay using everyday ingredients. By the end, you’ll be ready to start your next project with a unique, homemade material that feels just right.
Let’s dive in and bring your creative ideas to life!
Materials Needed
Making clay at home is simple and fun. You only need a few basic materials. Most are easy to find around the house or at a local store.
Gathering the right materials helps you create good clay for crafting. Here is what you will need to start.
Flour
Flour is the main ingredient for homemade clay. It gives the clay structure and helps it hold together well.
Salt
Salt adds texture and helps preserve the clay. It also makes the clay less sticky and easier to shape.
Water
Water is needed to mix with the dry ingredients. It helps form a smooth, pliable dough that is easy to work with.
Optional Materials
- Vegetable oil – adds softness to the clay
- Food coloring – to make colored clay
- Lemon juice – helps prevent mold
- Cornstarch – improves texture and smoothness
Basic Material Quantities
| Material | Amount Needed | Purpose |
| Flour | 2 cups | Structure and base |
| Salt | 1 cup | Texture and preservation |
| Water | 1 cup | Mixing and binding |
| Vegetable oil (optional) | 1 tablespoon | Softness |
| Food coloring (optional) | Few drops | Color |

Credit: www.youtube.com
Choosing The Right Ingredients
Making clay at home is simple and fun. Choosing good ingredients helps your clay work better.
Each ingredient plays a role. Some make the clay soft. Others help it dry strong.
Flour
Flour is the base of most homemade clays. It gives shape and texture to the clay.
Salt
Salt helps preserve the clay and adds firmness. It also stops mold from growing.
Water
Water binds the flour and salt together. Use just enough to make a soft dough.
Optional Ingredients
Some recipes add extra items to improve clay feel or drying time.
- Vegetable oil makes clay smoother and less sticky.
- Lemon juice helps keep clay fresh longer.
- Cream of tartar improves elasticity and strength.
Comparing Ingredients
| Ingredient | Role | Effect on Clay |
| Flour | Base | Gives shape and texture |
| Salt | Preservative | Firmness, prevents mold |
| Water | Binder | Makes dough soft |
| Vegetable Oil | Softener | Reduces stickiness |
| Lemon Juice | Preservative | Keeps clay fresh |
| Cream of Tartar | Elasticity enhancer | Stronger clay |
Basic Clay Recipe
Making clay at home is simple and fun. You only need a few ingredients.
This guide shows you how to make basic clay using common kitchen items.
Mixing Dry Ingredients
Start by combining the dry ingredients in a large bowl. These form the base of your clay.
- 1 cup of baking soda
- 1/2 cup of cornstarch
- 1/2 cup of water (to be added later)
Adding Liquid Components
Slowly add water to the dry mix. Stir well to avoid lumps.
| Liquid | Amount |
| Water | 1/2 cup |
| Optional: Food coloring | Few drops |
Kneading The Dough
Once the mixture cools a little, knead it on a flat surface. This makes the clay smooth and soft.
- Sprinkle a little cornstarch on your hands to prevent sticking.
- Knead the dough for 5 to 10 minutes.
- Stop when the clay feels soft and stretchy.
- Store in an airtight container to keep it fresh.

Credit: www.youtube.com
Alternative Clay Recipes
Making clay at home is simple and fun. You can try different recipes using common kitchen ingredients. These alternative clays work well for crafts and play.
Here are three easy clay recipes you can make today. Each uses items you likely have on hand. Choose one that fits your needs best.
Salt Dough Clay
Salt dough clay is a classic recipe. It is cheap, easy to make, and dries hard. You need just three ingredients to start.
- 1 cup of flour
- 1 cup of salt
- 1/2 cup of water
Mix the flour and salt well. Add water slowly and stir until the dough forms. Knead it on a floured surface. Shape your clay and bake it at 250°F (120°C) for 2 hours to harden.
Flour-based Clay
This flour-based clay is soft and easy to mold. It stays fresh longer when stored in a sealed container. You can paint it once dry.
| Ingredient | Amount |
| Flour | 1 cup |
| Baking soda | 1/2 cup |
| Water | 3/4 cup |
Combine flour and baking soda in a pot. Add water and heat gently, stirring until thick. Remove from heat and cool. Knead the dough until smooth. Use it for crafts or decorations.
Cornstarch Clay
Cornstarch clay feels soft and smooth. It is great for small, detailed projects. You only need two main ingredients.
Ingredients:
- 1 cup cornstarch
- 1 cup baking soda
- 3/4 cup water
Mix all ingredients in a pot over medium heat. Stir until the mixture thickens and forms a ball. Let it cool, then knead well. Store in plastic wrap to keep soft.
Tips For Perfect Texture
Making clay at home is fun and easy. The texture of your clay affects how well it works. Good texture helps your clay hold shapes and dry evenly.
Try these tips to get the perfect clay texture. They focus on moisture, cracks, and storage.
Adjusting Moisture Levels
Moisture is key to soft and smooth clay. Too much water makes it sticky. Too little makes it dry and crumbly. Add water or flour little by little to fix this.
- If the clay feels sticky, add a small amount of flour and knead well.
- If the clay is hard or crumbly, add a few drops of water and mix until soft.
- Check clay texture often while adjusting moisture.
- Store clay in a sealed container to keep moisture balanced.
Preventing Cracks
Cracks happen when clay dries too fast or unevenly. Keep your clay smooth and moist. Cover it while drying to stop cracks from forming.
| Cause | How to Prevent |
| Drying too fast | Cover clay with plastic wrap |
| Uneven drying | Dry clay in a shaded area |
| Clay too dry before shaping | Add a few drops of water and knead |
| Too thick pieces | Make thinner shapes to dry evenly |
Storing Your Clay
Good storage keeps your clay soft and ready to use. Use airtight containers or wrap clay tightly to stop air from drying it out.
Try this simple storage tip:
- Wrap clay in plastic wrap.
- Place wrapped clay in a sealed plastic bag.
- Keep it in a cool, dry place.
Shaping And Sculpting Ideas
Creating clay at home is fun and creative. Shaping and sculpting with clay offers endless possibilities for art and play. Let's explore some ideas.
You can make anything from simple figures to complex sculptures. Here are some ideas to get you started.
Animal Figures
Animals are a popular choice for clay projects. They are simple and loved by everyone.
- Create a small clay dog or cat
- Make a bird with colorful wings
- Sculpt a tiny elephant with a long trunk
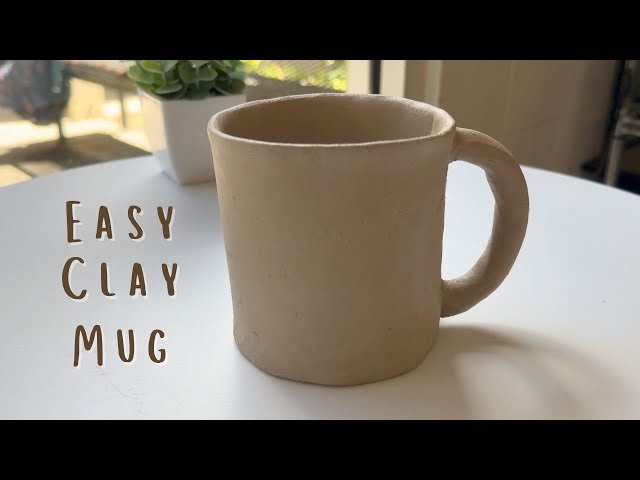
Functional Pottery
Functional pottery is both useful and decorative. It's a great way to practice your skills.
- Form a simple clay cup or bowl
- Design a small plate or dish
- Create a decorative vase
Miniature Food Items
Miniature food items are fun and easy to make. They are perfect for dollhouses and displays.
- Sculpt a tiny pizza with toppings
- Make a small clay sandwich
- Create a miniature fruit basket
Fantasy Creatures
Fantasy creatures allow your imagination to run wild. They are unique and creative.
- Craft a dragon with scales
- Make a unicorn with a rainbow mane
- Sculpt a mermaid with flowing hair
Drying And Hardening Methods
Creating clay at home is fun and creative. Drying and hardening your clay is the next step after shaping.
There are different methods to make sure your clay is ready for use. Let's explore some of these techniques.
Air Drying
Air drying is a simple method. It requires no special tools or equipment.
- Place clay on a flat surface
- Ensure good airflow around the clay
- Allow 24 to 72 hours for complete drying
- Check the thickness of the clay; thicker pieces take longer
Baking In Oven
Baking clay in an oven speeds up the hardening process. It is ideal for larger or thicker pieces.
| Temperature | Time |
| Low (150°F) | 20-30 minutes |
| Medium (200°F) | 15-20 minutes |
| High (250°F) | 10-15 minutes |
Always monitor the clay while baking. It prevents overheating and maintains quality.
Painting And Finishing Touches
After making your clay, painting and finishing it can bring your creation to life. These steps help protect the clay and improve its look.
This guide covers simple painting tips and ways to add finishing touches to your homemade clay projects.
Choosing The Right Paint
Use water-based paints for clay because they dry fast and are safe. Acrylic paints work well on dried clay and give bright colors.
Try to avoid oil-based paints since they may not stick well or can damage the clay surface.
Applying Paint
Paint your clay in thin layers for the best results. Let each layer dry before adding another. This method stops colors from mixing too much.
- Use small brushes for details.
- Cover large areas with a sponge or wide brush.
- Work in a well-lit area to see colors clearly.
- Wear old clothes or an apron to avoid stains.
Sealing And Finishing
Sealing your clay project protects it from water and dirt. Use a clear varnish or sealant made for crafts. It also adds shine.
| Sealant Type | Finish | Best For |
| Matte Varnish | Non-shiny | Natural look |
| Glossy Varnish | Shiny | Bright colors |
| Satin Varnish | Semi-shiny | Balanced look |
Adding Extra Details
You can add extra touches like glitter, beads, or small stickers after painting. Attach them with craft glue while the paint is still slightly wet.
Be careful not to add too much weight to keep your clay sturdy.

Credit: www.youtube.com
Frequently Asked Questions
How Can I Make Clay At Home Easily?
You can make clay using simple ingredients like flour, salt, and water. Mix 2 cups flour, 1 cup salt, and 1 cup water. Knead until smooth. This homemade clay is non-toxic and great for crafts.
What Materials Are Needed To Make Homemade Clay?
You need basic kitchen items: all-purpose flour, salt, water, and optional cream of tartar. These create a pliable, air-dry clay perfect for modeling and painting.
How Long Does Homemade Clay Last?
Homemade clay lasts up to two weeks if stored in an airtight container. Keep it cool and moist to prevent drying out or cracking.
Can I Paint Or Bake Homemade Clay Creations?
Yes, you can paint air-dry clay after it hardens. Baking is optional but can speed up drying and harden the clay for durability.
Conclusion
Making clay at home is simple and fun. You only need a few common ingredients. This DIY project saves money and lets you create art anytime. Experiment with different textures and colors. Enjoy crafting with your homemade clay. Keep practicing to improve your skills.
Making your own clay brings creativity to life. Try it today and see how easy it can be. Happy crafting!