

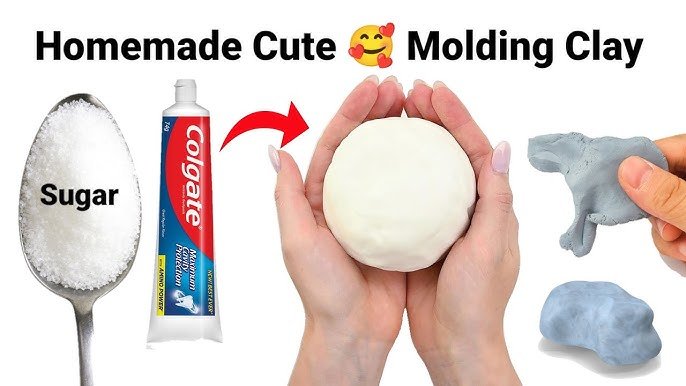
Have you ever wanted to create your own clay for slime right at home? It’s easier than you think, and you don’t need fancy ingredients or tools.
Imagine having soft, stretchy clay that feels just right in your hands—made by you! Whether you're looking for a fun activity or a way to customize your slime, this guide will show you simple steps to make clay at home.
Keep reading, and you’ll discover how to turn everyday items into a satisfying, colorful clay that’s perfect for your slime projects. Get ready to impress yourself with your own homemade clay!

Materials Needed
Making clay for slime at home is easy and fun. You only need a few materials.
Gather the right items to create soft and stretchable clay for slime.
Basic Ingredients
These ingredients form the base of your slime clay. You can find most of them in your kitchen or local store.
- White school glue (about 1 cup)
- Baking soda (1 teaspoon)
- Contact lens solution (1 to 2 tablespoons)
- Water (1 cup)
- Cornstarch (2 tablespoons)
Optional Add-ins
Add these items to change the color, smell, or texture of your slime clay. They make your slime more fun and unique.
| Add-In | Purpose |
| Food coloring | Change color |
| Glitter | Add sparkle |
| Essential oils | Add scent |
| Shaving cream | Make it fluffy |
| Baby oil | Make it smooth |
Step-by-step Clay Recipe
Making clay for slime at home is fun and easy. You only need simple ingredients. Follow these steps to create soft, stretchy clay for your slime projects.
This guide will help you mix the base, add texture, and knead the clay for the best results. Let’s get started.
Mixing The Base
Start by combining glue and shaving cream. This mixture forms the soft base of your clay. Use white glue for a smooth texture.
- Pour 1 cup of white glue into a bowl.
- Add 1 cup of shaving cream to the glue.
- Mix gently until the texture is fluffy and even.
Adding Texture
Texture makes the clay stretchy and fun to play with. Add baking soda and contact lens solution to get the right feel.
| Ingredient | Amount |
| Baking Soda | 1 teaspoon |
| Contact Lens Solution | 2 tablespoons |
Stir these ingredients into the base mixture slowly. The clay will start to form and become less sticky.
Kneading Tips
Kneading helps the clay reach the perfect consistency. Use your hands to stretch and fold the clay.
- Take the clay out of the bowl.
- Press and fold it for 5 to 10 minutes.
- If sticky, add a few drops of contact lens solution.
- Keep kneading until the clay is soft and smooth.
Customizing Your Clay
Making clay for slime at home is fun and easy. You can change your clay by adding colors and scents.
Customizing your clay lets you create unique slime with your style. Try different ideas to see what you like best.
Coloring Techniques
You can add color to your clay using many simple ways. Use food coloring or paint to make bright colors.
Mix colors well to avoid streaks. You can also blend two or more colors for a new shade.
- Add a few drops of food coloring to your clay before mixing.
- Use acrylic paint for strong, even colors.
- Try pastel chalks crushed into powder for soft colors.
- Mix colors slowly to get the shade you want.
Scented Clay Ideas
Adding scents makes your clay smell nice and fun to play with. Use essential oils or extracts for different smells.
Start with a small amount of scent so it is not too strong. You can always add more if needed.
- Lavender or peppermint oils for a fresh smell.
- Vanilla or almond extract for a sweet scent.
- Citrus oils like orange or lemon for a bright aroma.
- Mix a few drops into the clay after making it.
Troubleshooting Common Issues
Making clay for slime at home can sometimes be tricky. You might face issues like sticky clay or wrong texture.
This guide helps you fix common problems. It explains how to adjust your clay to get the best slime.
Fixing Sticky Clay
Sticky clay can be hard to work with. It may stick to your hands or surfaces too much.
To fix sticky clay, add small amounts of cornstarch or baking soda. Mix it well after each addition.
- Add 1 teaspoon of cornstarch or baking soda
- Knead the clay for 2 to 3 minutes
- Repeat if it is still sticky
- Avoid adding too much to keep clay soft
Adjusting Consistency
Clay consistency changes if you add too much liquid or dry ingredients. It can be too hard or too soft.
If the clay is too hard, add a few drops of water or lotion. If too soft, add a little more glue or baking soda.
- For hard clay: add 1-2 drops of water or lotion, then knead
- For soft clay: add 1 teaspoon of glue or baking soda, then mix well
- Test clay after each change to get the right feel
- Work slowly to avoid over-adjusting
Safe Storage Tips
Making clay for slime at home is fun. Proper storage keeps it fresh and usable. Here are tips to safely store your homemade clay.
Keeping Clay Fresh
To keep your clay fresh, you need airtight containers. They prevent air from drying the clay out. Store them in a cool, dry place.
- Use airtight plastic or glass containers.
- Label the container with the date of preparation.
- Check regularly for signs of drying or mold.
Avoiding Drying Out
Moisture is key to prevent drying. If clay starts to dry, add a few drops of water and knead gently.
| Condition | Solution |
| Slightly Dry | Add a few drops of water |
| Very Dry | Knead with wet hands |
| Too Wet | Leave open for a short time |

Creative Slime Projects
Making clay for slime at home adds fun to your craft time. You can create many shapes and textures with it.
This guide shows how to shape slime and mix it with clay for new effects. Try these ideas to enjoy slime more.
Simple Slime Shapes
Start with basic slime shapes to practice your skills. Shapes like balls and snakes are easy to make and fun to play with.
- Roll slime into smooth balls for a soft feel.
- Stretch slime into long snakes to twist and coil.
- Flatten slime to make discs or pancakes.
- Pinch slime to form small spikes or ridges.
- Fold slime to create layers and patterns.
Mixing Clay With Slime
Mixing clay with slime changes its texture and makes it thicker. It is easy to do and adds new fun to slime play.
| Material | Effect on Slime |
| Air-dry clay | Makes slime firm and less sticky |
| Modeling clay | Adds softness and stretchiness |
| Polymer clay (crumbled) | Creates a bumpy texture |
| Colored clay | Changes slime color and look |
To mix, knead clay into slime slowly. Add small amounts until you get the right feel. Enjoy your new slime clay mix!

Frequently Asked Questions
What Ingredients Do I Need To Make Clay For Slime?
To make clay for slime, you need glue, cornstarch, baking soda, and water. Some recipes include shaving cream or lotion for texture.
How Long Does Homemade Clay Slime Last?
Homemade clay slime typically lasts 1 to 2 weeks if stored in an airtight container away from heat and dirt.
Can I Use Natural Ingredients To Make Clay Slime?
Yes, you can use natural ingredients like cornstarch and water to create a simple clay slime without chemicals.
How Do I Fix Sticky Clay Slime?
Add small amounts of cornstarch or baking soda to sticky clay slime. Knead until it reaches the desired consistency.
Conclusion
Making clay for slime at home is simple and fun. You only need a few easy ingredients. Mix them well, and you get soft, stretchy clay. This clay is perfect for play or crafts. You can try different colors and textures too.
Enjoy creating with your homemade slime clay. It’s a great way to spend time and be creative. Give it a try today!






