Are you ready to create your own unique clay cutters without spending a fortune? Making clay cutters at home is easier than you think, and it gives you full control over the shapes and sizes you want.
Imagine turning your creative ideas into real tools that help you craft beautiful clay pieces. You’ll discover simple steps and tips to make your own clay cutters quickly and affordably. By the end, you’ll have the skills to customize your clay art like never before.
Keep reading to unlock your creative potential!

Credit: www.youtube.com
Materials Needed
Making clay cutters at home is a fun and simple craft project. You only need a few basic materials to get started.
These materials help you create cutters that fit your clay projects perfectly. Let’s look at what you need.
Types Of Clay Suitable For Cutters
Not all clay types work well with cutters. Some clays are soft, while others are firmer.
Choose clays that hold shape when cut and do not stick to the cutter edges.
- Polymer Clay: Soft and easy to cut, great for detailed shapes.
- Air-Dry Clay: Firm but workable, good for simple designs.
- Pottery Clay: Firmer and moist, works with sharp cutters.
- Modeling Clay: Soft and reusable, not ideal for permanent shapes.
Tools Required For Making Cutters
Use simple tools to make clay cutters at home. You can find most in your kitchen or craft box.
These tools help you shape and cut the materials for your cutters.
- Metal Strips or Thin Aluminum Sheets: Easy to bend and form shapes.
- Scissors or Tin Snips: For cutting metal strips safely.
- Ruler and Marker: To measure and mark shapes accurately.
- Pliers: To bend and secure metal edges.
- Sandpaper: To smooth rough edges and avoid cuts.
- Glue or Tape: To hold ends of cutters together if needed.
Choosing The Right Cutting Edges
The cutting edges must be sharp but safe to use. Dull edges do not cut clay well.
Pick edges that can make clean cuts without damaging the clay or hurting your hands.
- Thin Metal Strips: Provide a clean cut for most clay types.
- Plastic Edges: Good for soft clays but may need frequent replacement.
- Cookie Cutter Shapes: Use for quick, uniform shapes with smooth edges.
- Custom Shaped Edges: Created by bending metal strips to your preferred design.
Preparing The Base
Making clay cutters at home starts with preparing a good base. This base will hold the shape you want to cut from the clay.
A strong and smooth base helps you cut clay cleanly. Let’s look at how to prepare this base step by step.
Selecting The Base Material
Choose a base material that is firm and easy to shape. It should not bend or break during use.
Common materials include wood, plastic, or thick cardboard. Wood is strong and lasts long. Plastic is easy to clean. Cardboard is cheap but less durable.
- Wood: sturdy and durable
- Plastic: smooth and washable
- Cardboard: inexpensive but less strong
Cutting And Shaping The Base
Use a pencil to draw the shape you want on the base material. Shapes like circles, stars, or squares work well.
Cut the shape carefully with scissors, a craft knife, or a saw. Take your time to follow the lines closely.
- Draw your shape on the base
- Use sharp tools for clean cuts
- Cut slowly to keep the shape neat
Smoothing Edges For Safety
After cutting, the edges may be rough or sharp. Use sandpaper or a file to smooth all edges.
Smooth edges protect your hands and help the cutter work better. Check all sides and corners carefully.
- Sand edges until they feel smooth
- Remove any splinters or sharp points
- Test the base by running your hand along the edges
Creating Custom Shapes
Making clay cutters at home allows you to create unique shapes for your projects. Custom shapes add a personal touch to your crafts.
With simple tools and materials, you can design cutters that fit your style and needs.
Designing Your Cutter Pattern
Start by sketching your desired shape on paper. Keep the design simple and clear to cut easily later.
- Draw your shape using a pencil.
- Use a ruler for straight lines or a compass for circles.
- Check the size fits your clay project.
- Cut out the paper pattern carefully.
Transferring Designs To The Base
Place your paper pattern on a thin, sturdy material like plastic or cardboard. This will be the base for your cutter.
Trace the outline of the paper pattern using a fine-tip marker or pen. Make sure the lines are clear and visible.
- Choose a base material that is easy to cut.
- Use double-sided tape to hold the paper pattern in place.
- Trace slowly to avoid mistakes.
- Remove the paper once tracing is complete.
Cutting Out The Shape
Use scissors or a craft knife to cut around the traced lines on your base. Cut carefully for smooth edges.
| Tool | Best Use |
| Scissors | Cutting thin plastic or cardboard |
| Craft Knife | Fine details and curves |
| Metal Ruler | Straight edges and support |
| Sandpaper | Smoothing rough edges |
After cutting, smooth any rough edges with sandpaper. Your clay cutter is now ready to use.
Attaching Cutting Edges
Clay cutters need sharp edges to shape clay well. Attaching cutting edges at home is simple.
This guide explains how to fix cutting edges to your clay cutter base safely.
Using Wire For Cutting Edges
Thin wire works well as a cutting edge for clay cutters. It cuts clay smoothly and is easy to attach.
Choose a strong wire like stainless steel or brass for durability and sharpness.
- Cut wire to the needed length
- Bend wire to the shape of the cutter
- Use pliers to handle and shape the wire safely
Securing Edges To The Base
Attach the wire edges firmly to the base for stability. The base can be wood, plastic, or metal.
Use glue, nails, or screws to hold the wire in place depending on the base material.
- Apply strong glue along the base edge
- Press the wire firmly onto the glued area
- Use small nails or screws if the base allows
- Let glue dry completely before use
Testing Edge Stability
Test the cutter edges before using them on clay. This ensures they stay secure and cut well.
Try cutting a small piece of clay with light pressure. Check if the wire moves or loosens.
- If the wire shifts, reattach it more firmly
- Make sure the edges do not bend easily
- Repeat testing until edges feel solid and sharp
Finishing Touches
After shaping your clay cutters, finishing touches improve their look and feel. These steps make your cutters smoother, easier to use, and more attractive.
Focus on sanding, adding handles, and decorating to create a great final product.
Sanding And Polishing
Sanding removes rough edges and small bumps from the clay cutters. Use fine sandpaper to smooth the surface gently.
After sanding, polish the cutters to give them a clean, shiny finish. This makes them safer to use and more durable.
- Start with medium-grit sandpaper, then use fine-grit for smoothness
- Sand all edges and surfaces evenly
- Wipe the cutter with a damp cloth before polishing
- Use a soft cloth to polish the surface
Adding Handles For Comfort
Adding handles makes clay cutters easier to hold and control. You can attach wooden sticks or small plastic handles.
Secure the handle well to avoid it coming off during use. Choose handles that fit comfortably in your hand.
- Use strong glue to attach the handle
- Let the glue dry completely before use
- Sand the handle for smooth grip
- Choose lightweight materials for comfort
Painting And Decorating
Painting your clay cutters adds color and style. Use non-toxic paint that will not harm your clay or hands.
Decorate with simple patterns or solid colors to make your cutters unique. Allow the paint to dry fully before using the cutters.
- Choose water-based or acrylic paints
- Apply thin, even coats of paint
- Use brushes or sponges for different effects
- Seal the paint with a clear varnish for protection
Using Your Clay Cutters
Clay cutters are handy tools for shaping clay into beautiful designs. Making them at home can be fun and cost-effective.
Once you've created your clay cutters, it's important to know how to use them effectively. Let's explore some techniques and tips.
Techniques For Clean Cuts
Clean cuts make your clay designs look professional. Always press the cutter firmly and evenly through the clay.
- Use a smooth surface to avoid rough edges
- Apply even pressure for consistent shapes
- Rotate the cutter slightly for a sharper cut
Tips For Different Clay Types
Different clays need different handling. Soft clay is easier to cut, while hard clay may require more pressure.
- For soft clay, chill it for a few minutes before cutting
- Use water to soften hard clay
- Add cornstarch to prevent sticking
Maintaining Your Cutters
Proper maintenance keeps your clay cutters in good shape. Clean them after each use to prevent buildup.
- Wash with warm soapy water
- Dry thoroughly to prevent rust
- Store in a dry place
Troubleshooting Common Issues
Making clay cutters at home can be fun, but sometimes problems arise. Here, we address common issues you might face and how to fix them.
Follow these simple solutions to ensure your clay cutters work perfectly every time.
Fixing Bent Or Loose Edges
Bent or loose edges can make your clay cutters ineffective. Check your cutters regularly to ensure they are in good shape.
Use pliers to gently reshape any bent edges. For loose parts, apply a small drop of glue to secure them.
- Inspect cutters before each use
- Handle with care during storage
- Use a flat surface to reshape cutters
Dealing With Sticky Clay
Sticky clay can cause cutters to stick, ruining your designs. Ensure your clay is properly conditioned and not too soft.
If clay sticks, dust your cutter with a small amount of cornstarch or baby powder. This will prevent sticking without altering your clay.
- Use a clean, dry surface
- Avoid overhandling clay before cutting
- Test with a small piece first
Storage Tips To Prevent Damage
Proper storage keeps your clay cutters in good condition. Store them in a dry, cool place to avoid rust and bending.
Consider using a container with dividers to keep cutters separate. This prevents them from bumping into each other and getting damaged.
- Label each cutter for easy identification
- Avoid stacking cutters directly
- Use a soft cloth to wrap delicate cutters

Credit: sues-news.com

Credit: sues-news.com
Frequently Asked Questions
What Materials Are Needed To Make Clay Cutters At Home?
To make clay cutters at home, you need materials like thin metal sheets, scissors, pliers, and sandpaper. Optional tools include a ruler and marker for precise shapes. These simple items help you craft durable, customized cutters easily and affordably.
How Do I Shape Metal For Homemade Clay Cutters?
To shape metal for clay cutters, cut the metal sheet into desired shapes using scissors. Use pliers to bend edges smoothly. Sand the edges to prevent sharpness. This method ensures safe, functional cutters for crafting clay.
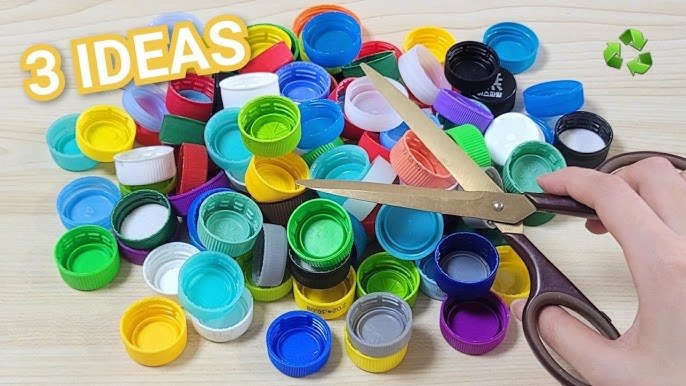
Can I Use Household Items As Clay Cutters?
Yes, household items like bottle caps, cookie cutters, and old credit cards can work as clay cutters. They offer various shapes and sizes, making them practical alternatives for DIY clay projects without extra cost.
How To Maintain Homemade Clay Cutters For Durability?
Clean homemade clay cutters after each use to remove clay residue. Dry them thoroughly to prevent rust. Store in a dry place to maintain shape and longevity. Proper care keeps your cutters effective and long-lasting.
Conclusion
Making clay cutters at home saves money and lets creativity flow. You only need a few simple tools and materials. The process is quick and fun for all skill levels. Handmade cutters give your clay projects a personal touch. Try different shapes and sizes to fit your needs.
Keep practicing to improve your cutting skills. Enjoy crafting with your new homemade clay cutters every time.