Are you ready to create beautiful pottery but don’t want to spend money on expensive clay? What if you could make your own clay right at home, using simple ingredients you probably already have?
Making clay yourself is easier than you think, and it gives you full control over the texture and quality. In this guide, you’ll discover step-by-step how to make clay that’s perfect for your pottery projects. By the end, you’ll have the confidence to start molding your own unique creations.
Keep reading to unlock the secret to homemade clay that works just like the real thing.

Credit: potterycrafters.com
Materials Needed
Making clay at home for pottery is simple and fun. You only need a few basic materials.
Some optional additives can improve the clay's texture and strength.
Basic Ingredients
The main ingredients make the clay soft and moldable. You can find most at home or in stores.
- All-purpose flour: Acts as the base for the clay.
- Salt: Helps preserve the clay and adds texture.
- Water: Binds the dry ingredients together.
- Cream of tartar: Improves elasticity and prevents cracking.
Optional Additives
You can add extra materials to change how the clay feels or dries. These are not required but helpful.
- Vegetable oil: Makes the clay smoother and easier to work with.
- White glue: Adds strength and durability after drying.
- Food coloring: Gives color to your clay without painting later.
- Fine sand: Adds a rough texture for special effects.
Step-by-step Clay Preparation
Making clay at home for pottery is easy and fun. You need simple materials and some patience. Follow these steps to prepare your clay well.
This guide will show you how to mix ingredients, knead the clay, and adjust its texture for the best results.
Mixing Ingredients
Start by gathering the right materials. You will need soil, water, and some natural binders like flour or cornstarch. Mix them carefully to form a smooth base.
- Use 2 parts fine soil or clay powder
- Add 1 part water slowly
- Mix in 1/2 part flour or cornstarch
- Stir until the mixture is thick and even
Kneading The Clay
Kneading helps to make the clay soft and workable. Press and fold the mixture with your hands. It removes air bubbles and improves strength.
- Place the clay on a clean surface
- Push the clay with your palm
- Fold it over and press again
- Repeat for 10 to 15 minutes
- Stop when the clay feels smooth and elastic
Adjusting Texture
Check the texture of your clay. If it is too dry, add small amounts of water. If it is too sticky, add a bit more dry soil.
| Texture | Fix |
| Too dry | Add water, one teaspoon at a time |
| Too sticky | Add dry soil, mix well |
| Too crumbly | Knead longer and add water if needed |
Tips For Working With Homemade Clay
Making clay at home is fun and easy. It helps you create unique pottery pieces.
Working with homemade clay needs care. Follow these tips to get the best results.
Preventing Cracks
Cracks can ruin your pottery. To avoid cracks, keep the clay moist while shaping it.
Work slowly and press the clay evenly. Thin parts dry faster and crack easily.
- Cover clay with a damp cloth while working
- Use slip (wet clay) to join pieces
- Smooth edges and surfaces carefully
- Dry pieces slowly in a cool place
Storage Suggestions
Store homemade clay properly to keep it soft and ready to use. Air can dry it out fast.
Use airtight containers or plastic bags to keep moisture in. Check clay often for dryness.
- Wrap clay tightly in plastic wrap
- Place wrapped clay in a sealed container
- Store in a cool, dark place
- Add a damp sponge inside the container for extra moisture

Credit: www.youtube.com
Common Mistakes To Avoid
Making clay at home for pottery can be fun and rewarding. Yet, many beginners make simple mistakes that can ruin their clay.
Knowing what to avoid helps you create better clay for your pottery projects.
Using The Wrong Type Of Soil
Not all soil works well for making clay. Avoid using sandy or rocky soil. These types do not stick well and make weak clay.
Look for soil that is rich in fine particles and feels smooth. This type of soil creates better clay.
Skipping The Sifting Process
Many people skip sifting soil before using it. This mistake leaves stones, sticks, and debris in the clay. It makes the clay uneven and harder to shape.
Always sift the soil through a fine mesh to get smooth clay. This step improves your pottery quality.
Not Removing Organic Matter
Organic matter like roots, leaves, or bugs can cause problems in clay. It may cause cracks or holes when the clay dries or fires.
Remove all organic materials from your soil before mixing to keep your clay strong.
Adding Too Much Water
Adding too much water makes clay sticky and hard to work with. It also takes longer to dry and can crack easily.
Add water slowly and mix until the clay feels like soft dough. This balance makes shaping easier.
Not Letting Clay Rest
Using clay right after making it can cause problems. Fresh clay needs time to rest and absorb water evenly.
Let your clay rest for at least 24 hours before using it for pottery. This improves texture and workability.
Ignoring Air Bubbles
Air bubbles inside clay cause cracks during drying or firing. Many beginners miss this problem.
Wedge your clay well to remove air bubbles. This process makes your clay stronger and smooth.
Creative Pottery Ideas
Making clay at home is fun and easy. It lets you create pottery pieces without buying expensive materials. You can use simple items from your kitchen to make clay that works well for pottery.
With homemade clay, you can try many pottery projects. These ideas help you learn pottery and decorate your creations with unique designs.
Simple Projects For Beginners
Start with small and easy pottery projects. These help you practice shaping clay and using basic tools. Try making bowls, plates, or simple cups with your homemade clay.
- Roll the clay into a ball and flatten it for a plate.
- Shape a bowl by pinching the edges upward.
- Use a small cup mold to form a cup.
- Let the clay dry or bake it if your recipe requires.
- Paint or glaze your pieces after they are dry.
Decorative Techniques
Decorate your pottery with simple techniques. These add texture and color. Use tools like forks, stamps, or even leaves to create patterns on the clay surface before it dries.
| Technique | Description | Tools Needed |
| Texturing | Create patterns by pressing objects into soft clay. | Forks, stamps, leaves |
| Painting | Use watercolors or acrylic paints after drying. | Paintbrushes, paints |
| Carving | Cut designs into the clay surface before drying. | Clay carving tools, toothpicks |
| Glazing | Apply a shiny coating before baking. | Glaze paints or spray |

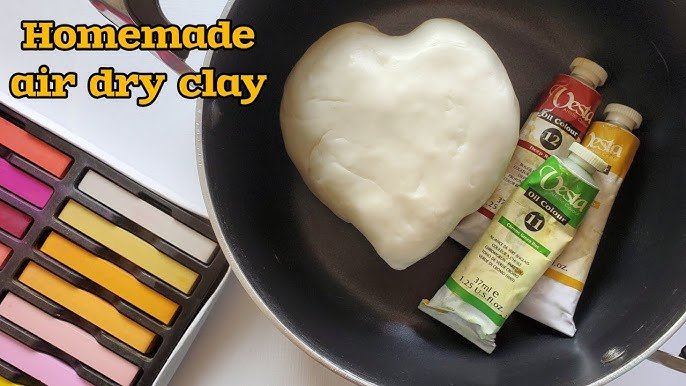
Credit: www.youtube.com
Frequently Asked Questions
What Ingredients Are Needed To Make Clay At Home?
You need flour, salt, water, and cream of tartar to make homemade clay. These simple ingredients create a pliable dough for pottery projects.
How Long Does Homemade Clay Last Without Drying?
Homemade clay lasts about 1 to 2 weeks if stored in an airtight container. Keep it cool and moist to prevent drying out.
Can Homemade Clay Be Used For Firing Pottery?
No, homemade clay is not suitable for kiln firing. It’s best for air-dry projects or crafts but not for traditional pottery firing.
How Do I Store Homemade Clay To Keep It Soft?
Store clay in a sealed plastic bag or airtight container. Add a damp paper towel inside to maintain moisture and softness.
Conclusion
Making clay at home for pottery is simple and fun. You only need a few basic ingredients. Mixing them well creates soft, moldable clay ready to use. This homemade clay saves money and lets you try new designs. Plus, it’s a great way to learn pottery skills.
Start small and enjoy the process of shaping your ideas. With practice, your creations will improve. Making clay yourself brings joy and creativity to every project. Try it today and see what you can create!